Introduction
Linear rails are usually provided with a coating of light oil to protect them during storage and shipping, so be sure to have ample lint-free paper towels on hand and wear gloves if you wish to avoid getting oily hands!
-
-
Prepare your work surface with disposable and absorbent paper towels. The linear rails are supplied with a protective oil coating on them.
-
Carefully open one end of the linear rail packaging and remove the rail assembly. Place it upon the paper towels.
-
Take a paper towel and carefully wipe the excess lubricant from the rail. Move the carriage to allow you to clean the whole rail fully.
-
-
-
With the rail still on the absorbent paper towels, carefully and slowly move the carriage from one end of the rail to the other.
-
You want to ensure the carriage is smooth over the entire travel length. Small changes in resistance are normal, but the carriage becoming much harder to push, or binding completely are not.
-
Repeat the previous test whilst applying a small amount of force downwards on the carriage. You will likely find the carriage travels more smoothly when doing so, this is normal.
-
If the carriage moves freely from end to end, you are ready to proceed with installation onto your machine.
-
-
-
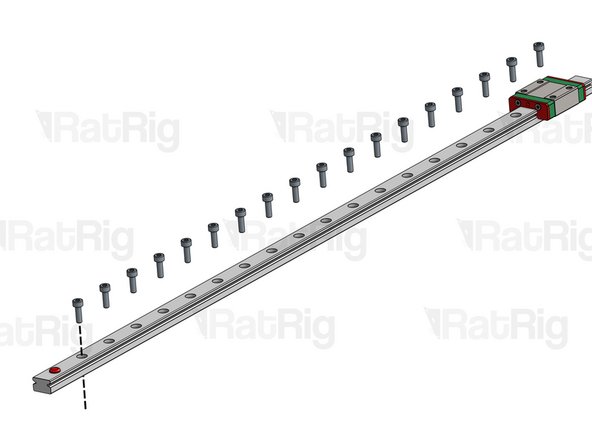
With the linear rail on a work surface, carefully install an appropriate length M3 socket head cap screw into each mounting hole on the rail.
-
M3x8mm for 2020
-
M3x12mm for 3030
-
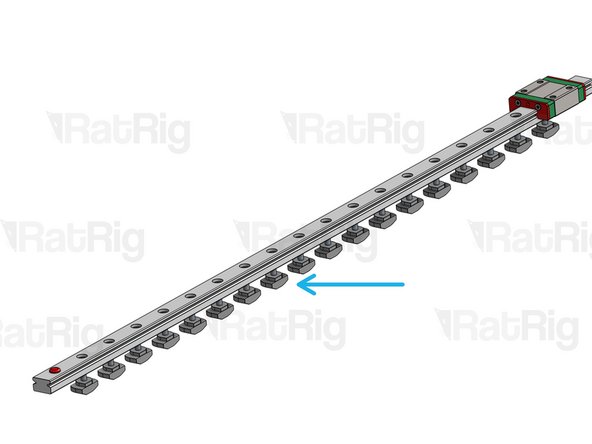
Partially screw an appropriate size M3 Drop-in T-Nut to each M3 bolt.
-
Align all the T-Nuts so that they will slot into the chosen extrusion.
-
-
-
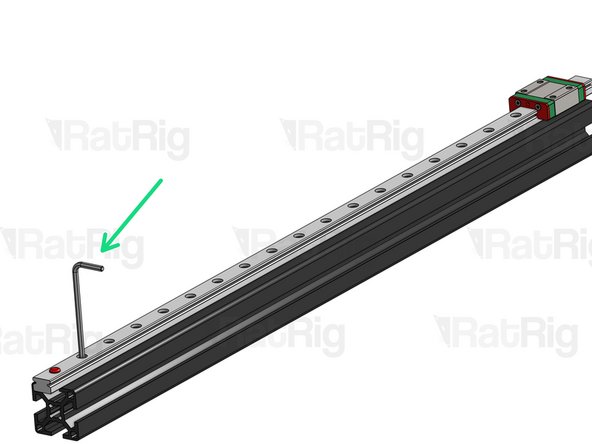
Carefully place the rail onto the extrusion, ensuring all the T-Nuts fall into the slot.
-
Align the rail to the center of the extrusion. This can either be done with a 3D printed alignment tool, or simply a ruler or vernier calipers. The measurements for each side of the rail will depend on your chosen extrusion and rail combination:
-
2020 Extrusion with MGN12 rail - 4mm each side of the rail
-
2020 Extrusion with MGN15 rail - 2.5mm each side of the rail
-
3030 Extrusion with MGN12 rail - 9mm each side of the rail
-
3030 Extrusion with MGN15 rail - 7.5mm each side of the rail
-
Tighten the first M3 screw at one end of the rail and re-check your measurements. If the rail is still correctly aligned, tighten every other M3 screw until you reach the other end of the rail.
-
Double check your measurements once more, if the rail is still correctly aligned, return to the start and tighten the remaining screws in order.
-
-
-
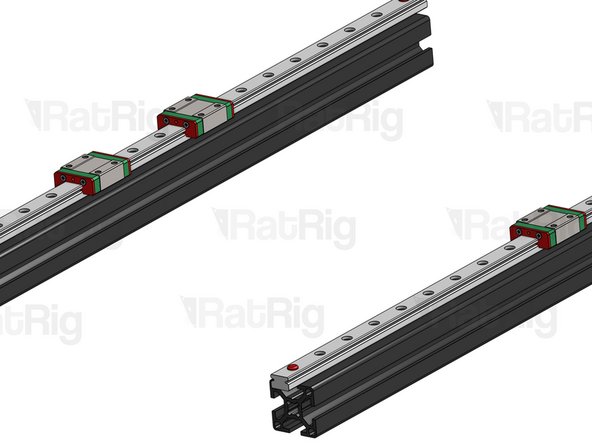
When mounting a pair of rails which will be attached to a single part, such as a printer bed support, we must be careful to ensure that the rails remain parallel to each other.
-
Follow step 3 for the first rail (herein described as the stationary rail). Ensure that the stationary rail is aligned correctly and the carriage(s) run smoothly along its length.
-
Prepare the parallel rail as instructed in step 3, up to and including placing it upon the extrusion.
-
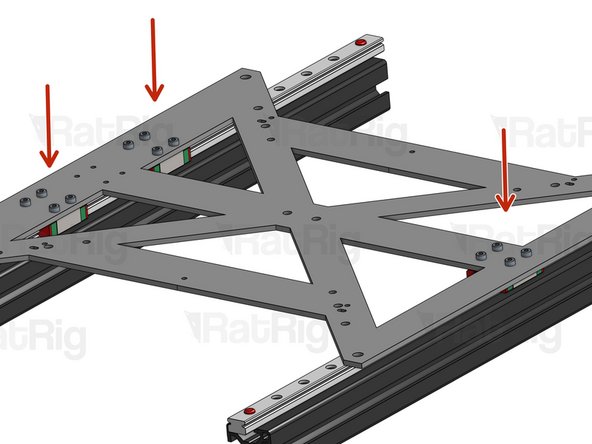
Attach the component which will connect both rails, such as the bed carriage plate, to all carriages on both rails.
-
Gently bring the carriage of the stationary rail to one end of the rail, this will also move the carriage on the parallel rail.
-
Slightly tighten whichever M3 bolt is closest to the carriage on the parallel rail.
-
-
-
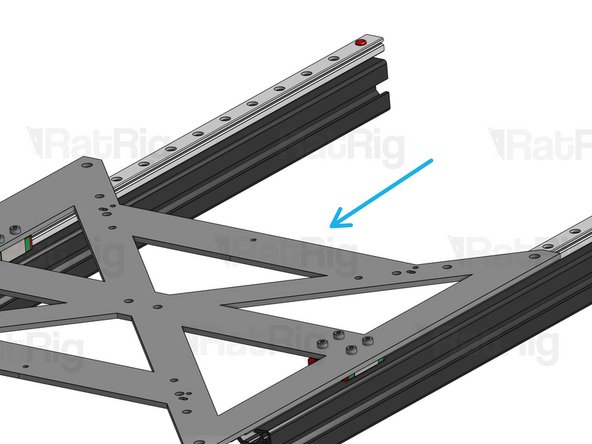
Gently move the carriage of the stationary rail to the opposite end of its travel. Again this will also move and align the parallel rail.
-
Once again, slightly tighten whichever M3 bolt is closest to the carriage on the parallel rail.
-
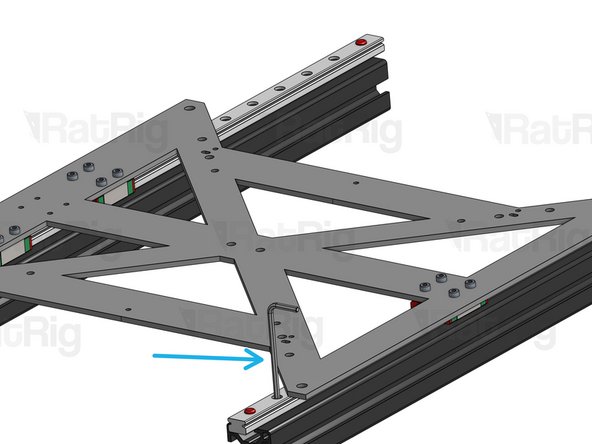
Slowly run the carriages over the full length of travel, check for any increase in resistance or any binding. If the travel is smooth, begin to tighten down the remaining M3 bolts on the parallel rail. Remember to check the travel frequently.
-
Once all M3 bolts are tightened, you are done and both rails are now parallel to one another.
-