
-
-
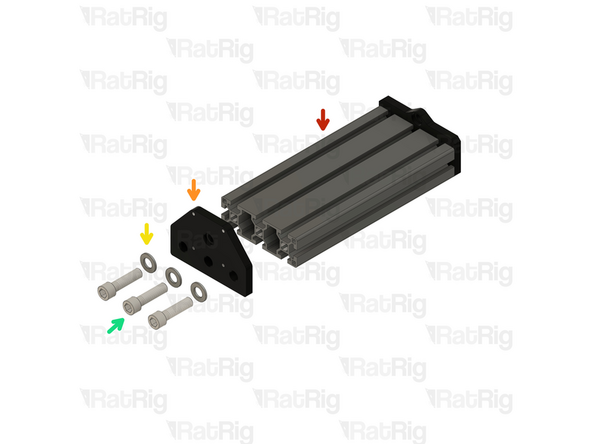
250mm 40120 Extrusion
-
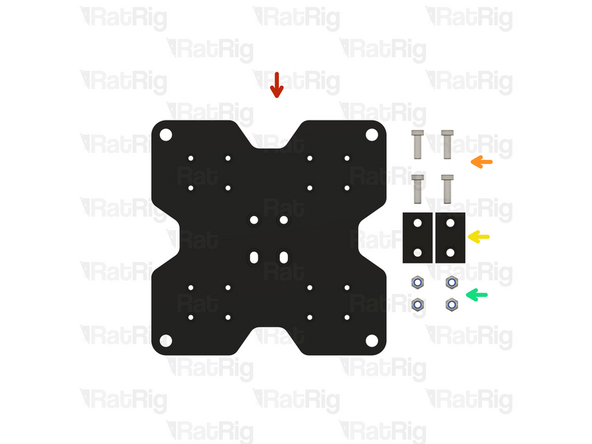
Rat Rig StrongHold ONE CNC Bottom Plate
-
Rat Rig StrongHold ONE CNC TopPlate
-
3x M12x45 Cap Head Screw
-
3x M12x25 Countersunk Screw
-
3x M12 Washers
-
-
-
250mm 40120 extrusion
-
Rat Rig StrongHold ONE CNC Bottom Plate
-
3x M12x25 Countersunk Screw
-
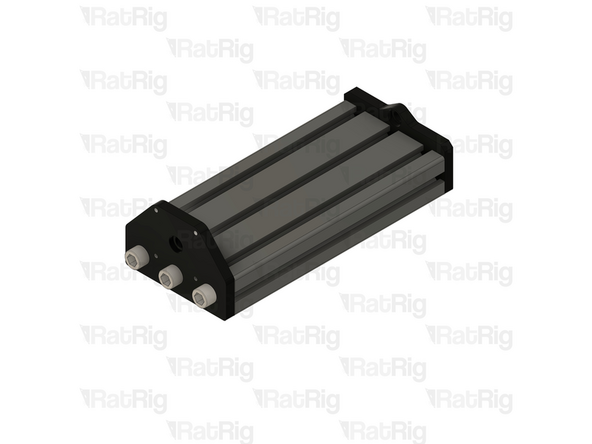
Tighten the screws on the Bottom Z Plate
-
-
-
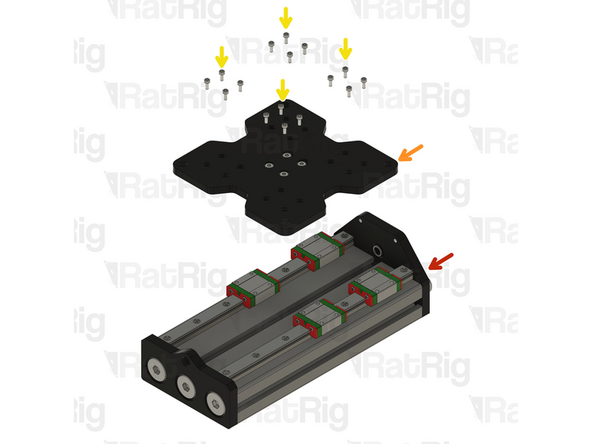
Assembly from previous Step
-
Rat Rig StrongHold ONE CNC Top Plate
-
3x M12 Washers
-
3x M12x45 Cap Head Screw
-
Tighten the screws on the Top Z Plate
-
-
-
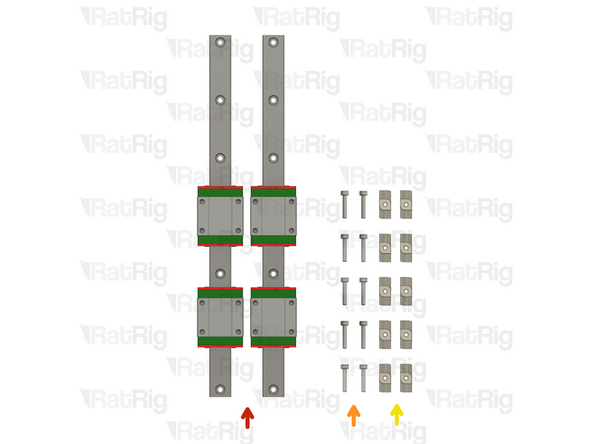
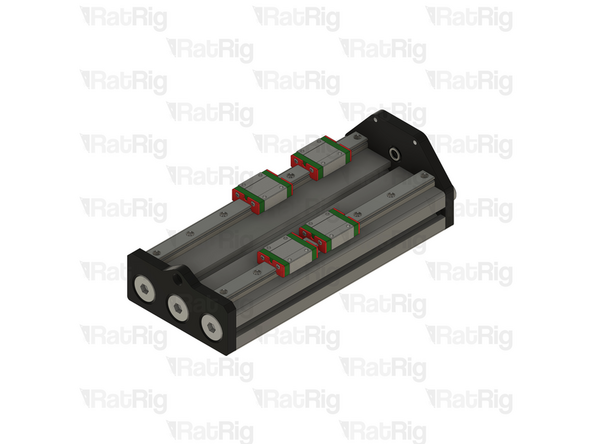
2x 250mm MGN15 Linear Rail with 2x Carriages
-
10x M3x16 Cap Head Screw
-
10x 4040 Drop-in T-Nut - M4
-
Leave the holes on the ends empty
-
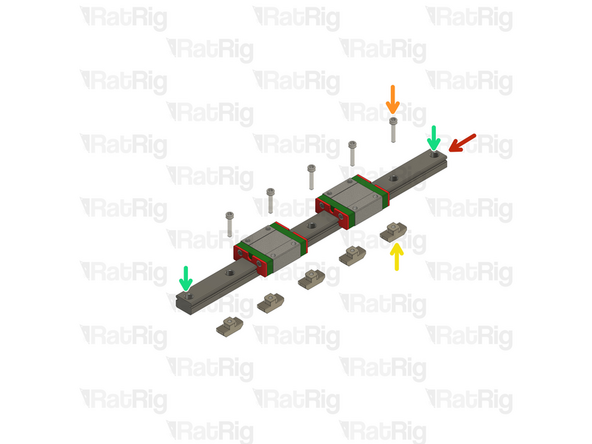
Prepare the Linear Rails as detailed in Step 6 of the X-Axis Gantry Assembly Guide
-
Insert an M3x16 Cap Head Screw into each of the holes on the linear rail and loosely thread a 4040 Drop-in T-Nut
-
Repeat these instructions for the second linear rail
-
The linear rail carriages are not interchangeable. Do not try to use a carriage on a different linear rail than the one it was supplied with.
-
-
-
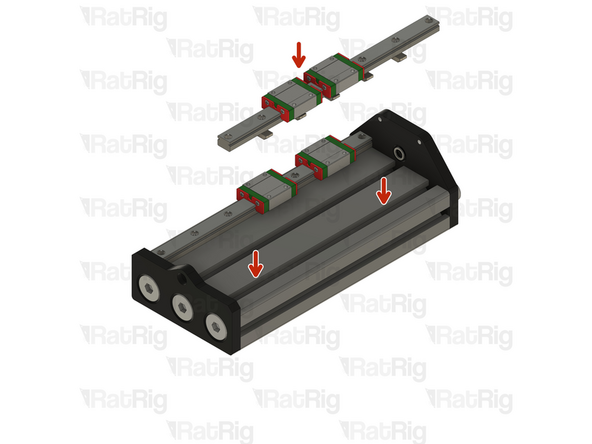
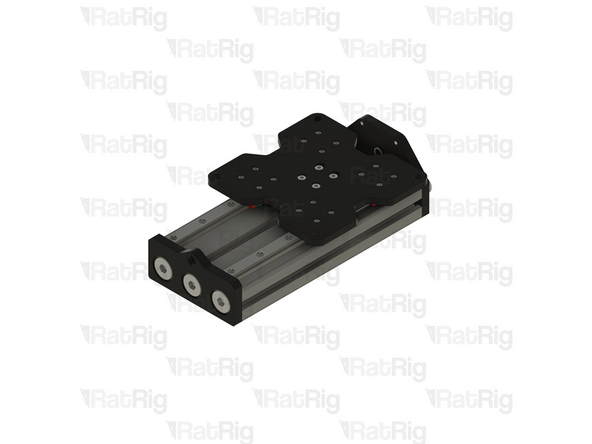
Assembly from Step 3
-
Linear Rail assembly from the previous step
-
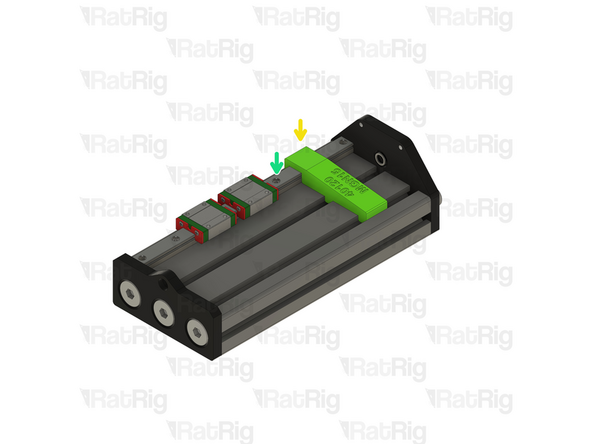
Install the MGN15 40120 alignment tool as shown, this will make sure the linear rail is positioned correctly
-
Tighten the screw next to the alignment tool
-
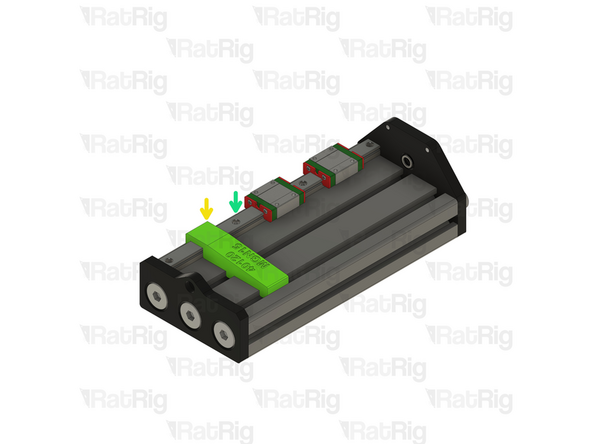
Repeat the steps to tighten the screw on the other end of the rail
-
Tighten the remaining screws
-
-
-
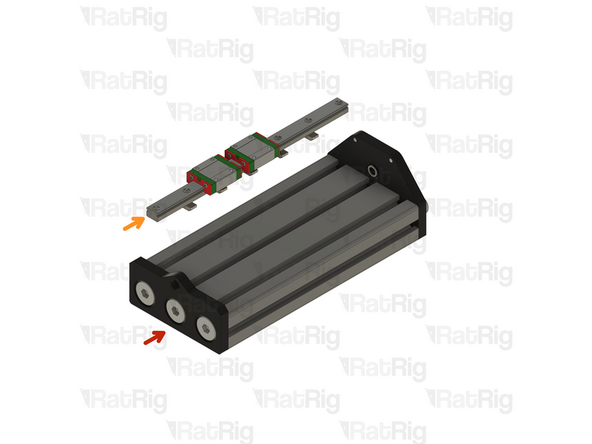
MGN15 linear rail
-
Place the linear rail on to the 40120 extrusion as shown, do not tighten any of the screws at this point
-
-
-
Rat Rig StrongHold ONE CNC XZ Joiner Plate
-
4x M5x16 Low Profile Cap Head Screw
-
2x Nut Block for TR8x8
-
4x M5 Nylon Locking Hex Nut
-
Repeat Steps 9 and 10 to assemble another XZ plate
-
-
-
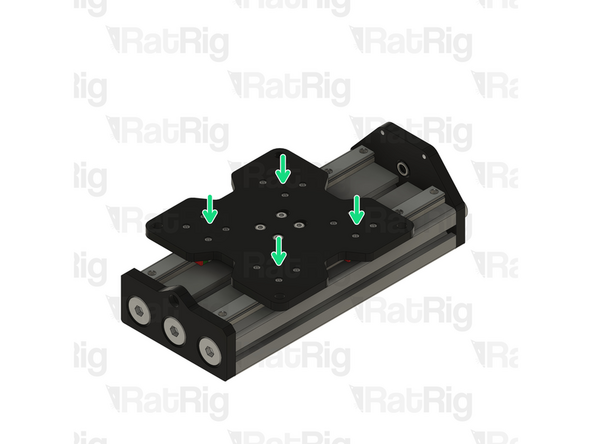
Assembly from previous step
-
XZ Plate assembly from previous step
-
Make sure the Nut Blocks face are facing the assembly, and the threads are oriented accordingly to the linear rails
-
16x M3x8 Cap Head Screw
-
Install an M3x8 screw through each hole in the plate, and into the MGN15 linear rail carriage below, lighty tighten them
-
-
-
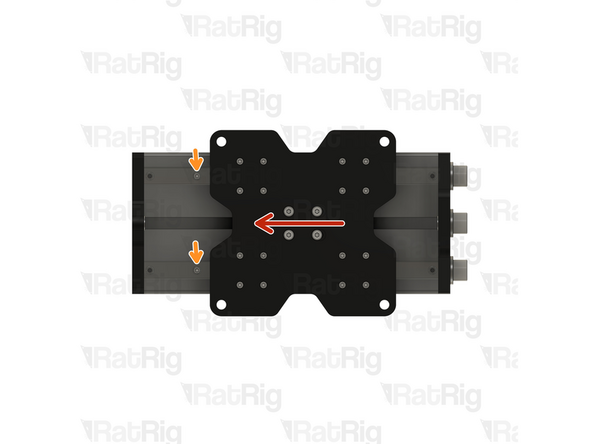
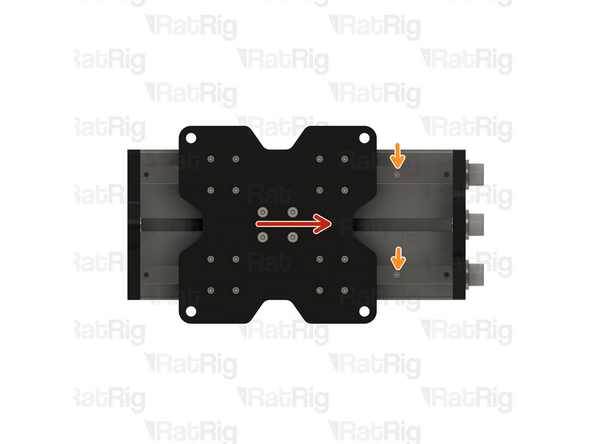
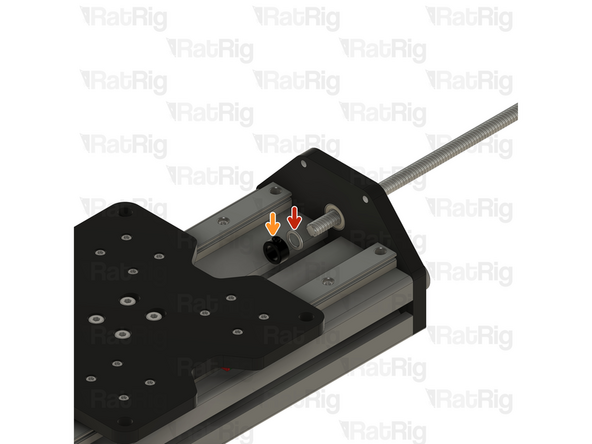
Push the XZ Plate to the one side
-
Tighten the M3x16 screw closest to the XZ plate
-
Repeat the Steps with the Plate pushed to the opposite side
-
If the Z-axis binds or becomes tight, check that the lower rail is aligned correctly. Loosening the screws securing the lower rail to the 40120 extrusion and repeat the steps above.
-
Do not overtighten the screws as it can cause the axis to bind.
-
-
-
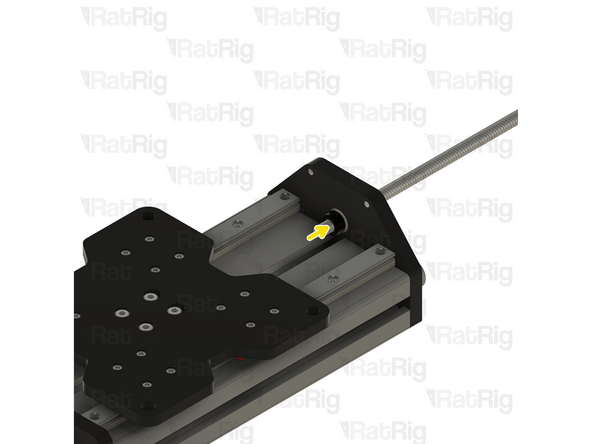
Remove the XZ Plate
-
Tighten the remaining screws on the linear rail
-
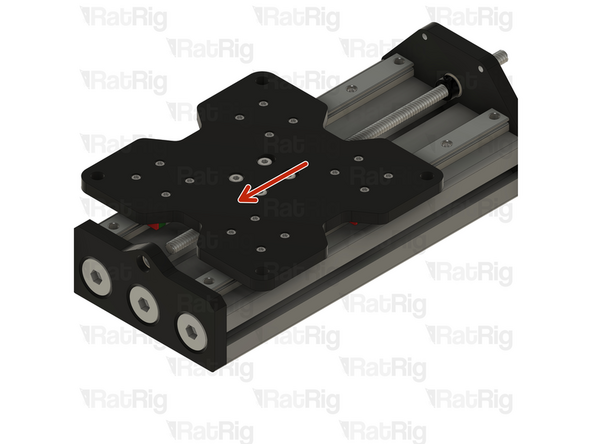
Move the carriages to access the screws underneath them
-
Reinstall the XZ plate and tighten the screws on it
-
-
-
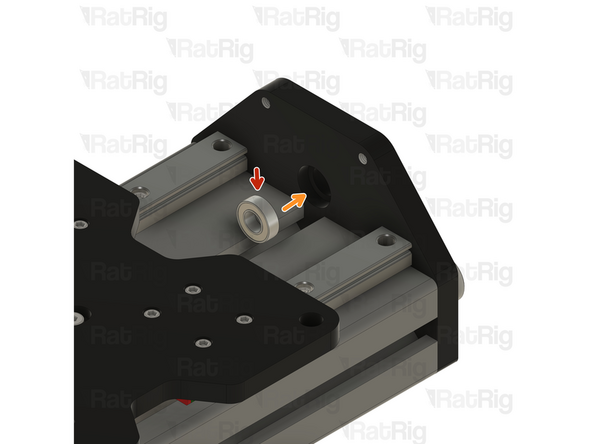
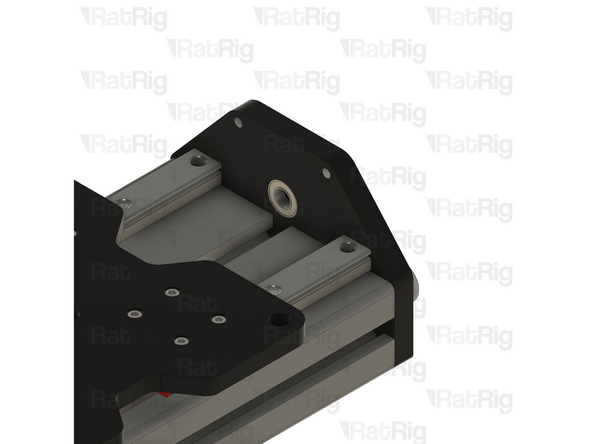
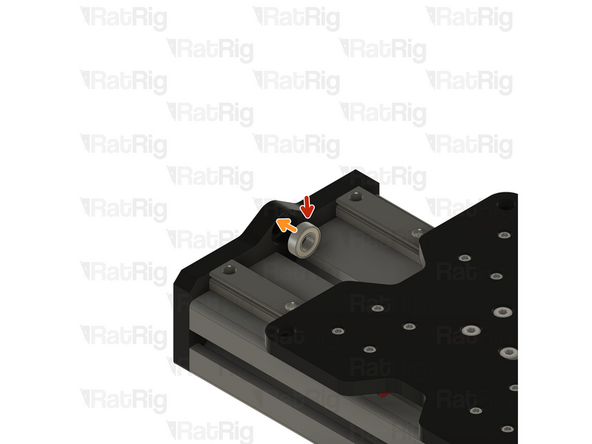
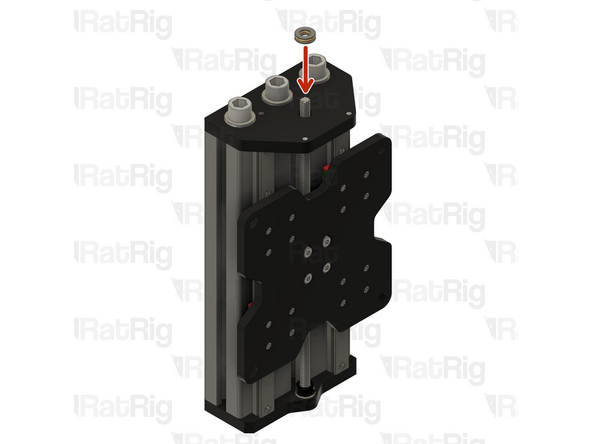
688ZZ Ball bearing
-
Push the ball bearing against the slot on the inner side of the plate.
-
-
-
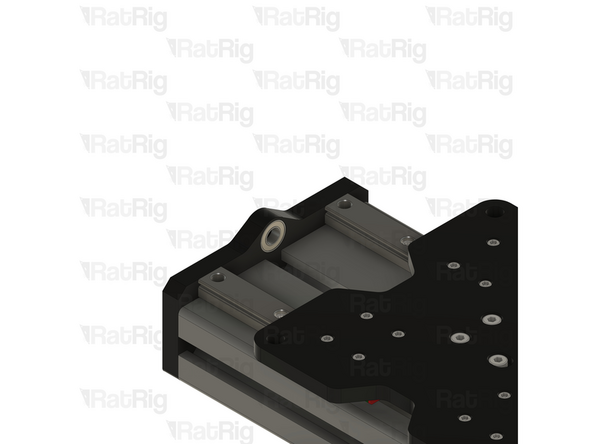
688ZZ Ball bearing
-
Push the ball bearing against the slot on the inner side of the plate.
-
-
-
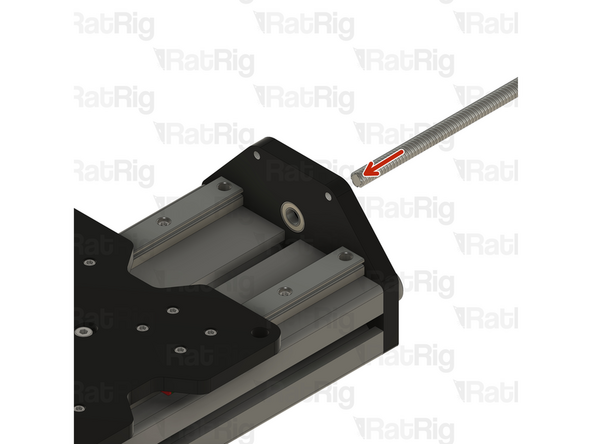
281mm TR8x8 Lead Screw
-
2x Precision Shim 12x8x1mm
-
Thrust Bearing F8-16M
-
2x Lock Collar 8mm
-
2x 688ZZ Ball Bearing
-
-
-
Insert the Lead Screw through the hole in the ball bearing
-
-
-
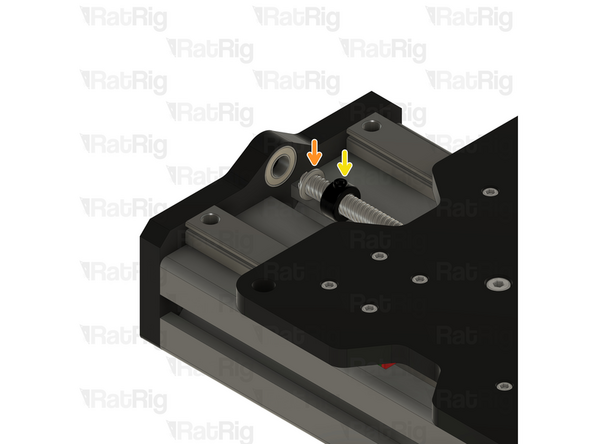
Precision Shim
-
Lock Collar
-
Slide the components into the Lead Screw
-
Do not tighten the screw on the Lock Collar yet.
-
-
-
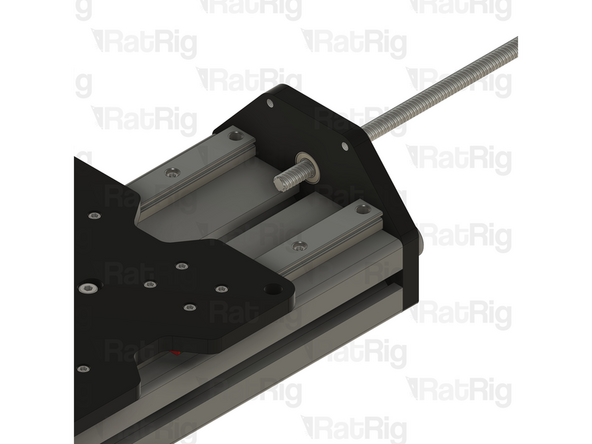
Thread the lead Screw in to the Nut Blocks on the XZ Plate and push the assembly
-
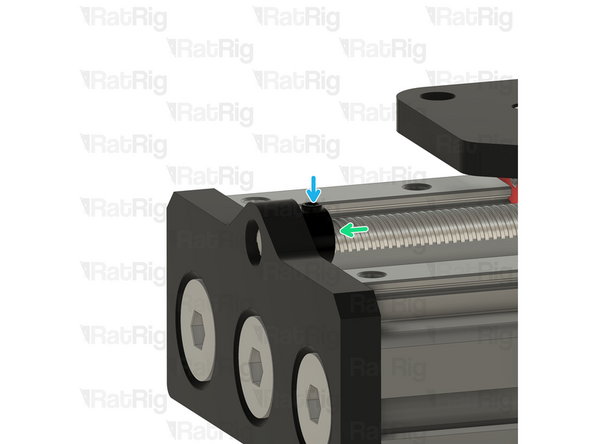
Lock Collar
-
Precision Shim
-
Push the exposed end of the Lead Screw through the hole in the ball bearing
-
Tighten the Screws on the Lock Collars to avoid the lead screw from falling in the next steps
-
-
-
Install the Thrust Bearing F8-16M on to the Lead Screw
-
Be careful that the bearing does not fall off whilst this assembly is set aside
-


Cancel: I did not complete this guide.
One other person completed this guide.
