Steps
9
- 04. CoreXY Idler Assemblies 9 steps

In Progress
This guide is currently being written. Reload periodically to see the latest changes.

User-Contributed Guide
This guide is not managed by the site's staff.

Private
This guide will not appear in search results and can only be viewed by team members!
Quiz
0
-
-
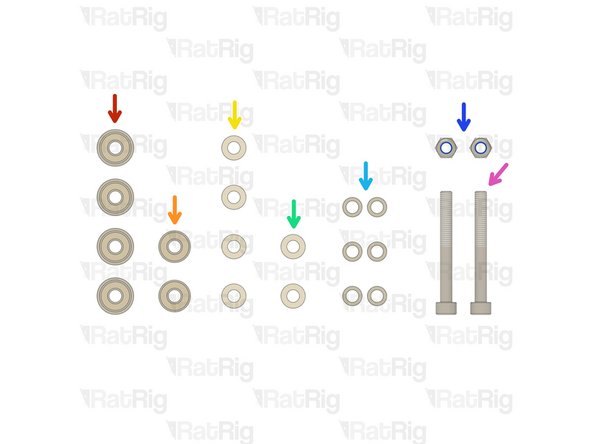
8x M6x12 Cap Head Screw
-
8x 3030 Drop-in T-Nut - M6
-
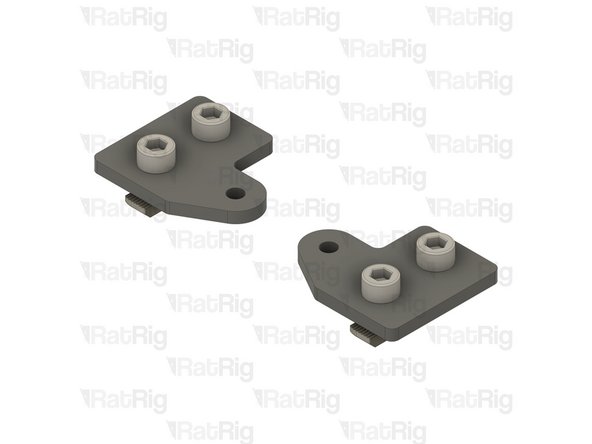
4x idler_plate_enclosure_2.0 plate
-
2x y_min_bumper printed part
-
-
-
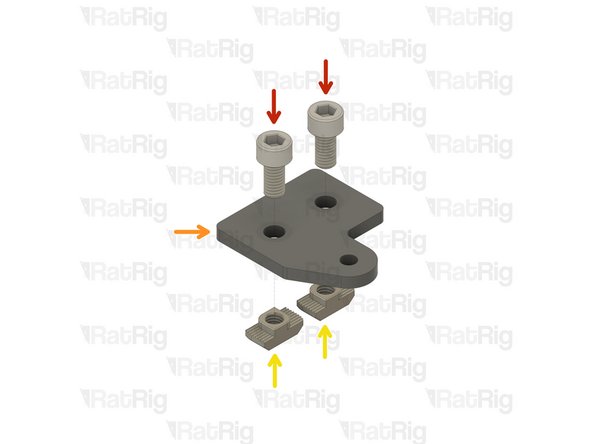
M6x12 Cap Head Screw
-
y_min_bumper printed part
-
idler_plate_enclosure_2.0 plate
-
3030 Drop-in T-Nut - M6
-
Loosely thread a 3030 T-Nut onto each of the M6x12 screws. Do not tighten them at this point
-
Pay attention to the different orientation of the idler plates
-
Set these assemblies aside until Step 4
-
-
-
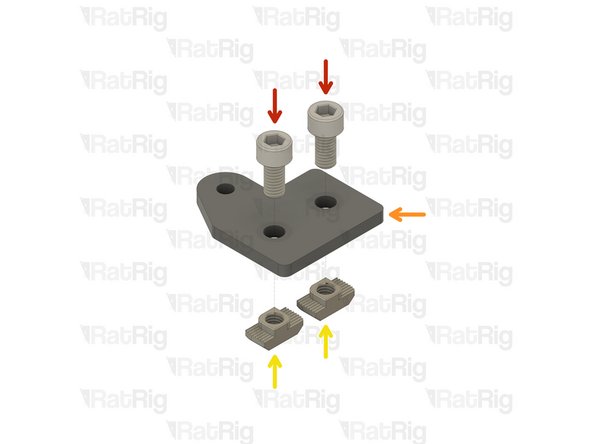
M6x12 Cap Head Screw
-
idler_plate_enclosure_2.0 plate
-
3030 Drop-in T-Nut - M6
-
Loosely thread a 3030 T-Nut onto each of the M6x12 screws. Do not tighten them at this point
-
Pay attention to the different orientation of the idler plates
-
Set these assemblies aside until Steps XX & XX
-
-
-
Lower CoreXY idler assembly from Step 2
-
Position the CoreXY idler assembly onto the V-Core 3 frame as shown
-
Tighten the two M6x12 screws to secure the CoreXY idler assembly to the V-Core 3 frame
-
Make sure the assembly is seated against the front 3030 extrusion before tightening the M6x12 screws
-
Repeat these steps for the lower CoreXY idler on the other side
-
-
-
4x F695ZZ Ball Bearing
-
2x 695ZZ Ball Bearing
-
4x 6mm Aluminium Spacer
-
2x 3mm Aluminium Spacer
-
6x Mini Precision Shim
-
2x M5 Nylon Locking Hex Nut
-
2x M5x45 Cap Head Screw
-
-
-
M5x45 Cap Head Screw
-
Install the following components in the order shown in the image
-
Mini Precision Shim
-
6mm Aluminium Spacer
-
F695ZZ Ball Bearing (Flange at the bottom)
-
695ZZ Ball Bearing
-
F695ZZ Ball Bearing (Flange at the top)
-
3mm Aluminium Spacer
-
-
-
Upper CoreXY idler assembly from Step 3
-
Position the upper CoreXY idler assembly onto the V-Core 3 frame as shown
-
Tighten the two M6x12 screws to secure the upper CoreXY idler assembly to the V-Core 3 frame
-
Make sure the assembly is seated against the front 3030 extrusion before tightening the M6x12 screws
-
M6 Nylon Locking Hex Nut
-
Fasten the M6 hex nut onto the M5x45 screw to secure the bearing assembly in place
-
-
-
M5x45 Cap Head Screw
-
Install the following components in the order shown in the image
-
Mini Precision Shim
-
F695ZZ Ball Bearing (Flange at the bottom)
-
695ZZ Ball Bearing
-
F695ZZ Ball Bearing (Flange at the top)
-
6mm Aluminium Spacer
-
3mm Aluminium Spacer
-
-
-
Upper CoreXY idler assembly from Step 3
-
Position the upper CoreXY idler assembly onto the V-Core 3 frame as shown
-
Tighten the two M6x12 screws to secure the upper CoreXY idler assembly to the V-Core 3 frame
-
Make sure the assembly is seated against the front 3030 extrusion before tightening the M6x12 screws
-
M6 Nylon Locking Hex Nut
-