
-
-
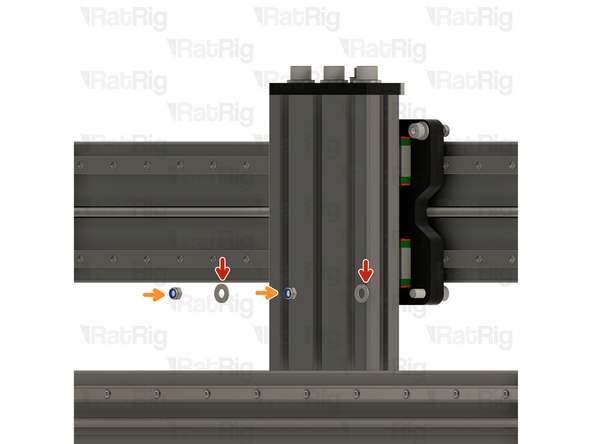
Z- Axis Assembly
-
4x M8x30 Cap Head Screw
-
4x M8 Nylon Locking Hex Nut
-
8x M8 Washer
-
-
-
Make sure the top Z plate is at the top
-
Once all four holes are aligned, install an M8 washer on to each M8x30 screw and insert them through the XZ plates, screwing them into the ball screw block
-
The top fasteners must be inserted from the front
-
The bottom fasteners must be inserted from the back
-
-
-
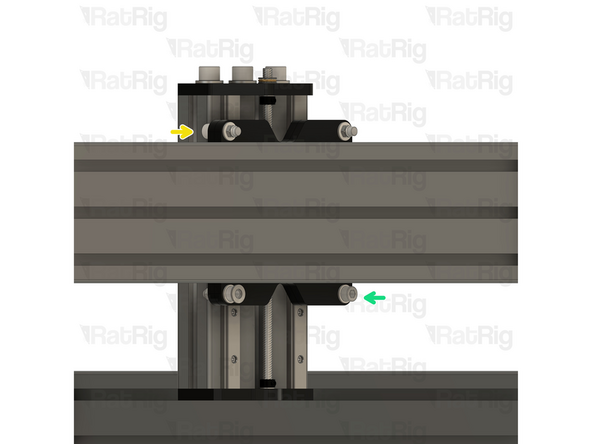
Insert an M8 Washer on to each screw
-
Thread a Nylon Locking Hex Nut into each Screw and tighten everything
-
Double check the orientation of the screws before proceeding:
-
The top screws must be inserted from the front
-
The bottom screws must be inserted from the back
-
-
-
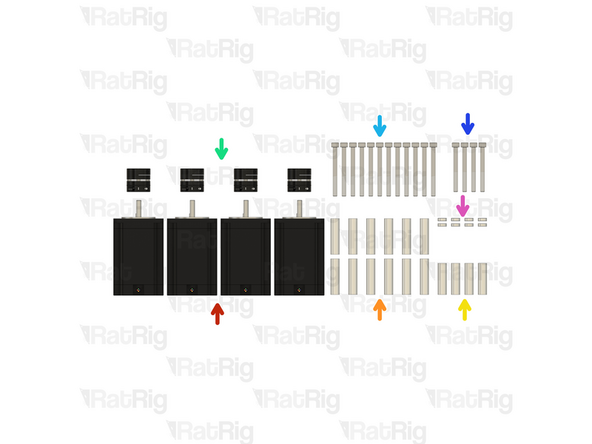
4x Nema 23 Stepper Motor High Torque
-
12x 40mm Aluminium Spacer
-
4x 35mm Aluminium Spacer
-
4x Coupler - Disk Type
-
12x M5x55 Cap Head Screw
-
4x M5x50 Cap Head Screw
-
4x 3mm Aluminium Spacer
-
-
-
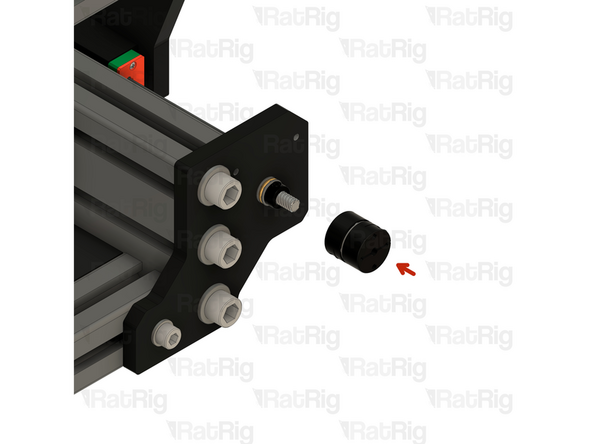
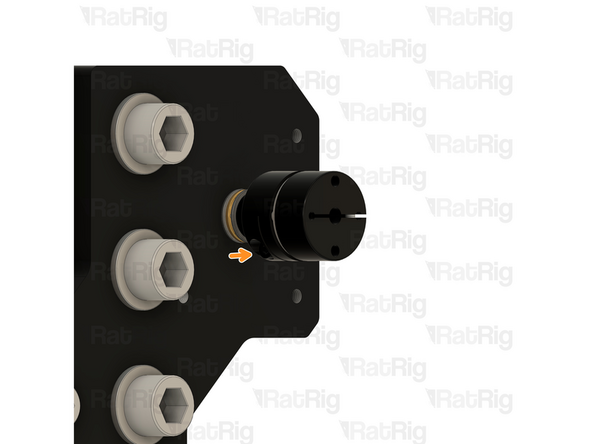
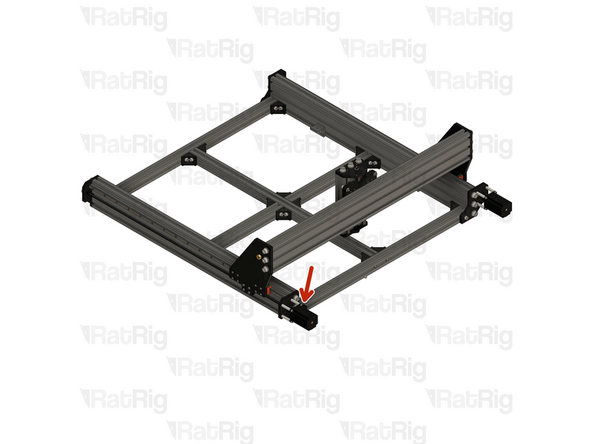
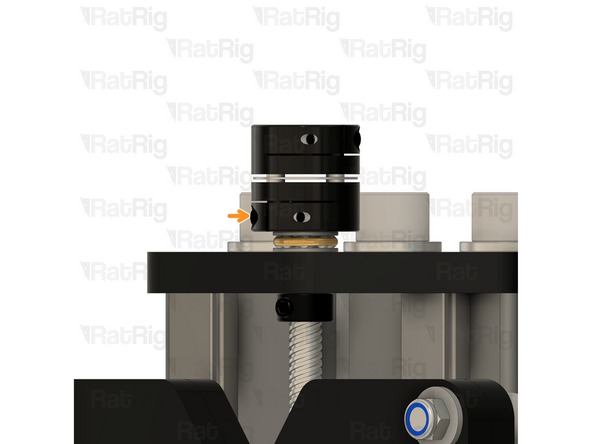
Coupler - Disk Type
-
Insert the coupler on to the end of the Y-Axis Lead Screw
-
Tighten the Screw on the Coupler
-
-
-
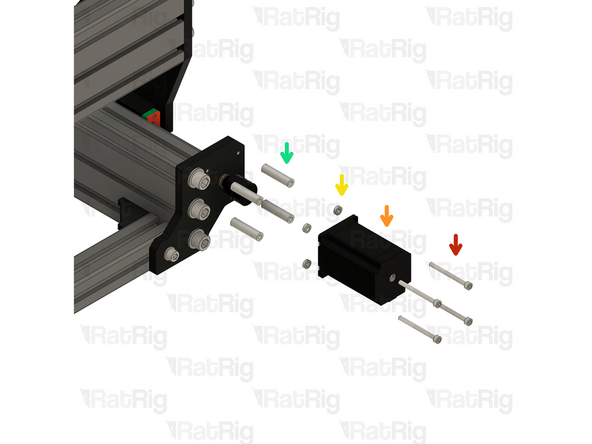
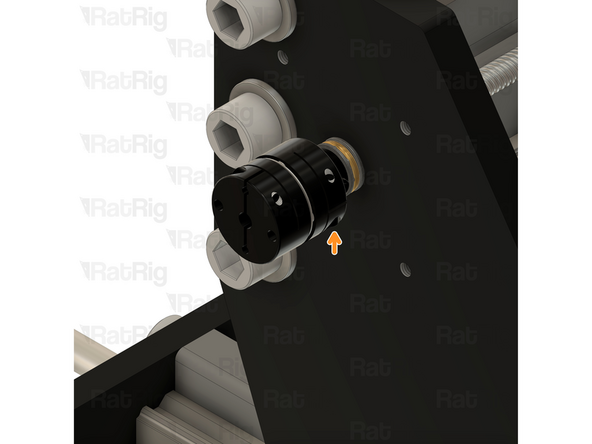
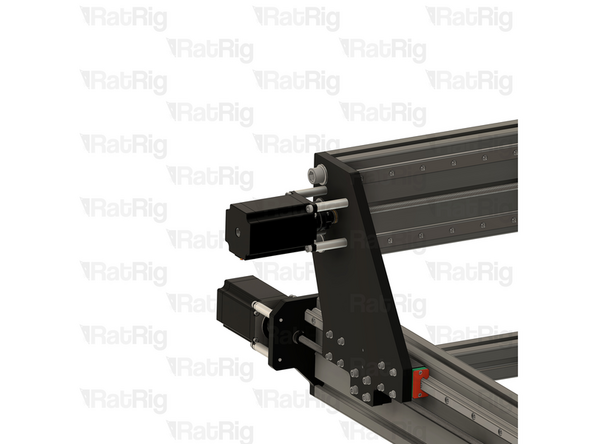
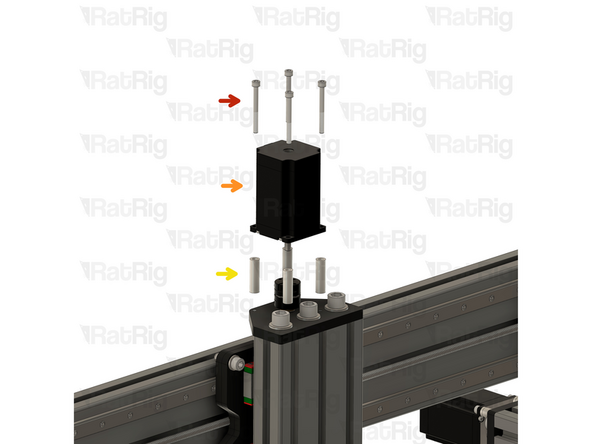
4x M5x55 Cap Head Screw
-
Nema 23 Stepper Motor High Torque
-
4x 40mm Aluminium Spacer
-
4x 3mm Aluminium Spacer
-
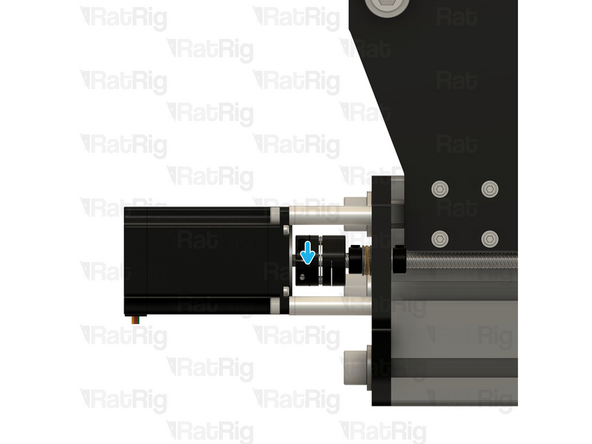
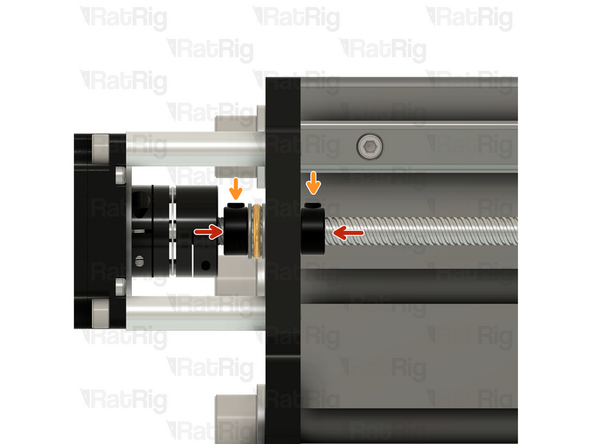
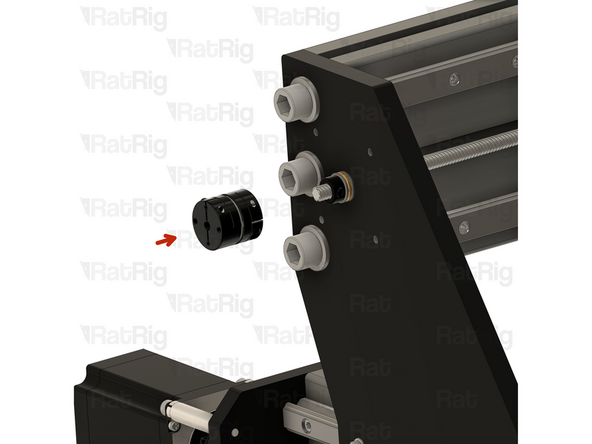
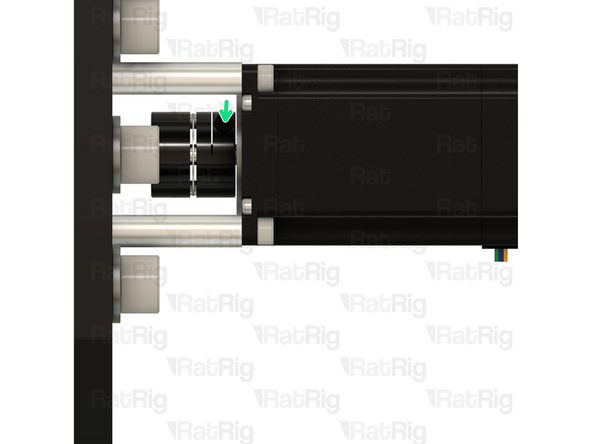
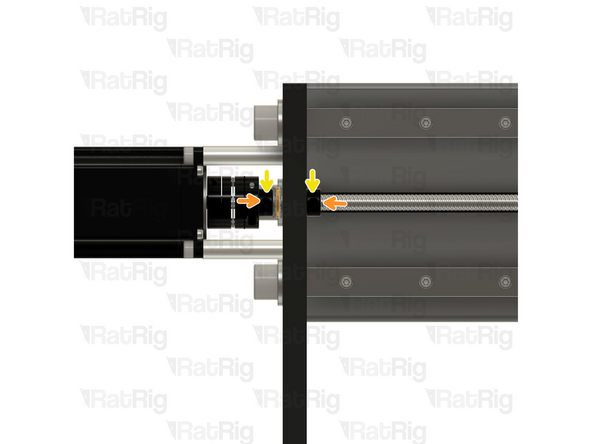
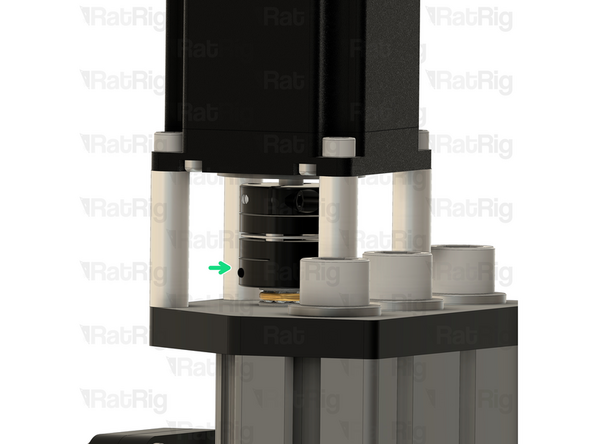
Using a 2.5mm hex key, tighten the marked screw to secure the disc coupler to the NEMA23 shaft
-
Rotate the lead screw by hand until the marked screw is accessible. It's required that both Y-Axis lead screw are rotated simultaneously since they are atatched to the X-gantry.
-
-
-
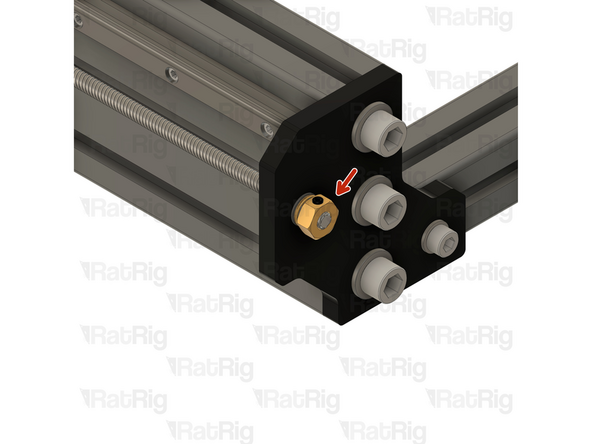
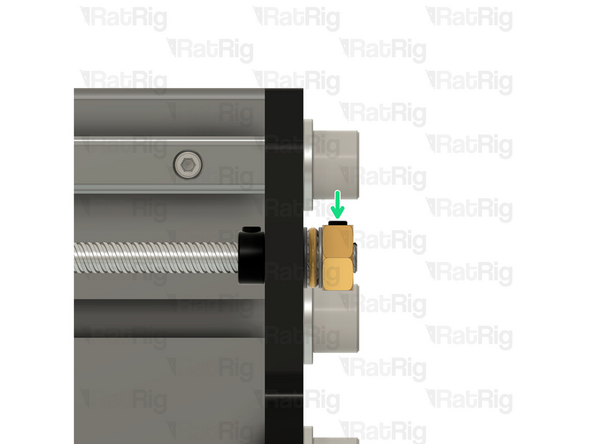
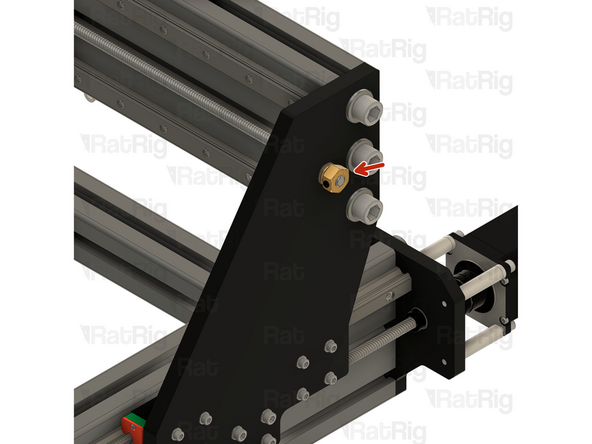
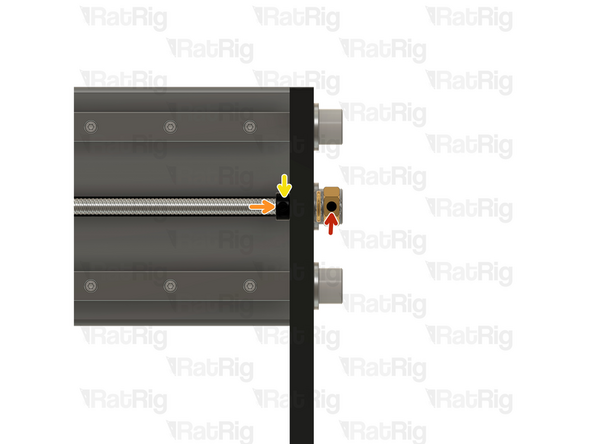
Tighten the Tensioning Nut until the lead screw is straight
-
If you are building a bigger StrongHold ONE then sag on the Lead Screw should be more noticeable, requiring a bit more tension to keep it straight
-
Don't overtighten the tensioning nut as it will lead to binding and malfunction of the axis
-
Tighten the screw on the tensioner nut once the lead screw is properly adjusted
-
-
-
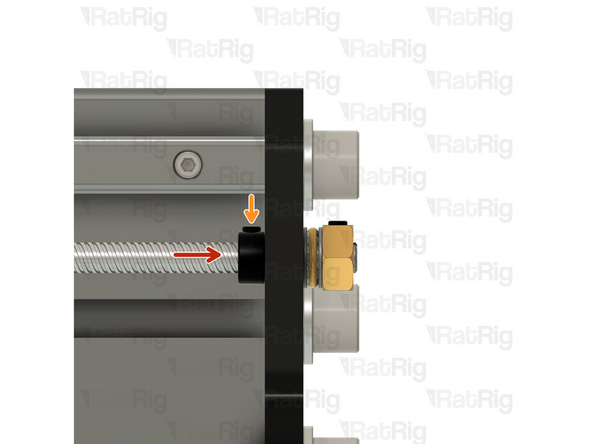
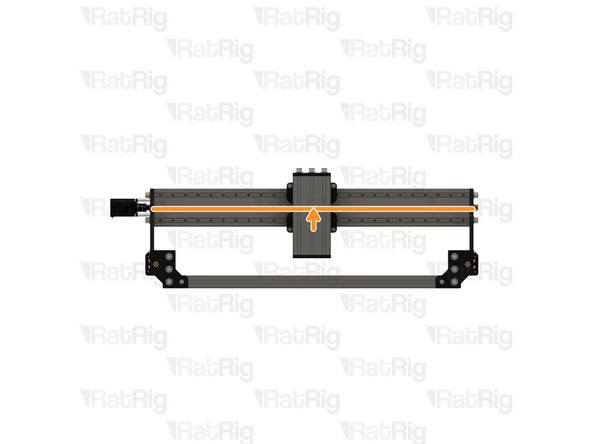
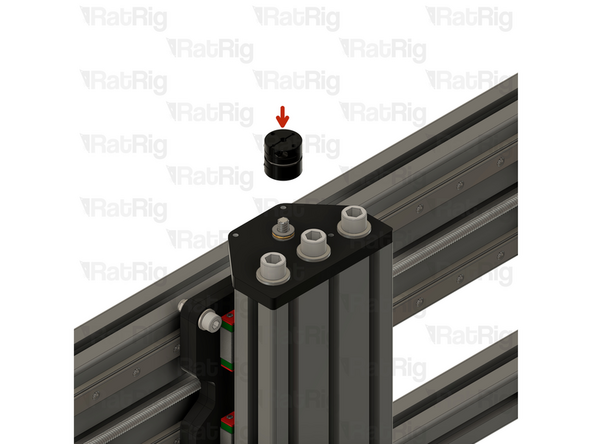
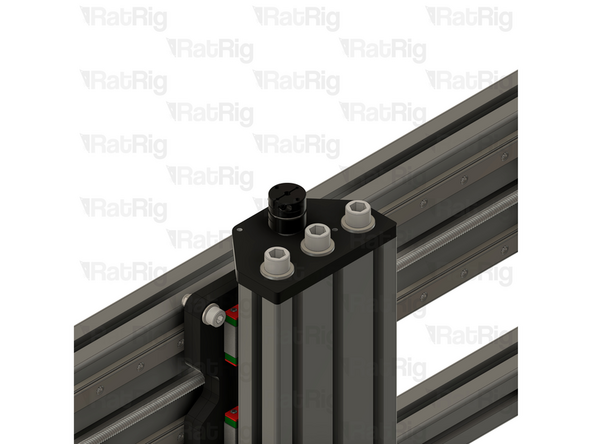
Push both Lock Collars against the plate
-
Tighten the Lock Collar screw
-
Repeat for the Lock Collar on the other end of the Lead Screw
-
-
-
Repeat Steps 5 through 8 to install the remaining Y-Axis Stepper Motor
-
-
-
Coupler - Disk Type
-
Insert the coupler on to the end of the X-Axis Lead Screw
-
Tighten the Screw on the Coupler
-
-
-
4x M5x55 Cap Head Screw
-
Nema 23 Stepper Motor High Torque
-
4x 40mm Aluminium Spacer
-
Using a 2.5mm hex key, tighten the marked screw to secure the disc coupler to the NEMA23 shaft
-
Rotate the coupler by hand until the marked screw is accessible
-
-
-
Tighten the Tensioning Nut until the lead screw is straight
-
If you are building a bigger StrongHold ONE CNC then the sag on the Lead Screw should be more noticeable, requiring a bit more tension to keep it straight
-
Don't overtighten the tensioning nut as it will lead to binding and malfunction of the axis
-
-
-
Tighten the screw on the tensioner nut once the lead screw is properly adjusted
-
Push both Lock Collars against the plate
-
Tighten the Lock Collar screw
-
Repeat for the Lock Collar on the other end of the Lead Screw
-
-
-
Coupler - Disk Type
-
Insert the coupler on to the end of the Z-Axis Lead Screw
-
Tighten the Screw on the Coupler
-
-
-
4x M5x50 Cap Head Screw
-
Nema 23 Stepper Motor High Torque
-
4x 35mm Aluminium Spacer
-
Using a 2.5mm hex key, tighten the marked screw to secure the disc coupler to the NEMA23 shaft
-
Rotate the coupler by hand until the marked screw is accessible
-


Cancel: I did not complete this guide.
One other person completed this guide.
