
Steps
10
- 12. Accessories 10 steps

User-Contributed Guide
This guide is not managed by the site's staff.
Quiz
0
Introduction
Please note: Three lengths of PTFE tubing are recommended for use on the accessories. One length to run from the bowden holder to the toolhead, and two smaller lengths for the spool to run on. These are not supplied.
It is recommended to use a tube with a 4mm OD and a 2.5mm ID. A 3mm ID tube will also work, but take care as it may kink or bend too easily.
The required length varies depending on the size of the machine being built. The following can be used as a guideline:
- 200x200: 1400mm
- 300x300: 1700mm
- 400x400: 2100mm
- 500x500: 2400mm
-
-
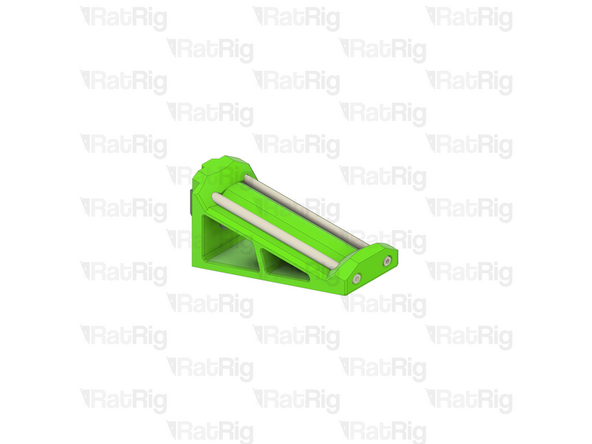
1x enclosure2_spool_holder_4mm Printed Part
-
3x M6x12 Cap Head Screw
-
3x 3030 Drop-in T-Nut - M6
-
2x 85mm PTFE Tube
-
1x enclosure2_bowden_clamp Printed Part
-
1x electronics_wire_guide_rear Printed Part
-
-
-
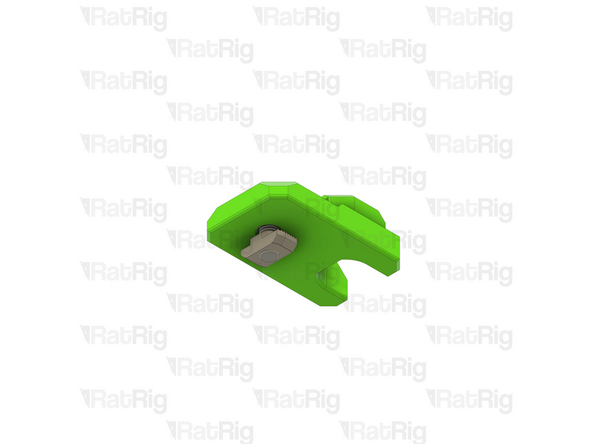
enclosure2_spool_holder_4mm Printed Part
-
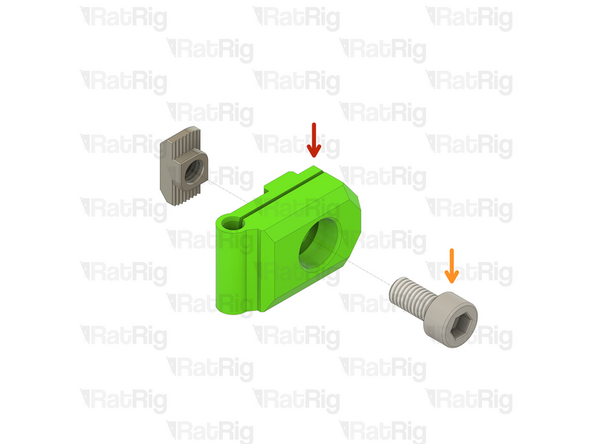
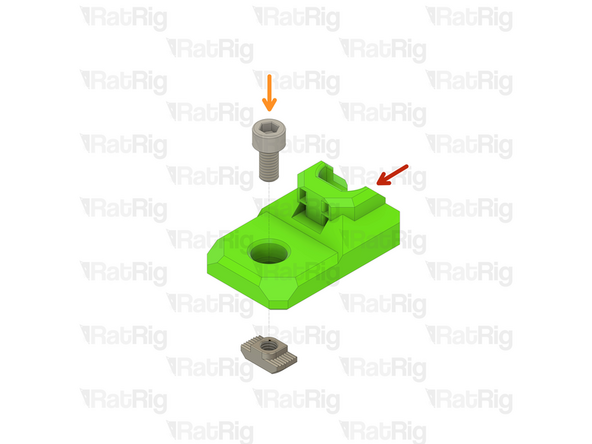
M6x12 Cap Head Screw
-
Install the M6 cap head screw into the spool holder as shown
-
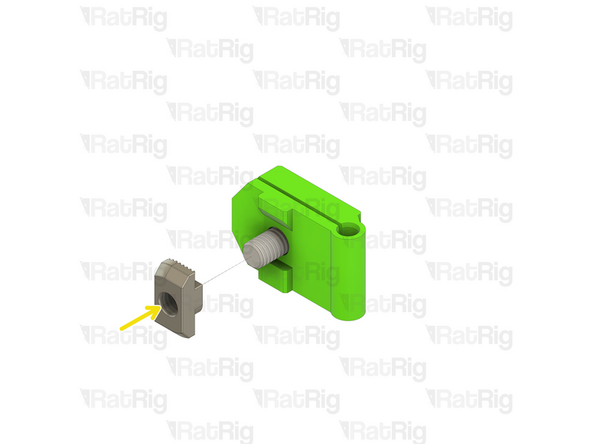
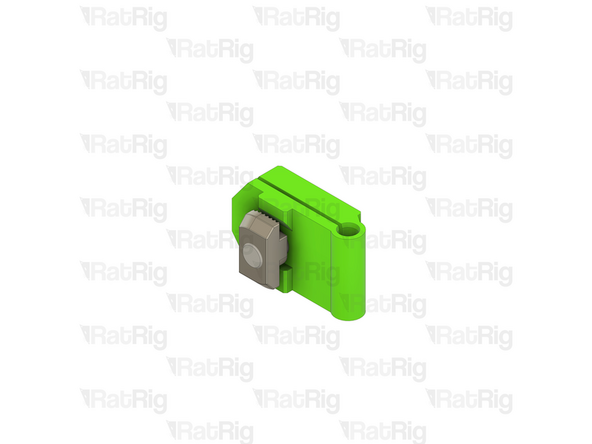
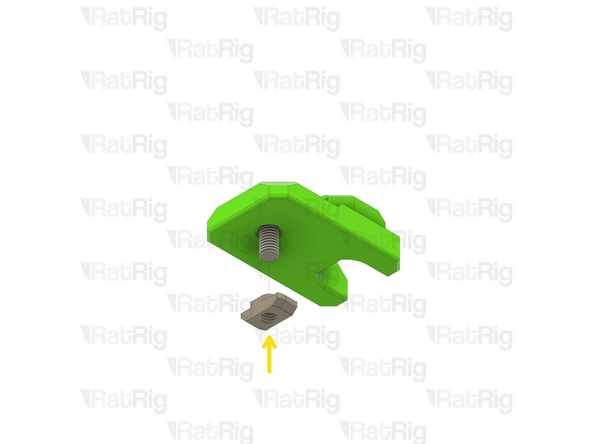
3030 Drop-in T-Nut - M6
-
Loosely thread a 3030 T-Nut onto the M6x12 screws. Do not tighten it at this point
-
-
-
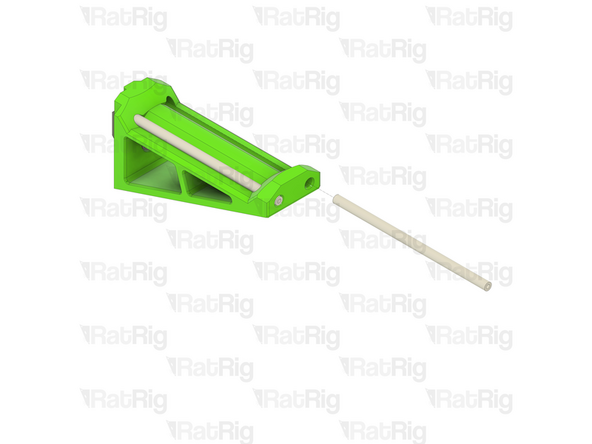
Assembly from the previous step
-
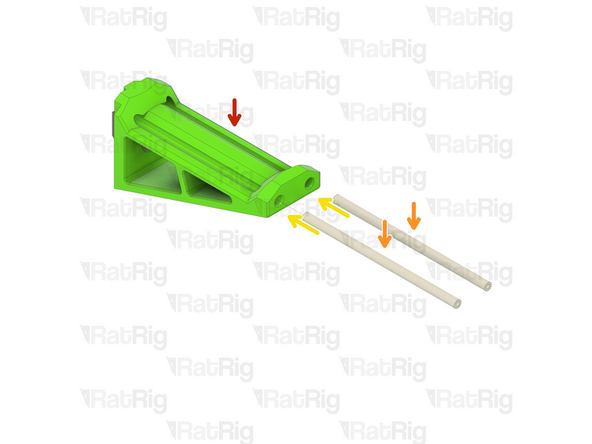
85mm length of PTFE tubing
-
Using a sharp blade (such as a utility knife), cut two lengths of PTFE tubing measuring 85mm in length
-
Insert a length of PTFE into each channel of the spool holder as shown
-
Set the spool holder assembly aside until Step 7
-
-
-
enclosure2_bowden_clamp Printed Part
-
M6x12 Cap Head Screw
-
Install the M6 cap head screw into the bowden clamp as shown
-
3030 Drop-in T-Nut - M6
-
Loosely thread a 3030 T-Nut onto the M6x12 screws. Do not tighten it at this point
-
Set the bowden clamp assembly aside until Step 8
-
-
-
electronics_wire_guide_rear Printed Part
-
M6x12 Cap Head Screw
-
Install the M6 cap head screw into the cable guide as shown
-
3030 Drop-in T-Nut - M6
-
Loosely thread a 3030 T-Nut onto the M6x12 screws. Do not tighten it at this point
-
-
-
Cable guide assembly
-
Install the cable guide assembly to the V-Core 3.1 frame as shown
-
Check that the cable guide is in the middle of the frame
-
Tighten the M6x12 screw to secure the cable guide
-
-
-
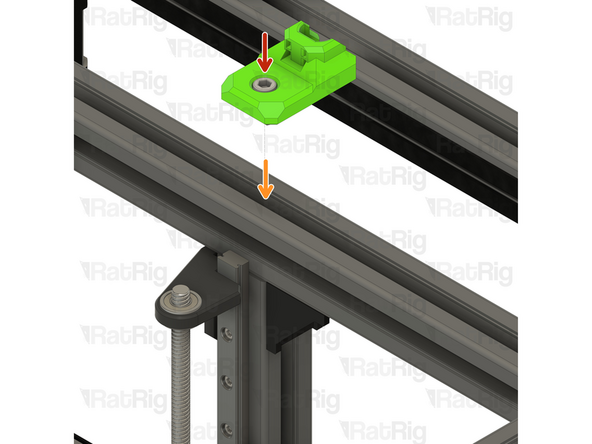
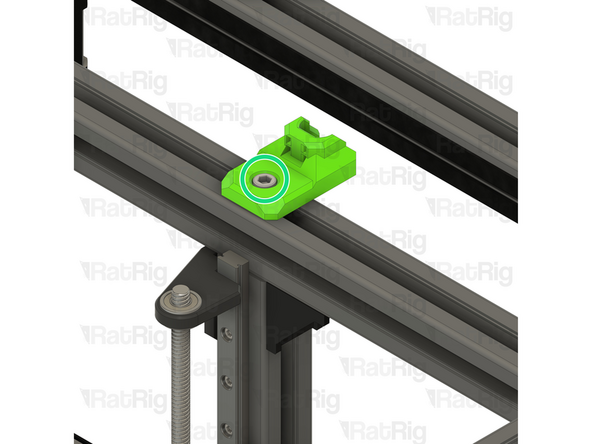
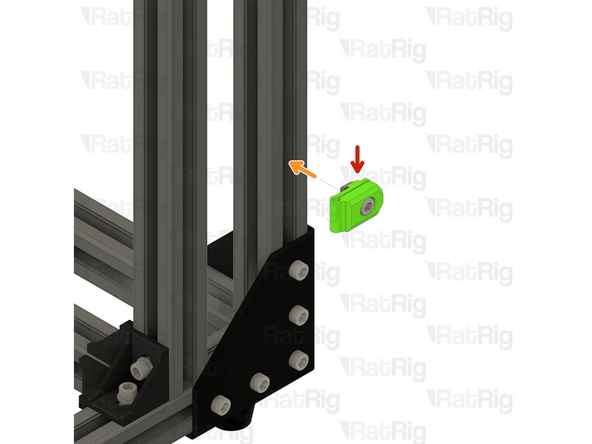
Spool holder assembly from Step 3
-
Position the spool holder assembly on the V-Core 3.1 frame
-
The marked distance should measure 85mm
-
Tighten the M6x12 screw to secure the spool holder to the frame
-
-
-
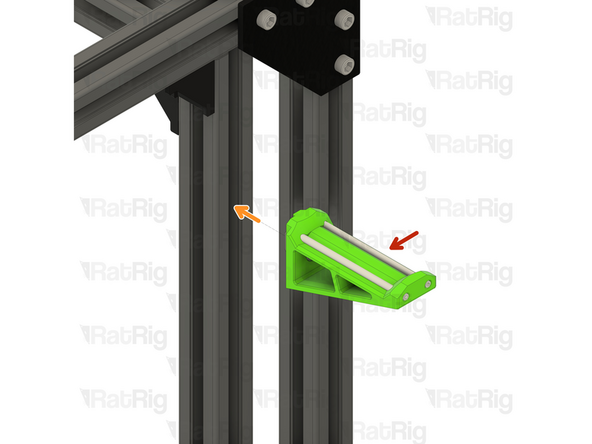
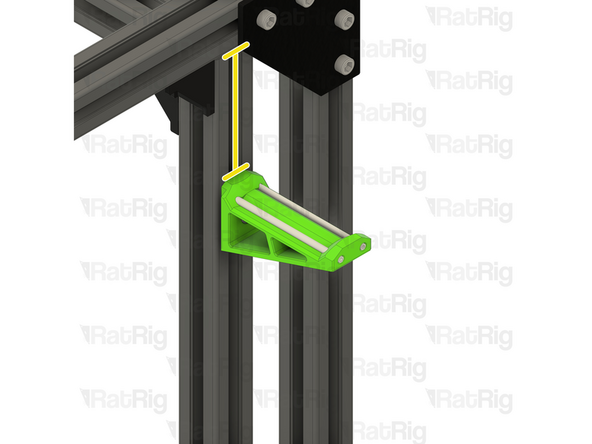
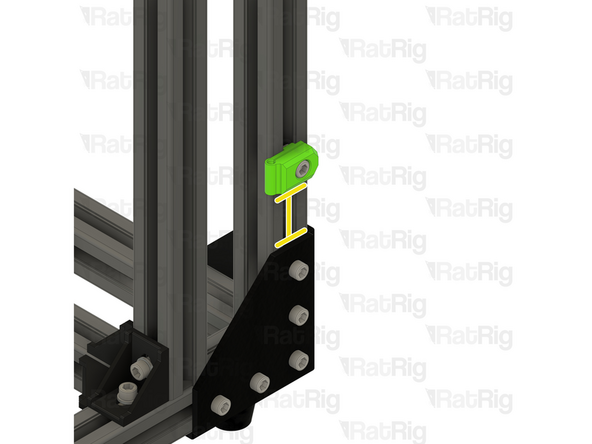
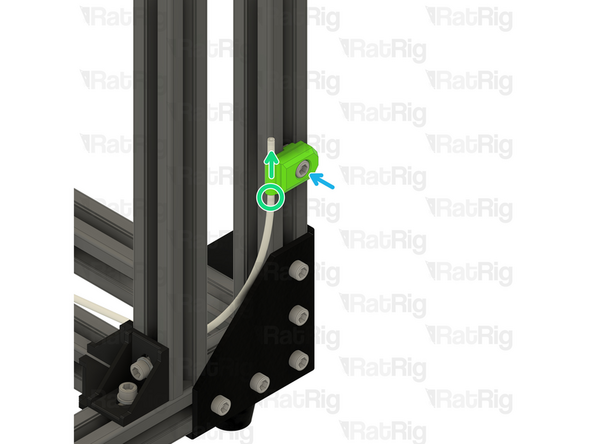
Bowden clamp assembly from Step 4
-
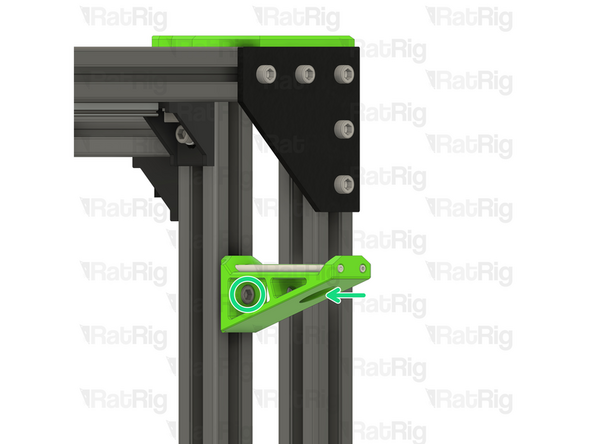
Position the bowden clamp assembly on the V-Core 3.1 frame
-
The marked distance should measure 45mm
-
Insert a length of PTFE tubing into the bowden clamp, as shown
-
Tighten the M6x12 screw to secure the bowden holder and PTFE to the frame
-
-
-
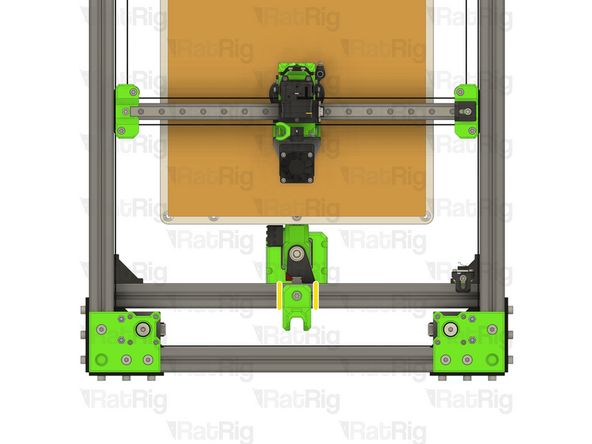
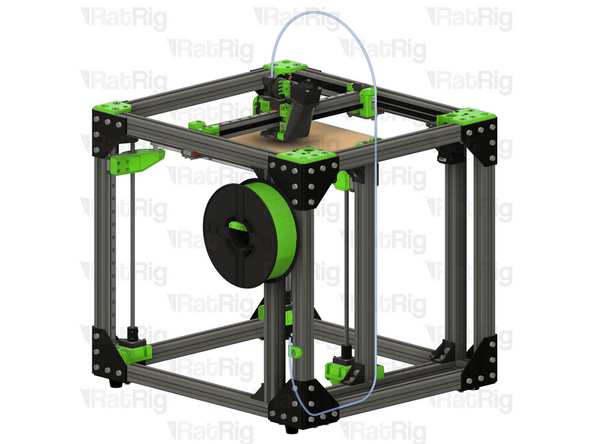
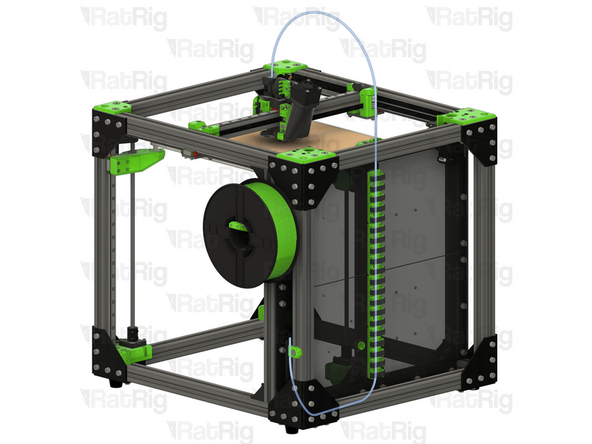
It is recommended to route the PTFE filament guide as shown
-
When using the electronics panel and printed cable guides, the PTFE tube can be routed through the cable guides
-


Cancel: I did not complete this guide.
7 other people completed this guide.