
Video Overview
-
-
1x 345mm 3060 Extrusion
-
1x 270mm 3060 Extrusion
-
1x 115mm 3060 Extrusion
-
2x Corner Plate
-
1x T-Shape Joining Plate
-
3x 90 Degree Corner
-
-
-
345mm 3060 Extrusion
-
115mm 3060 Extrusion
-
2x Corner Plate
-
It is recommended to assemble the frame on a flat surface and to ensure that the extrusions are square to one another.
-
Fasten all ten M6x12 screws on the corner plates
-
-
-
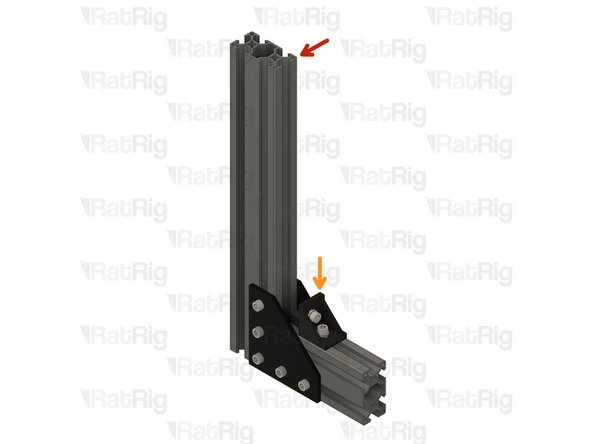
Assembly from Step 2
-
90 Degree Corner
-
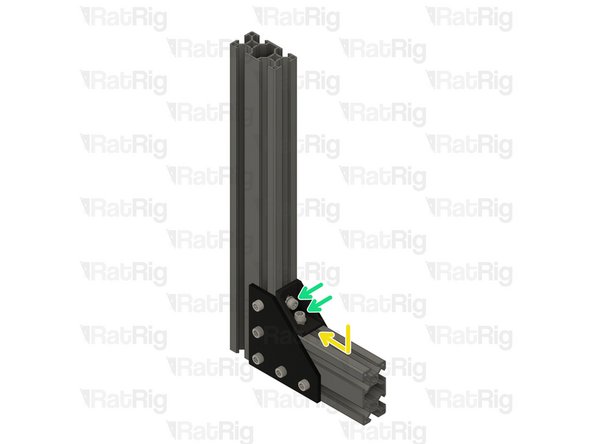
Install the 90 degree corner as shown
-
Fasten both M6x12 screws on the 90 degree corner
-
-
-
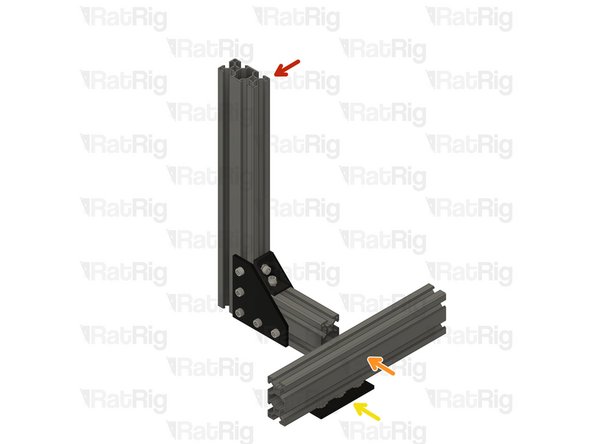
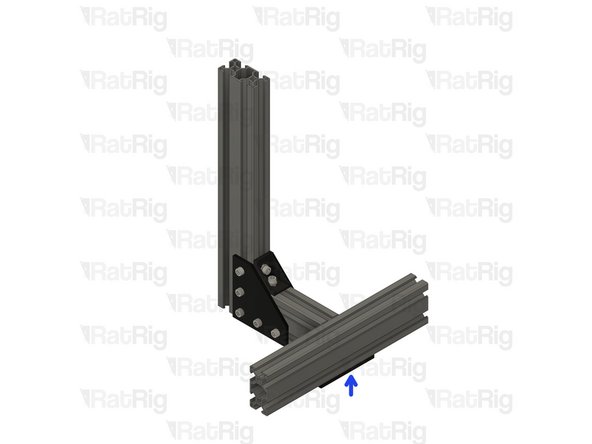
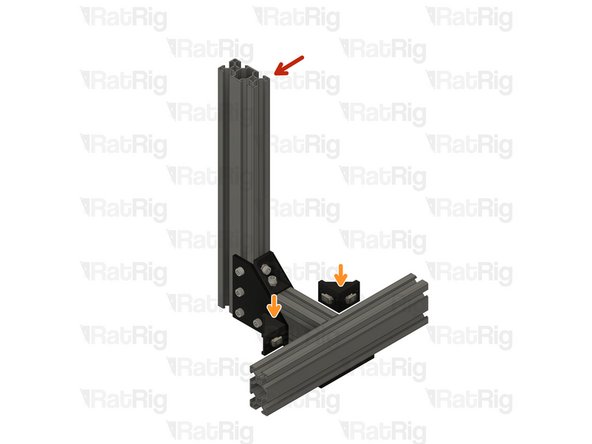
Assembly from Step 3
-
270mm 3060 Extrusion
-
T-Shape Joining Plate
-
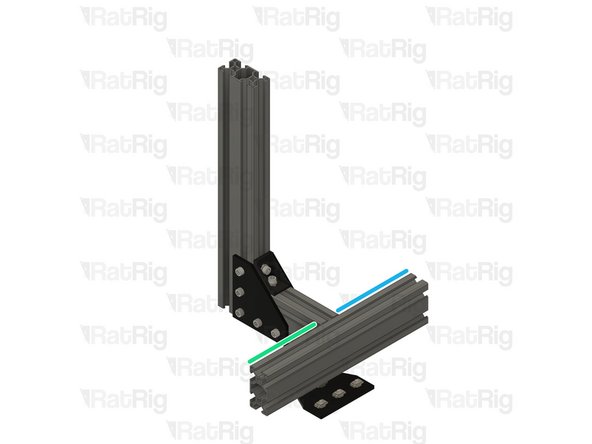
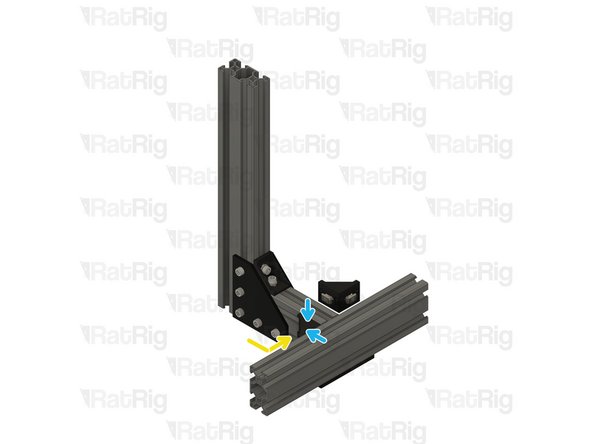
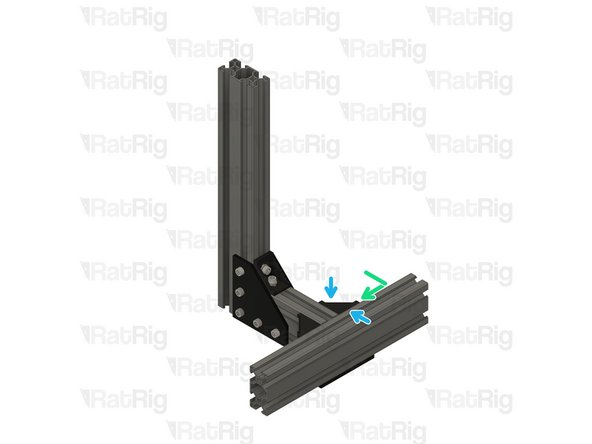
Position the 270mm 3060 extrusion as shown. The distances shown should be as follows:
-
100mm
-
140mm
-
Install the T-shape joining plate as shown and secure all five M6x12 screws
-
-
-
Assembly from Step 4
-
2x 90 Degree Corner
-
Install the first 90 degree corner as shown
-
Fasten both M6x12 screws on the first 90 degree corner
-
Install the second 90 degree corner as shown
-
Fasten both M6x12 screws on the second 90 degree corner
-
Set the frame assembly aside until Step 8
-
-
-
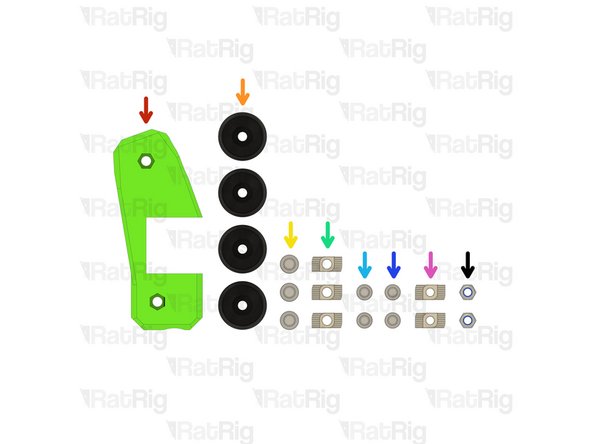
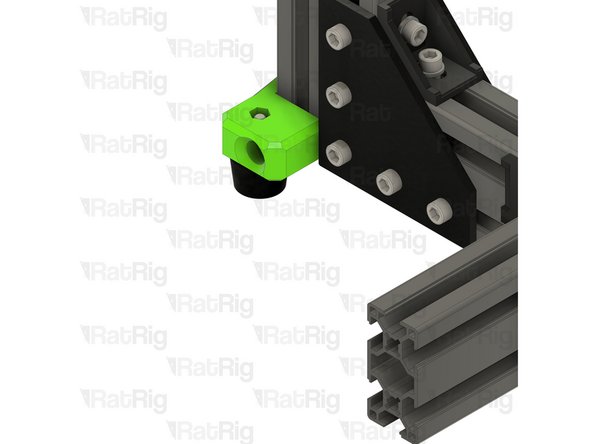
side_legs printed part
-
4x Rubber Foot
-
3x M6x12 Cap Head Screw
-
3x 3030 Drop-in T-Nut - M6
-
2x M5x25 Cap Head Screw
-
2x M5x14 Cap Head Screw
-
2x 3030 Drop-in T-Nut - M5
-
2x M5 Nylon Locking Hex Nut
-
-
-
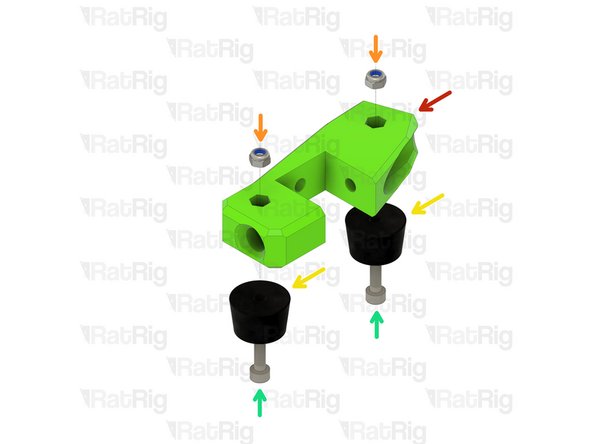
side_legs printed part
-
2x M5 Nylon Locking Hex Nut
-
2x Rubber Foot
-
Fasten the two M5x25 screws through the rubber foot and into the M5 nylon locking nuts
-
Take care not to over tighten the M5x25 screws as you can damage the printed part.
-
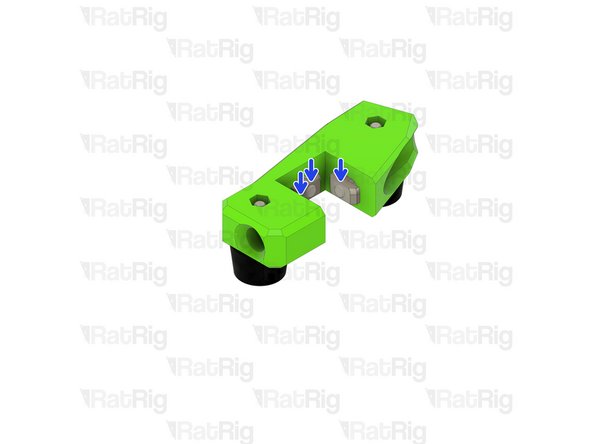
3x M6x12 Cap Head Screw
-
3x 3030 Drop-in T-Nut - M6
-
Loosely thread the 3030 T-Nuts onto the M6x12 screws. Do not tighten them at this point.
-
-
-
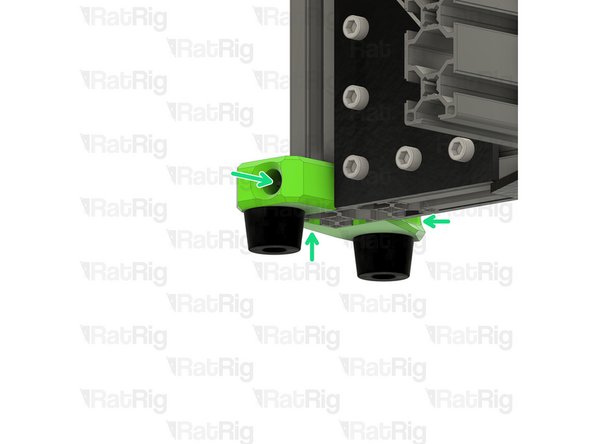
Frame assembly from Step 5
-
Rear feet assembly from Step 7
-
Install the rear feet assembly onto the frame as shown
-
Make sure the printed part is flush with the end of the 3060 extrusion
-
Fasten all three M6x12 screws to secure the rear feet assembly to the frame
-
Take care not to over tighten the M6x12 screws as you can damage the printed part
-
-
-
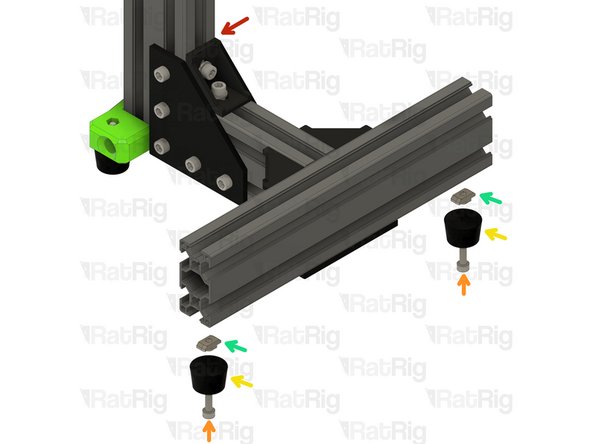
Assembly from Step 8
-
2x M5x14 Cap Head Screw
-
2x Rubber Foot
-
2x 3030 Drop-in T-Nut - M5
-
Insert the M5x14 screws into the rubber feet and loosely thread the 3030 T-Nuts onto them.
-
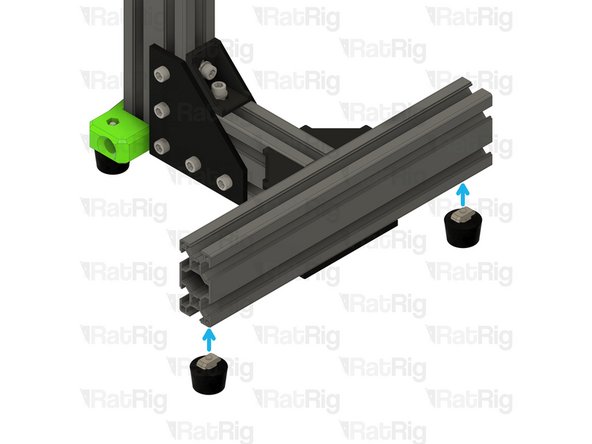
Insert the assembled feet into the ends of the 3060 extrusion as shown. Fasten the M5x14 screws to secure them in place.
-
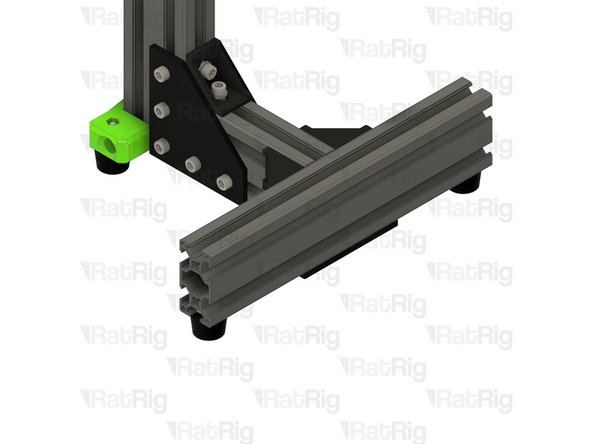
Place the frame assembly on a flat surface and make sure all four feet are level. The frame should sit firmly without any wobble.
-
-
-
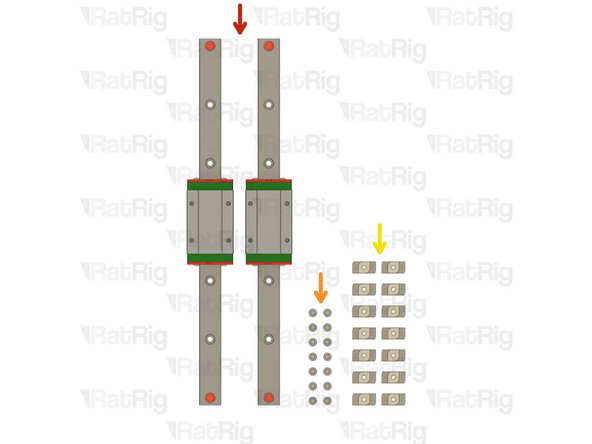
2x 250mm MGN15 Linear Rail
-
14x M3x12 Cap Head Screw
-
14x 3030 Drop-in T-Nut - M3
-
Please refer to the Rat Rig Linear Rail Guide (Steps 1 & 2) for full details on preparing the rails before installation.
-
The linear rail carriages are not interchangeable. Do not try to use a carriage on a different linear rail than the one it was supplied with.
-
-
-
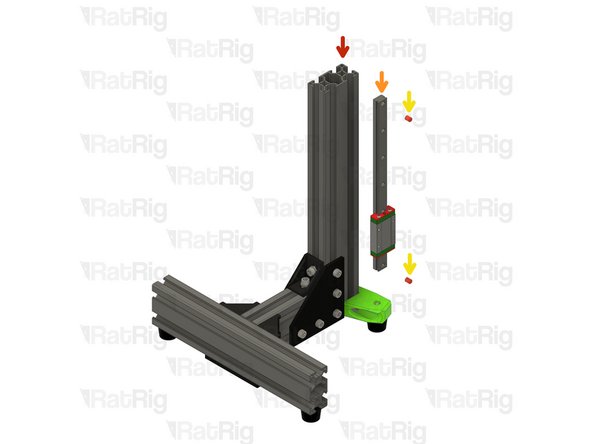
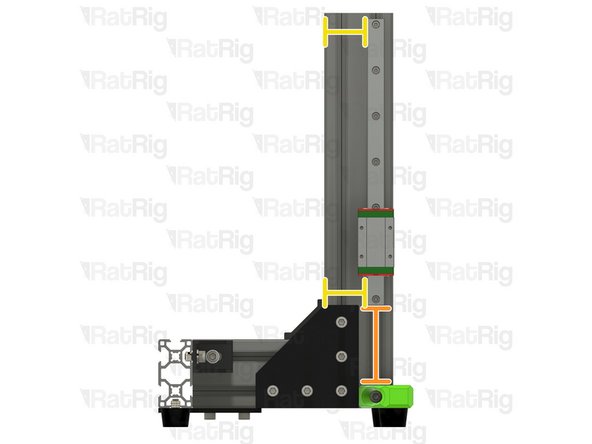
Frame assembly from Step 9
-
MGN15 Linear Rail
-
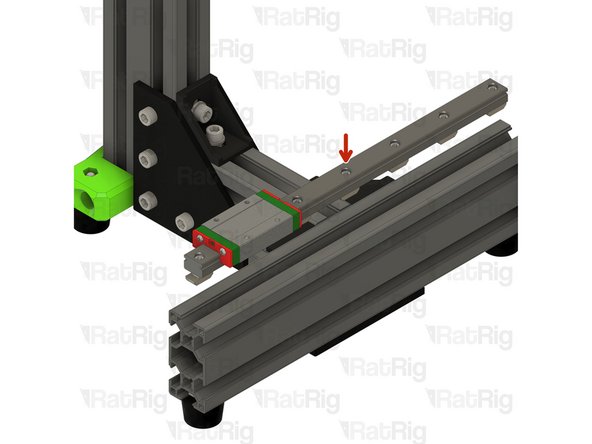
Remove the plastic stops installed in the ends of the linear rail
-
Do not allow the linear rail carriage to leave the end of the rail.
-
Insert an M3x12 screw in each of the holes on the linear rail
-
Loosely thread a 3030 T-Nut onto each of the M3x12 screws
-
-
-
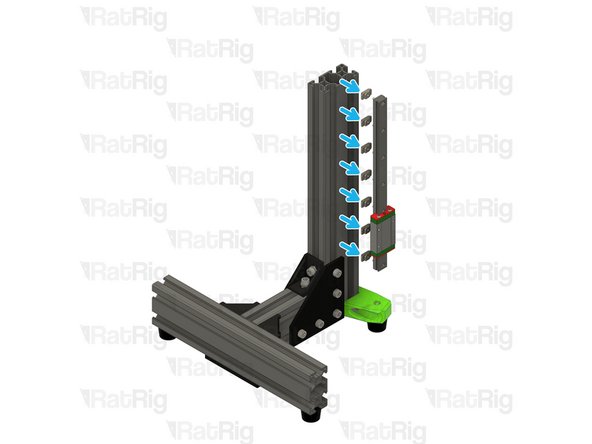
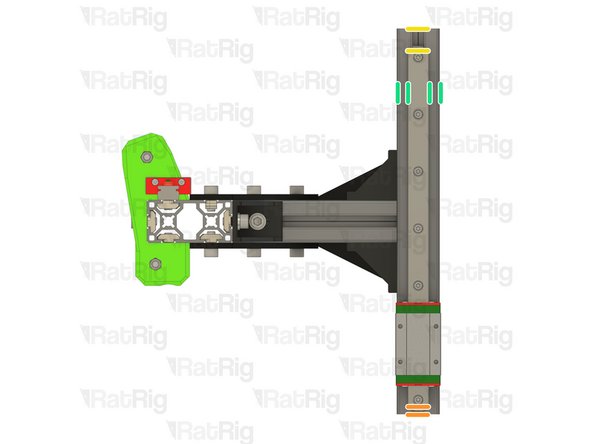
Insert the linear rail into the 3060 extrusion. Position the rail as shown with the following measurements:
-
70.00 mm
-
37.50 mm
-
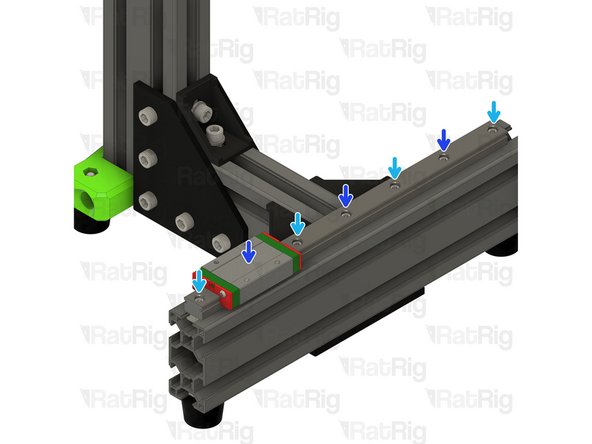
Fasten the M3x12 screws, starting from the top
-
Double check the position of the linear rail, using the measurements above
-
Fasten the remaining M3x12 screws, starting at the top
-
-
-
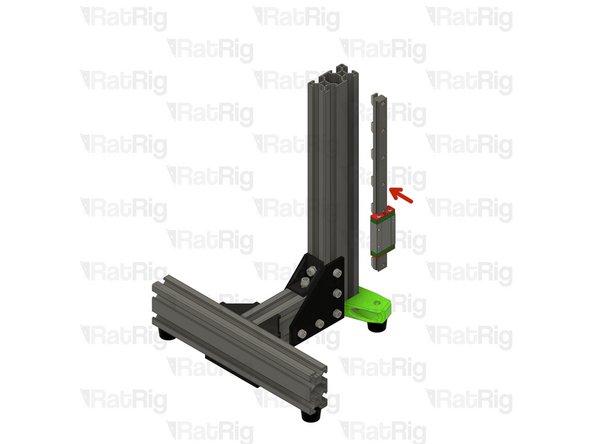
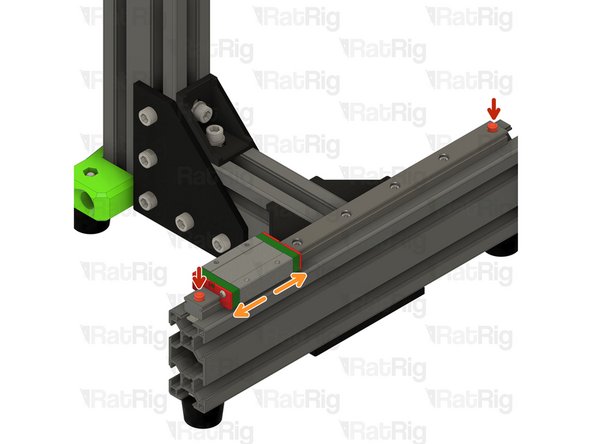
Re-install the plastic stops at the ends of the linear rail
-
Check that the carriage runs smoothly along the length of the rail
-
-
-
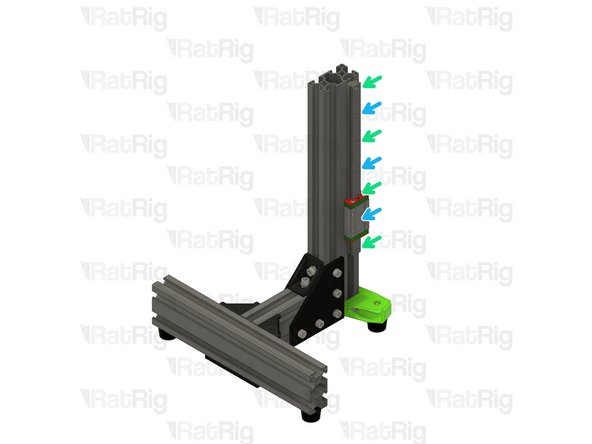
MGN15 Linear Rail
-
Remove the plastic stops installed in the ends of the linear rail
-
Do not allow the linear rail carriage to leave the end of the rail
-
Insert an M3x12 screw in each of the holes on the linear rail
-
Loosely thread a 3030 T-Nut onto each of the M3x12 screws
-
-
-
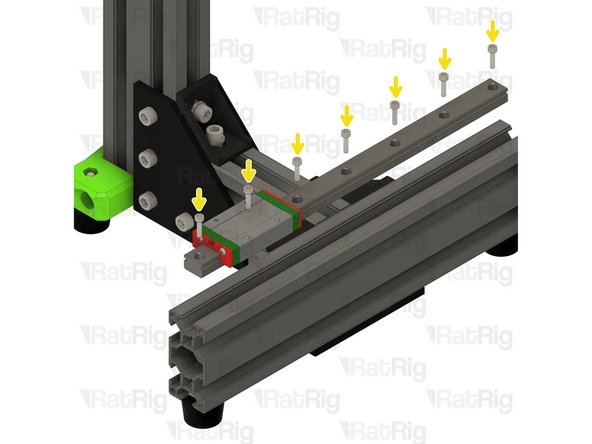
Insert the linear rail into the 3060 extrusion. Position the rail as shown with the following measurements:
-
5.00 mm
-
15.00 mm
-
7.50 mm
-
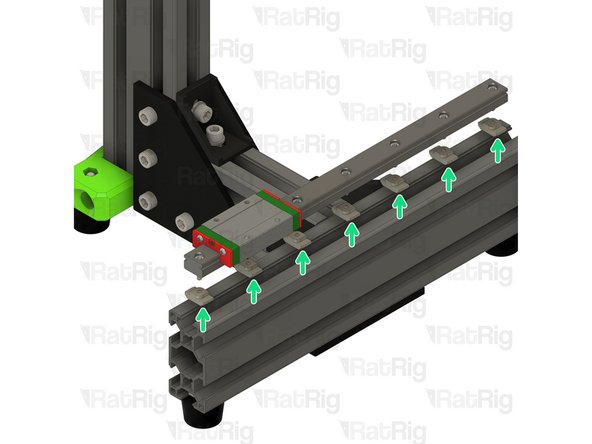
Fasten the M3x12 screws, starting from the left
-
Double check the position of the linear rail, using the measurements above
-
Fasten the remaining M3x12 screws, starting at the left
-
-
-
Re-install the plastic stops at the ends of the linear rail
-
Check that the carriage runs smoothly along the length of the rail
-


Cancel: I did not complete this guide.
22 other people completed this guide.