
-
-
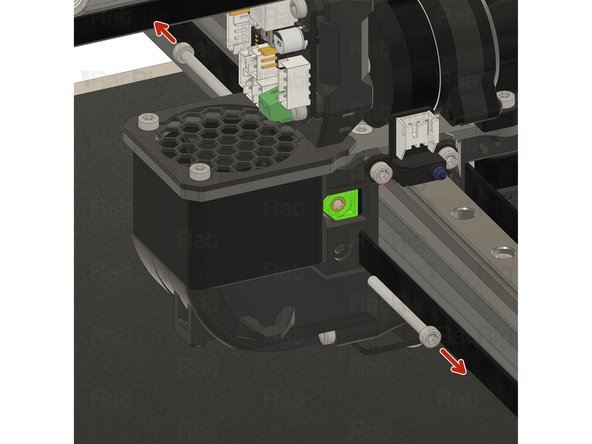
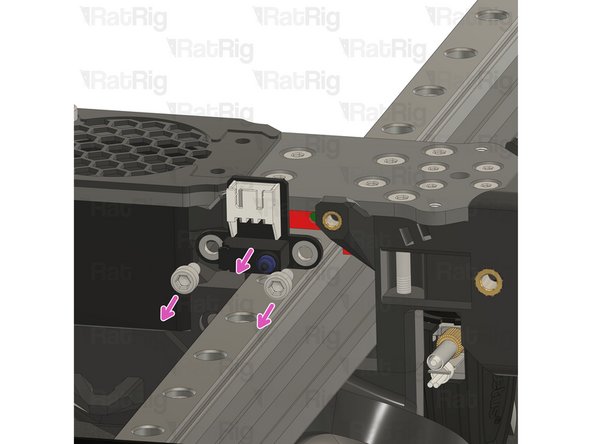
Loosen the lower set screw. Be careful not to lose it.
-
Do not touch the top set screw
-
Loosen the M4 tensioner screw to release the belt tension, but ensure the screw remains threaded in the tensioner arm. Do not remove it completely; just loosen it.
-
-
-
Remove the M4x10 Countersink screw
-
Remove the front belt clamp
-
Remove the belt
-
Repeat the previous steps for the lower belt
-
-
-
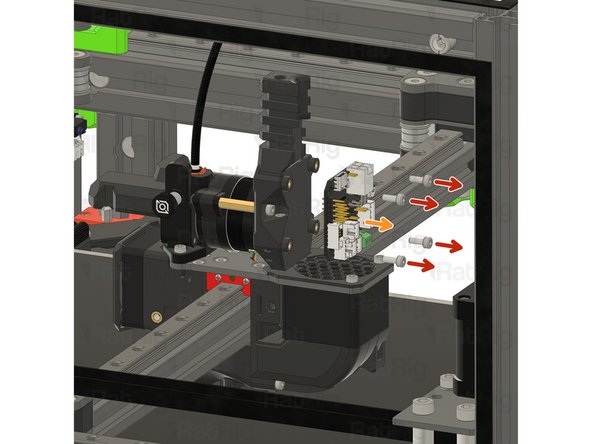
Remove the M3x35 Cap head screws from the back of the toolhead
-
Remove the back belt clamps
-
Remove both belts from the back of the toolhead
-
-
-
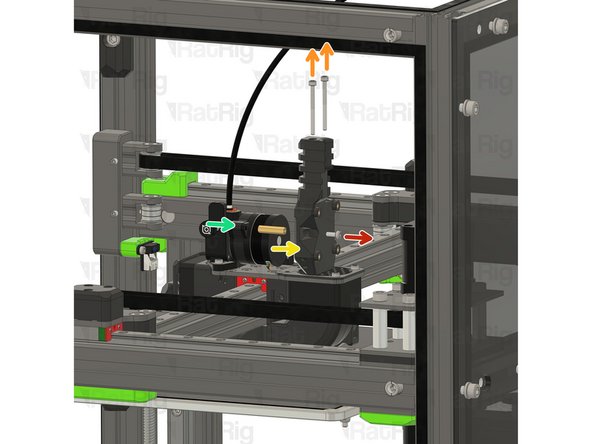
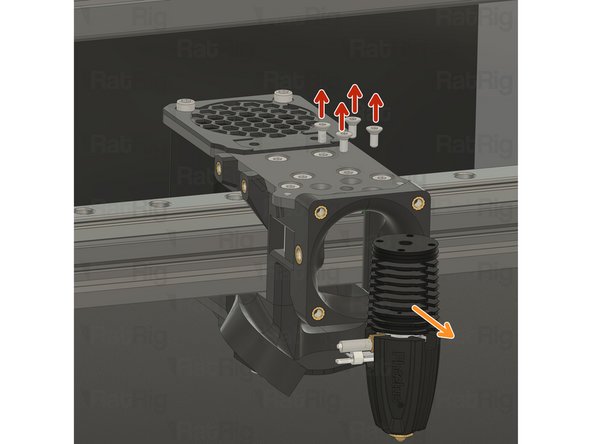
Remove the M3x8 Cap Head Screw.
-
Remove the two M3x35 Cap Head Screws
-
Remove the rr_vc4_toolhead_toolboard_vertical assembly
-
Remove the Hex standoff M3x20x4.5
-
-
-
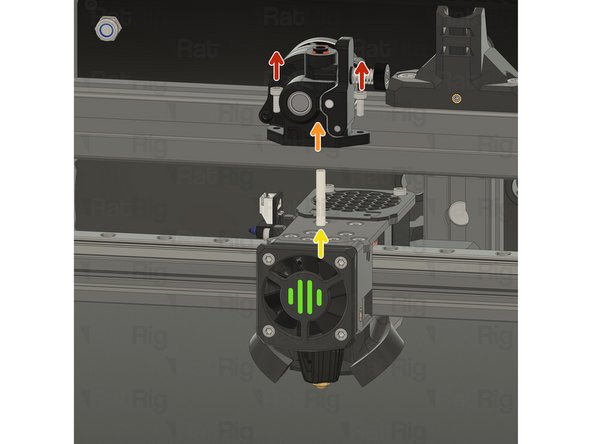
Remove the two M3x8 Cap Head Screws
-
Remove the Orbiter V2
-
Remove the PTFE tube
-
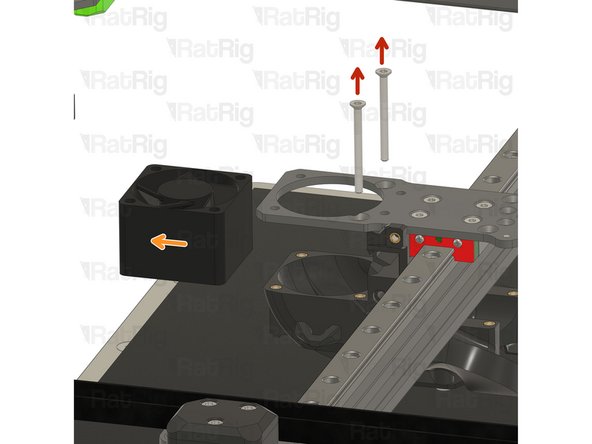
Remove the M3x16 Cap Head Screws and the toolhead shroud
-
Remove the 40x10mm axial fan
-
Remove the endstop and M3x 6 Cap Head Screws
-
Store the Orbiter, 40x10mm axial fan and the endstop aside, it will be needed later in the guide
-
-
-
Remove the four M2.5x6 Countersink Screw
-
Remove the Rapido hotend
-
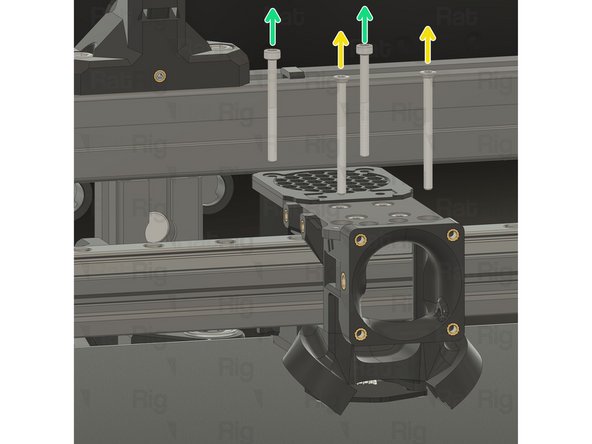
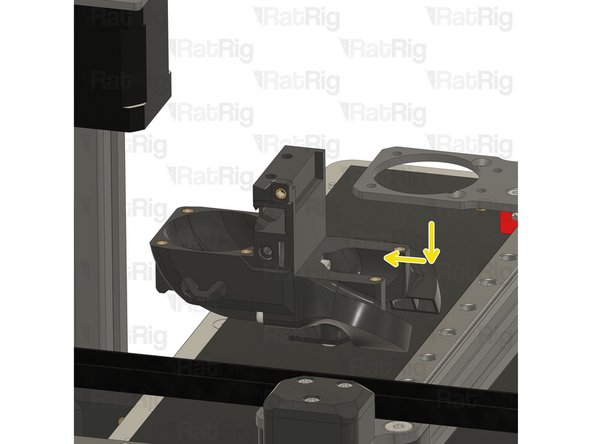
Remove the two M3x40 Countersink Screw
-
Remove the two M3x35 Cap Head Screw
-
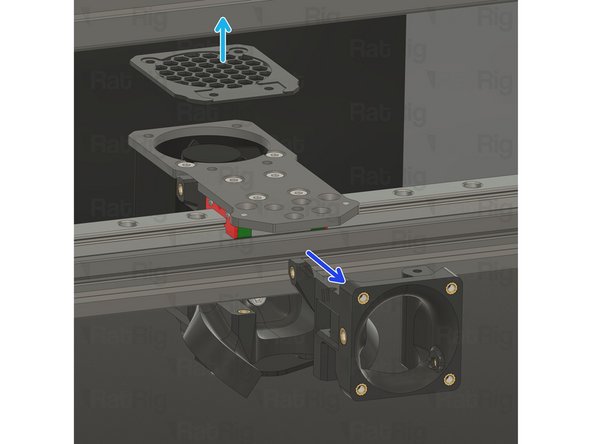
Remove the Rat Rig toolhead fan grille printed part
-
Remove the Rat Rig toolhead front printed part
-
-
-
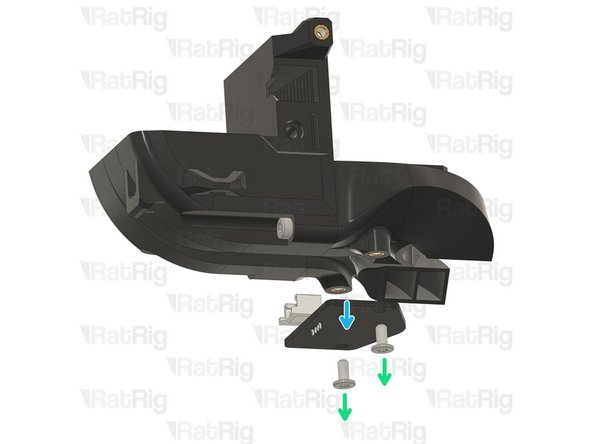
Remove the two M3x35 Countersink Screw
-
Remove the 4028 part cooling fan
-
Remove the back toolhead assembly as a whole.
-
Remove the two M3x6 Low Head Screw ss304 blk
-
Remove the Beacon Rev H Low Profile
-
-
-
Loosen all the screws on the X linear rail to allow for its removal, but do not fully remove them to avoid losing the t-nuts.
-
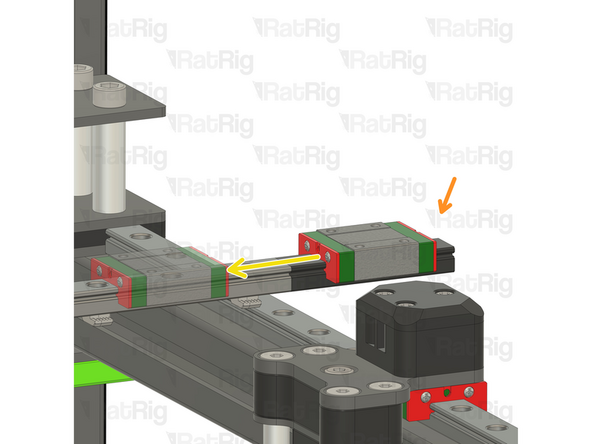
MGN12C carriage removed during the main assembly + mgn12c carriage mount
-
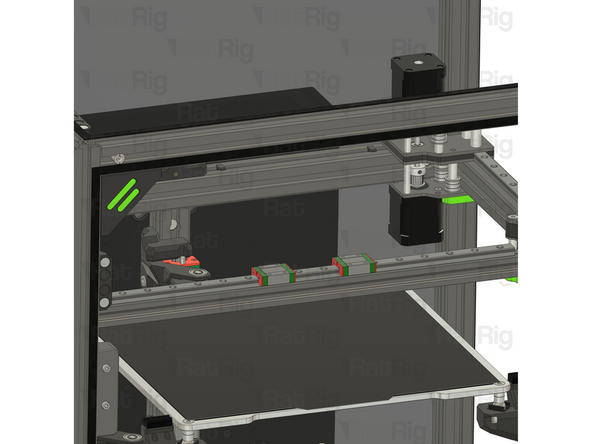
Slowly slide the mgn12c carriage into the linear rail
-
-
-
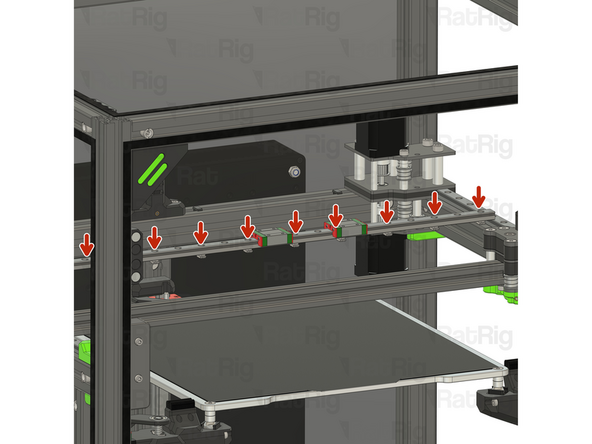
Install the linear rail back on the gantry extrusion.
-
Fasten the marked M3x8 screws, starting from onde side.
-
Do not overtighten the screws as it can cause the linear rail to bind.
-


Cancel: I did not complete this guide.
3 other people completed this guide.
