Steps
7

In Progress
This guide is currently being written. Reload periodically to see the latest changes.

Private
This guide will not appear in search results and can only be viewed by team members!
Quiz
0
-
-
vc4_enclosure_steel_base
-
vc4_enclosure_steel_top
-
vc4_enclosure_steel_left
-
vc4_enclosure_steel_bottom
-
vc4_enclosure_steel_right
-
3x vc4_Enclosure_corner_steel + 1x vc4_Enclosure_corner_hole_steel_V2
-
16x M3x6 Button Head Screw
-
4x M3x6 Countersink Screw
-
-
-
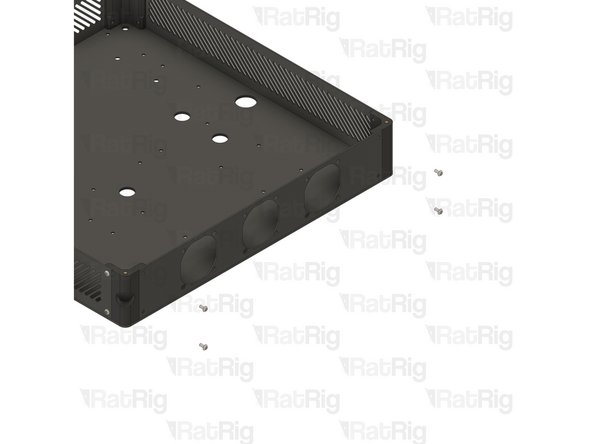
vc4_enclosure_steel_base
-
vc4_Enclosure_steel_corner
-
M3x6 Countersink Screw
-
Assemble the components as shown, and ensure the vc4_enclosure_steel_base is correctly oriented and the countersunk screw is inserted into the countersink groove.
-
Repeat the previous Steps and assemble the remaining corners.
-
-
-
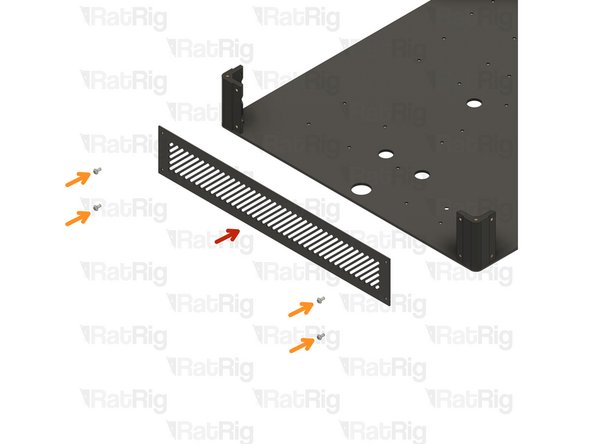
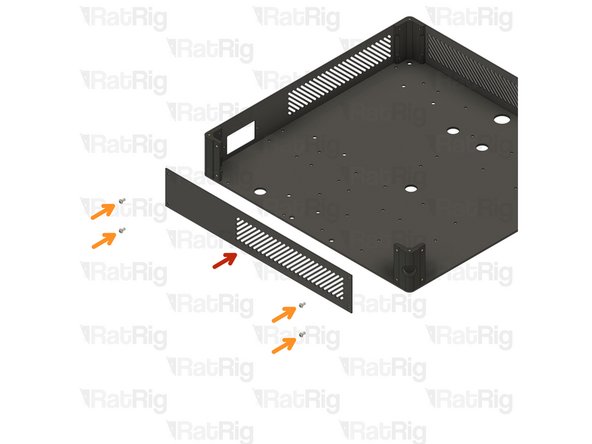
vc4_enclosure_steel_top
-
4x M3x6 Button Head Screw
-
Assemble the enclosure components as shown, making sure the panels are correctly oriented.
-
-
-
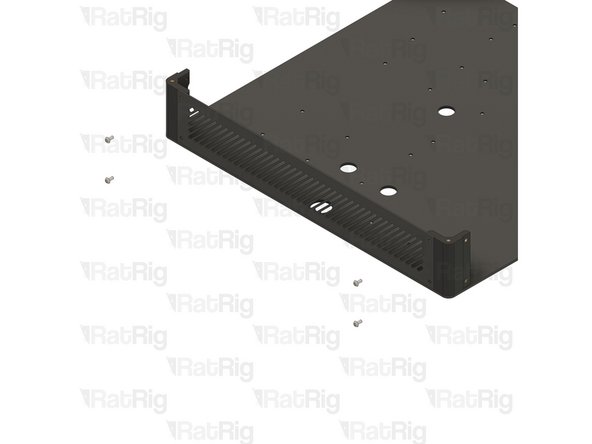
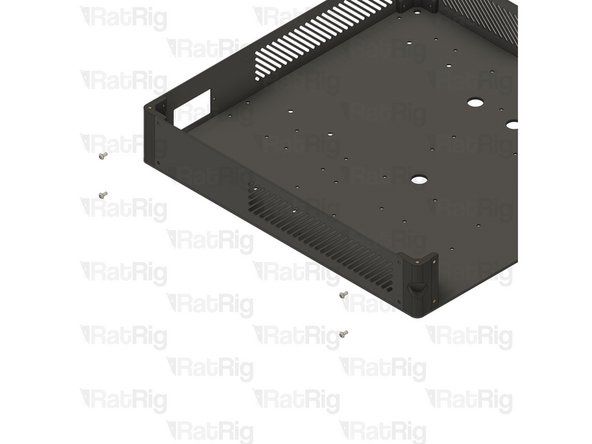
vc4_enclosure_steel_left
-
4x M3x6 Button Head Screw
-
Assemble the enclosure components as shown, making sure the panels are correctly oriented.
-
-
-
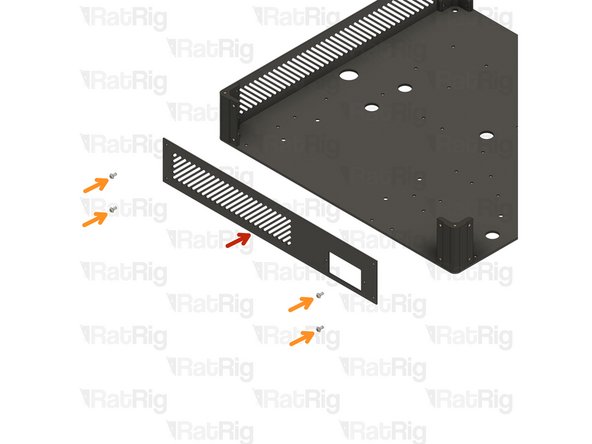
vc4_enclosure_steel_bottom
-
4x M3x6 Button Head Screw
-
Assemble the enclosure components as shown, making sure the panels are correctly oriented.
-
-
-
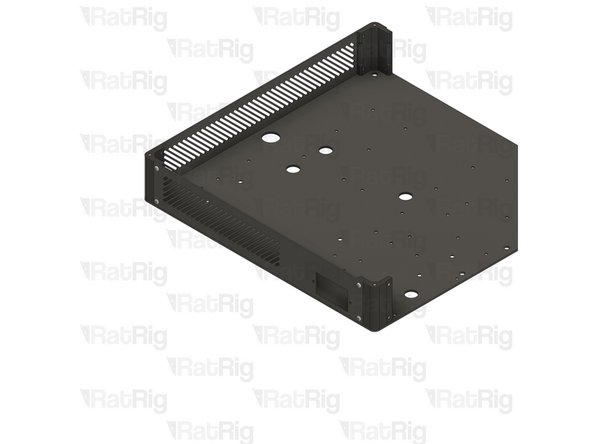
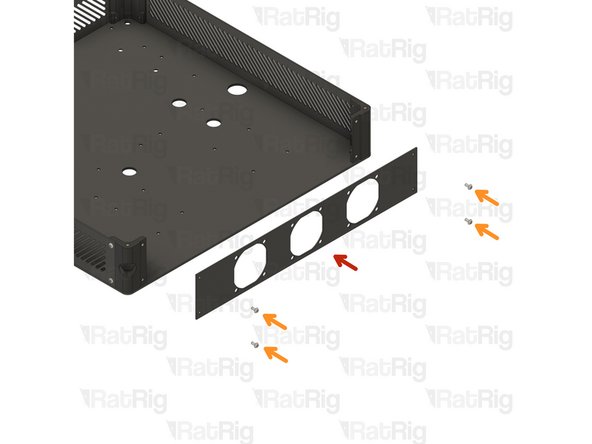
vc4_enclosure_steel_right
-
4x M3x6 Button Head Screw
-
Assemble the enclosure components as shown, making sure the panels are correctly oriented.
-
-
-
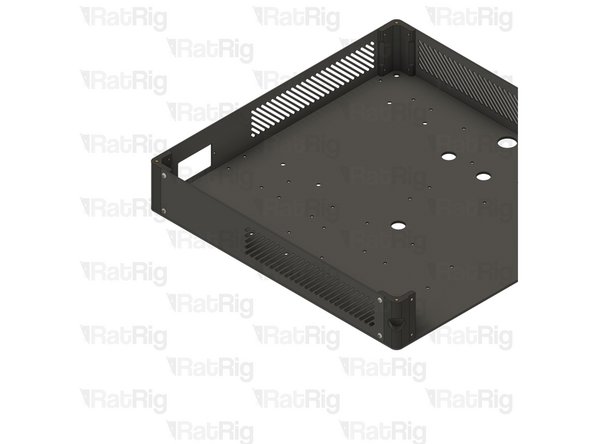
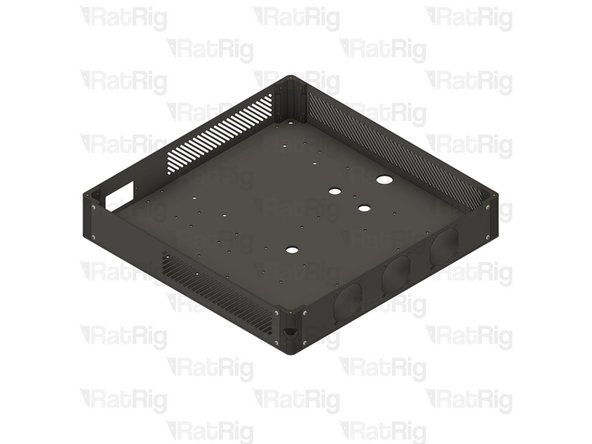
Double-check if all panels are correctly oriented and the assembly looks exactly like the picture.
-