Introduction
These steps are for the assembly of the X axis of the Dual Extruder V-Cast variant. Refer to the "Basic Machine Assembly" guide for the Single Extruder assembly.
Tools
Parts
No parts specified.
-
-
CAUTION: There's a lot of ball bearings inside a linear rail carriage. Be careful when you remove a carriage from a rail, or the balls may fall and roll away.
-
MGN15 Linear Rail
-
MGN15C Carriage
-
Remove one of the Linear Rail End Caps.
-
Carefully align the plastic rail segment of the MGN15C Carriage with your Linear rail and slide the carriage over.
-
Replace the Linear Rail End Cap.
-
-
-
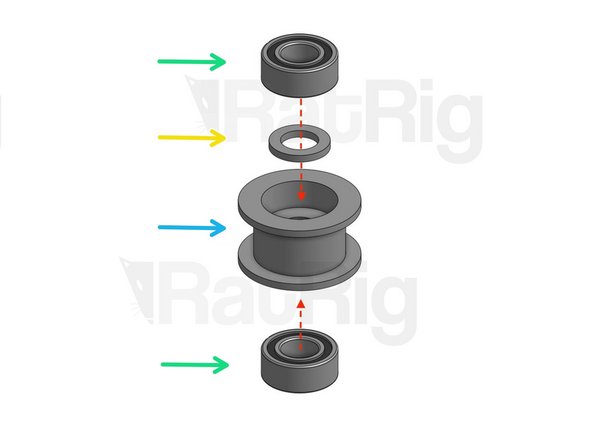
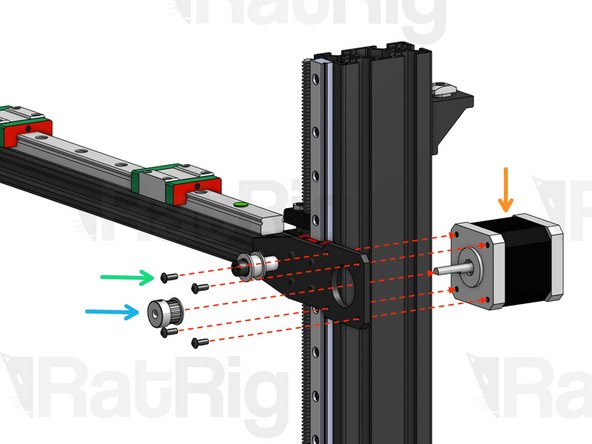
Mini Precision Shim 8x5x1mm
-
Mini Ball Bearing
-
6mm Metalic Idler Pulley
-
Cap Head Screw M5x20mm
-
Button Head Screw M5x8mm
-
2020 Drop-in T-Nut M5. Screw them into position, but don't tighten.
-
-
-
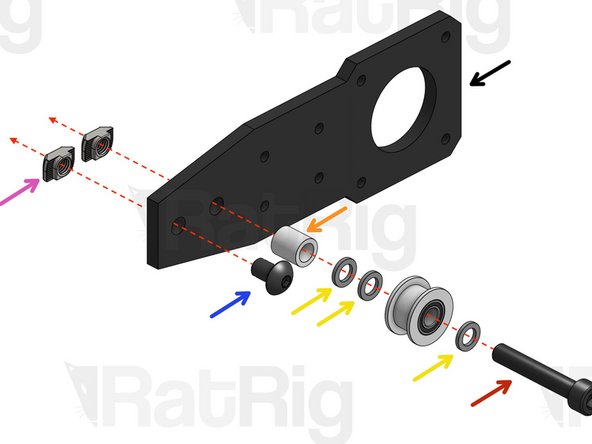
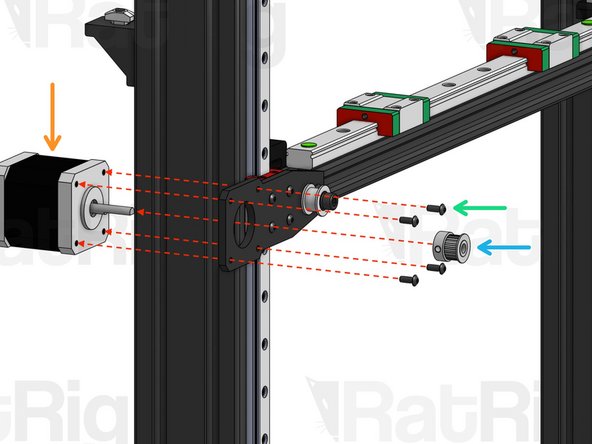
Mini Precision Shim 8x5x1mm
-
Mini Ball Bearing
-
6mm Metalic Idler Pulley
-
Cap Head Screw M5*30mm
-
Button Head Screw M5x8mm
-
Aluminium Spacer 9mm
-
2020 Drop-in T-Nut M5. Screw them into position, but don't tighten.
-
-
-
Mount the dual carriage MGN15 Linear rail onto the V-Slot 2020. Align it carefully and tighten all screws.
-
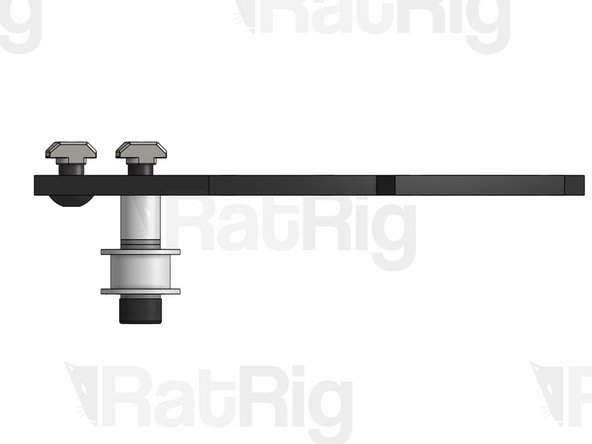
Mount both X Motor Plates on the 2020 profile. Do not tighten them too much, you will need some play in the next steps.
-
Note that the plate with the 9mm Spacer should be the one on the right side.
-
-
-
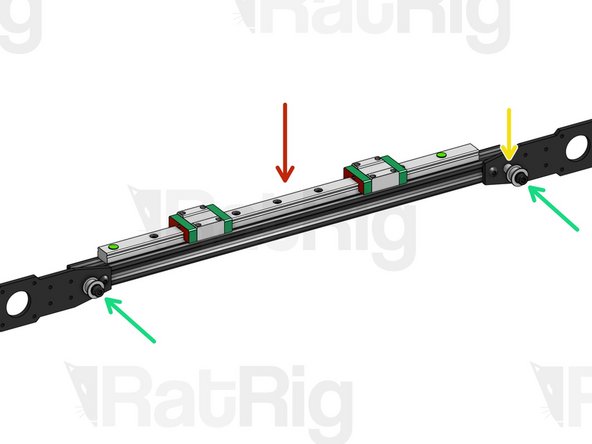
Button Head M3x8mm. Attach the IDEX axis to the linear rail carriages.
-
After attaching the IDEX Axis, move it upwards to its top position, making sure it's level, and firmly tighten these 4 screws, making sure the plates don't twist.
-
Slide the IDEX Axis up and down throughout its entire range of movement to ensure that the 2 Z Linear Rails are perfectly parallel. If the carriages bind at any point, you will need to adjust their positioning.
-
To do this, start by tightening the screws on one of the Linear Rails first, while leaving the other Rail loose enough that it can move. Slide the IDEX Axis all the way through, up and down, to establish the correct position, and then tighten the second linear rail. Start by tightening the screws at the tips and work your way inwards.
-
This step is very important to get the best performance. Take your time to get it right.
-
After everything is tight, connect the Anti-backlash nuts flush against the tips of the 2020 profile and tighten the screws. While positioning the Anti-Backlash nuts, make sure the Lead screws are straight and parallel between themselves as well as the 3060 Z pillars. They should not be tilting away or towards the pillars.
-
If later in the build you install the Z Tops (printed parts), you can look directly down through their top hole to make sure the Lead screws are perfectly straight.
-
-
-
Take note of the orientation of the pulleys on each motor (it's not the same). Left-side Motor Pulley should be perfectly aligned with right-side Idler Pulley, and vice-versa.
-
Nema 17 Motor
-
Timing Pulley GT2 20T (for 6mm belt)
-
Button Head M3x8mm
-
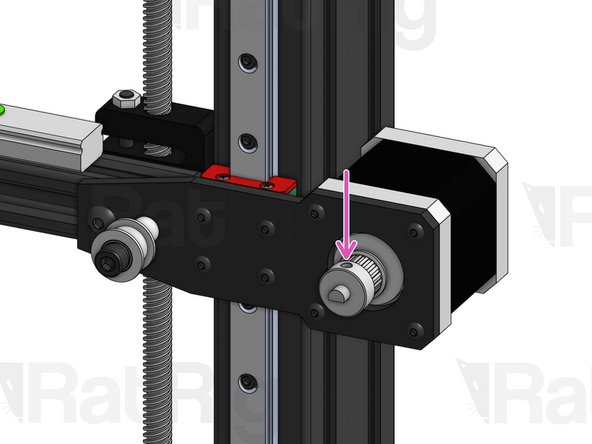
Tighten set screw to lock pulley in place. One set screw should center on the flat section of the D-shaped motor shaft.
-
-
-
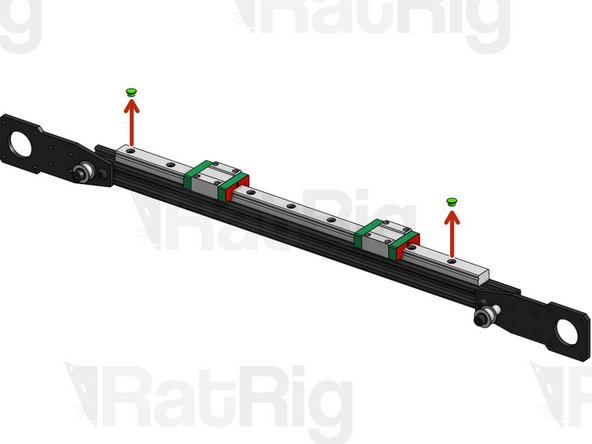
After mounting the IDEX axis on the main structure, remove the Linear Rail End Plugs.
-
-
-
This concludes the IDEX assembly. Please return to Step 27 on the Basic Machine guide.
-