-
-
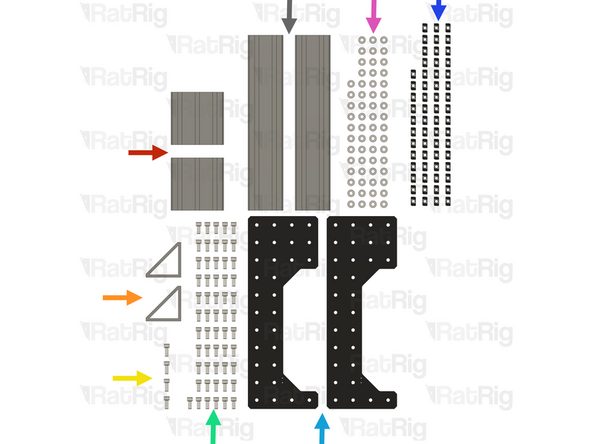
2x T-Slot extrusion 40120 - 120mm
-
2x Extruded 90º Corner for 40 series - 8040 Tall - Black
-
4x M8x20 Cap Head Screws
-
56x M8x18 Cap Head Screws
-
2x Rat Rig Mill - Z Side Plate
-
60x M8 4040 Drop in T-nuts
-
60x M8 Washer
-
2x T-Slot extrusion 4080 - 400mm
-
-
-
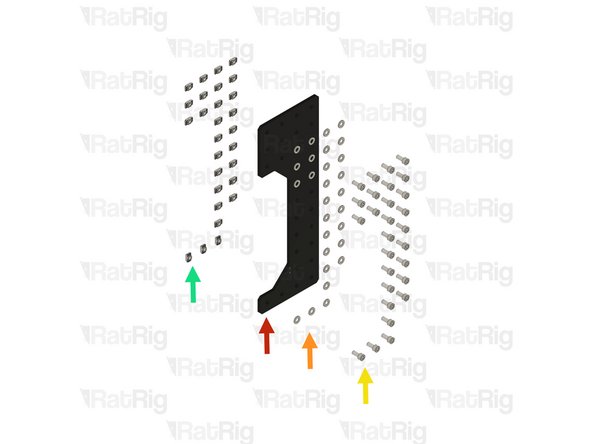
Repeat the following steps to assemble two Z-side plates, Make sure the second assembly is a Mirror of the first.
-
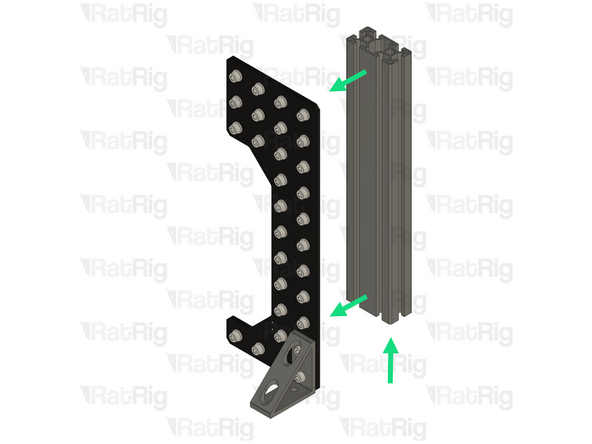
Rat Rig Mill - Z Side Plate
-
28x M8 Washer
-
28x M8x18 Cap Head Screws
-
28x M8 4040 Drop in T-nuts
-
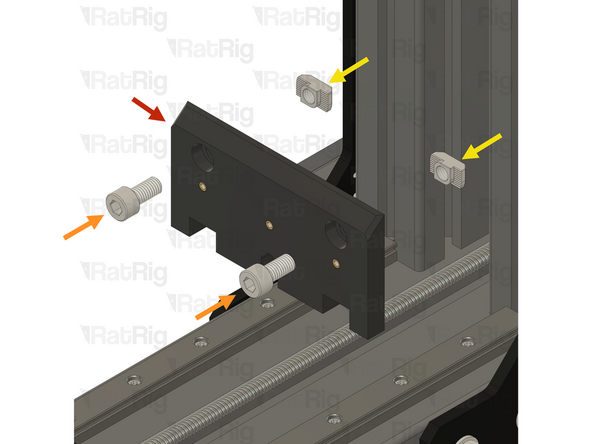
Assemble the components as shown.
-
-
-
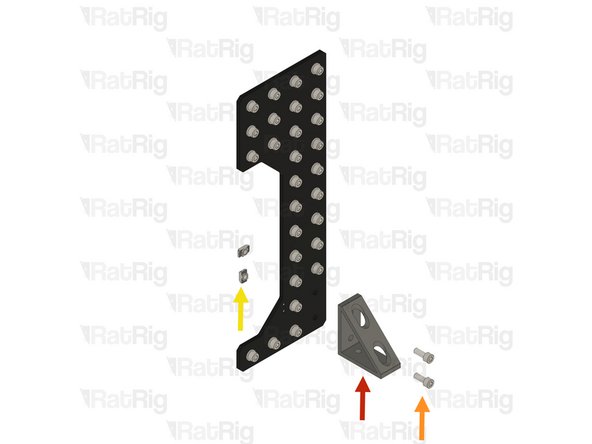
Extruded 90º Corner for 40 series - 8040 Tall - Black
-
2x M8x20 Cap Head Screws
-
2x M8 4040 Drop in T-nuts
-
Assemble the components as shown.
-
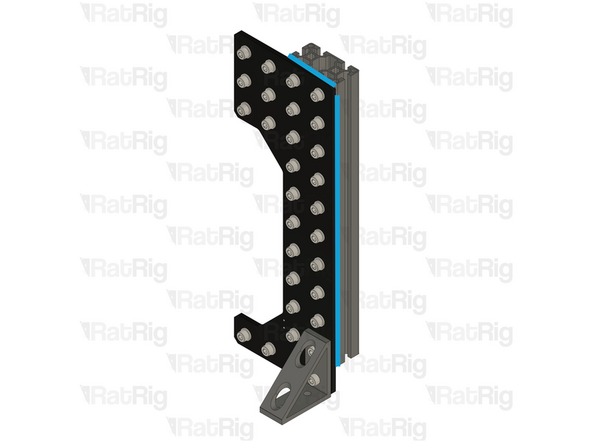
1x T-Slot extrusion 4080 - 400mm
-
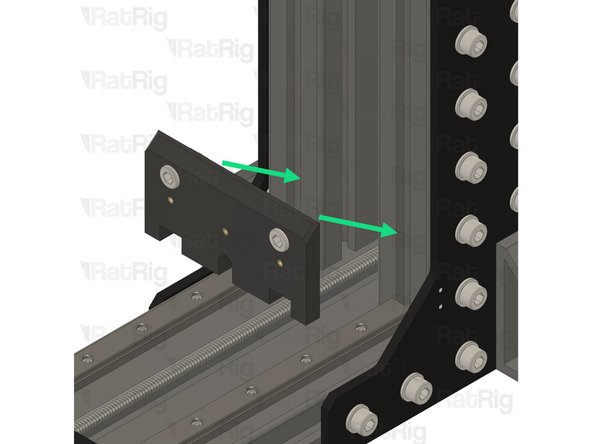
Fasten the Extrusion to the Z side plate, ensuring it sit flush with the Z side plate edges.
-
Assemble a second mirrored Z side plate, as shown.
-
-
-
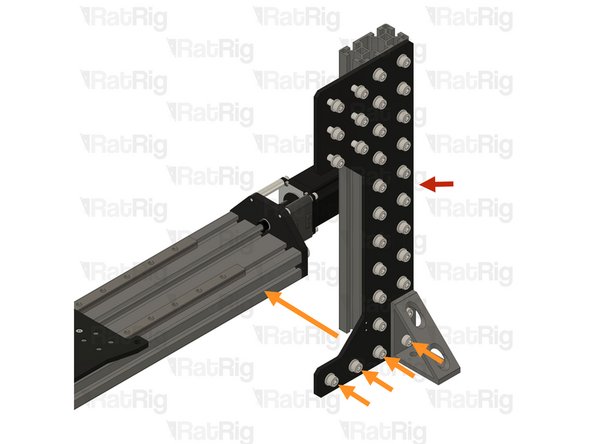
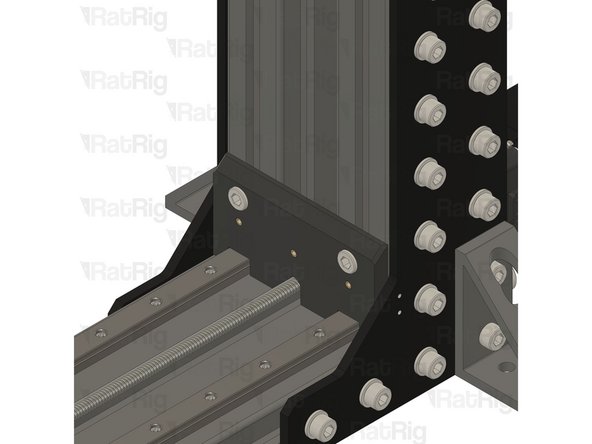
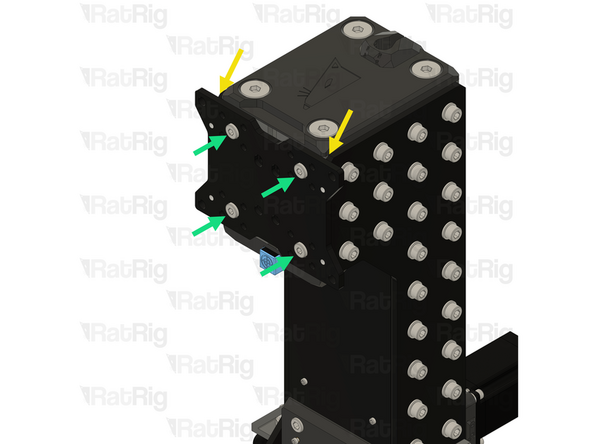
Z right side plate assembly
-
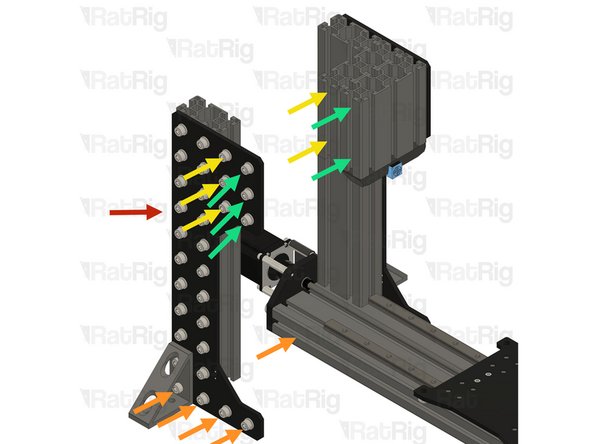
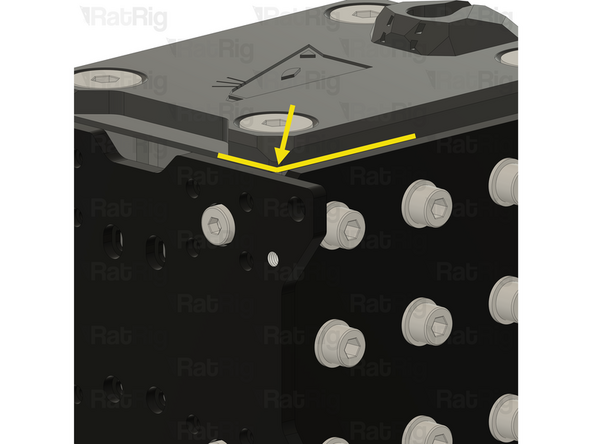
Fasten the assembly using the lower M8 screws.
-
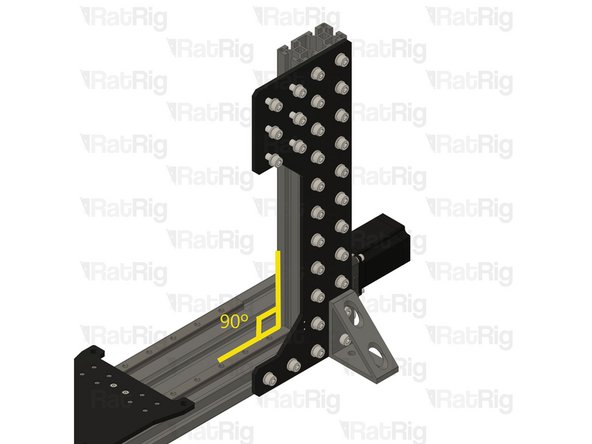
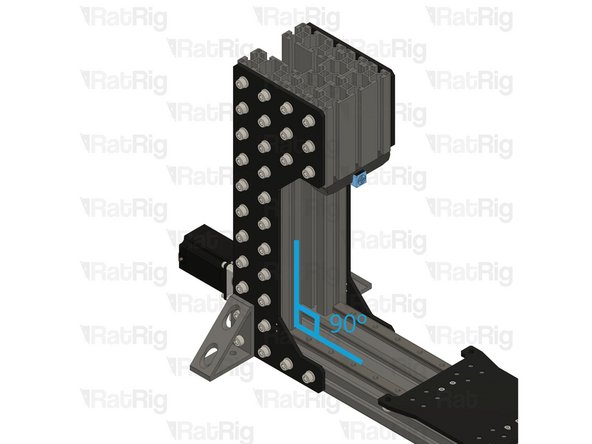
Ensure the extrusion is square with the Y-axis extrusion. Take your time to align this as best as possible.
-
-
-
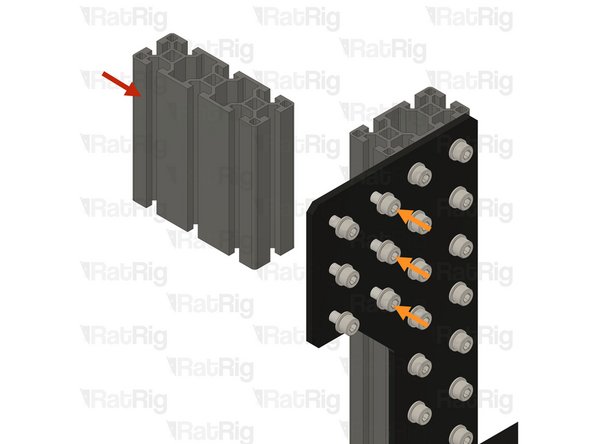
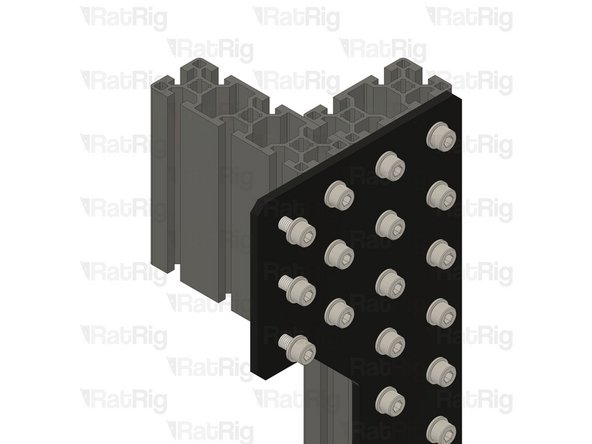
T-Slot extrusion 40120 - 120mm
-
Using the marked screws, secure the extrusion to the right side Z plate.
-
-
-
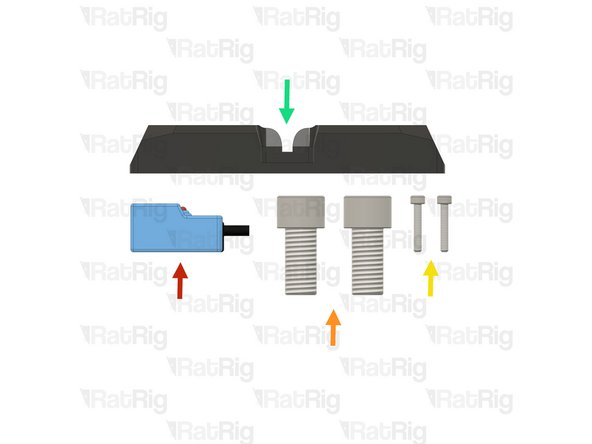
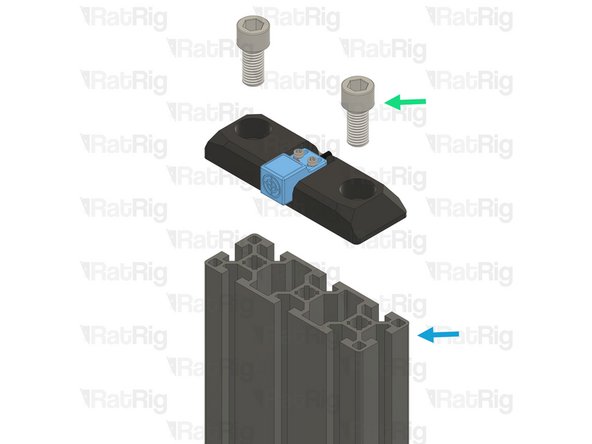
SN04-N2 Proximity Sensor
-
2x M12x25 Cap Head Screws
-
2x M3x18 Cap Head Screws
-
mill_z_endstop_mount assembly
-
-
-
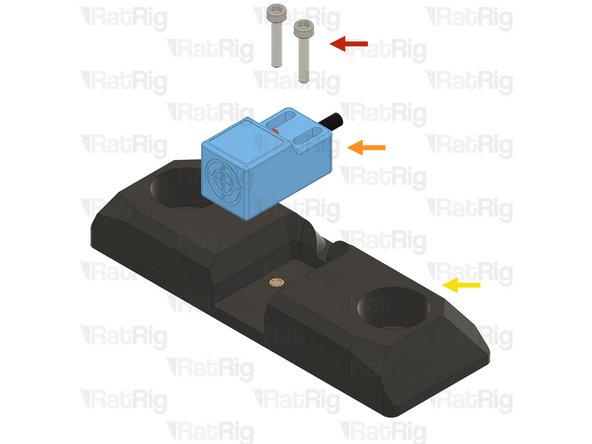
2x M3x18 Cap Head Screws
-
SN04-N2 Proximity Sensor
-
mill_z_endstop_mount assembly
-
Attach the endstop to the mill_z_endstop_mount assembly
-
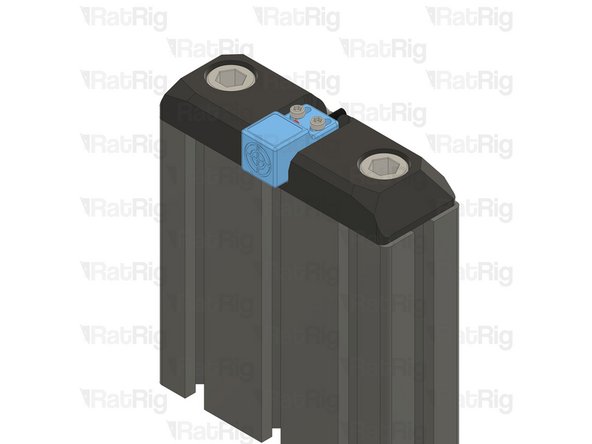
2x M12x25 Cap Head Screws
-
T-Slot extrusion 40120 - 120mm
-
Assemble the Z endstop mount to the T-Slot extrusion 40120 - 120mm
-
Take care not to over tighten the screws as you can damage the printed parts.
-
-
-
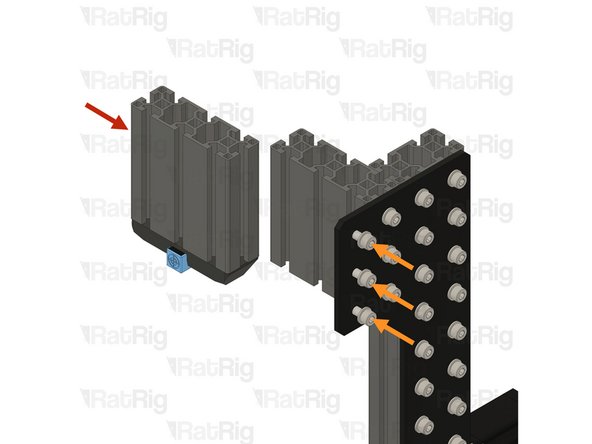
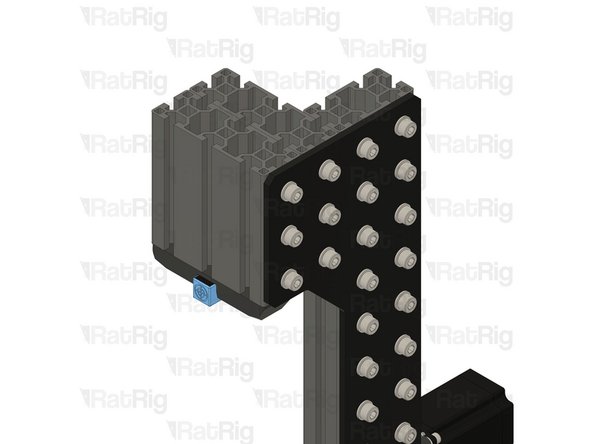
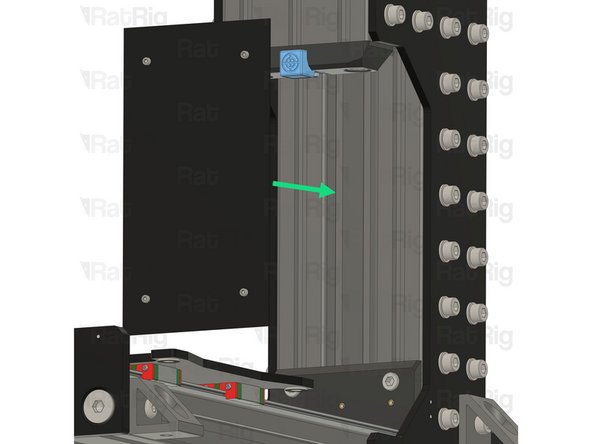
T-Slot extrusion 40120 - 120mm with Z endstop (from the last step)
-
Using the marked screws, secure the extrusion to the right side Z plate.
-
-
-
Z left side plate assembly
-
Fasten the assembly using the lower M8 screws.
-
Fasten the assembly to the small Z tower extrusion using the marked screws.
-
Fasten the assembly to the small Z tower extrusion using the marked screws.
-
Ensure the extrusion is square with the Y-axis extrusion. Take your time to align this as best as possible.
-
-
-
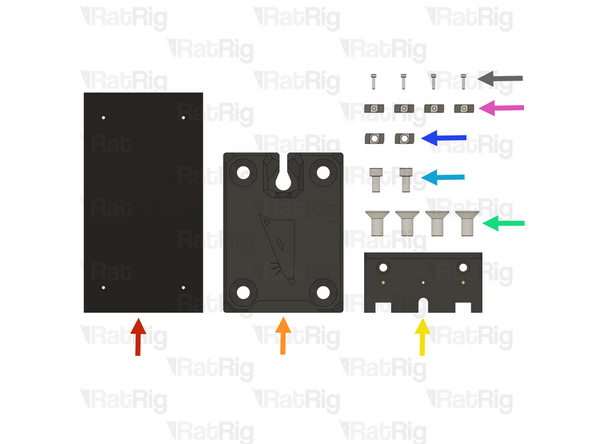
Rat Rig Mill - Shield panel 1.2mm v1.2
-
mill_z_tower_top printed part
-
mill_y_axis_rear_cover printed part
-
4x M12x15 Countersink Screws
-
2x M8x16 Cap Head Screws
-
2x M8 4040 Drop in T-nuts
-
4x M3 4040 Drop in T-nuts
-
4x M3x12 Cap Head Screws
-
-
-
Z tower assembly
-
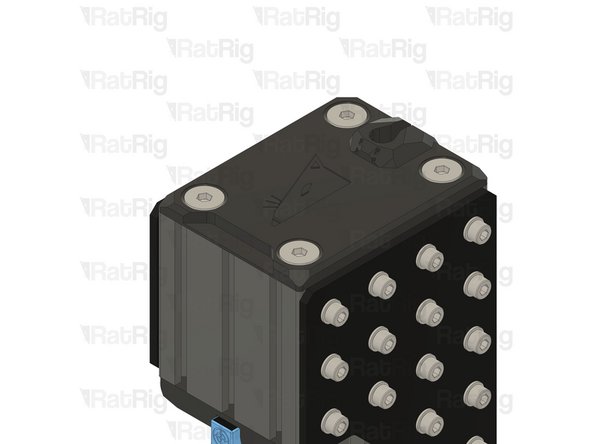
mill_z_tower_top printed part
-
4x M12x15 Countersink Screws
-
Assemble the tower top as shown.
-
Take care not to over tighten the screws as you can damage the printed parts.
-
-
-
mill_y_axis_rear_cover printed part
-
2x M8x16 Cap Head Screws
-
2x M8 4040 Drop in T-nuts
-
Assemble the Y axis rear cover as shown.
-
Install it on the Z tower, making sure it is sitting flush with the Y axis extrusion and Z tower extrusion.
-
Take care not to over tighten the screws as you can damage the printed parts.
-
-
-
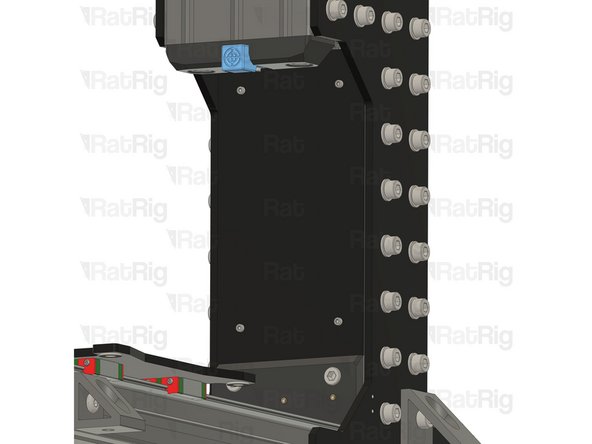
Rat Rig Mill - Shield panel 1.2mm v1.2
-
The panel is reversible, there is no correct side to install it.
-
4x M3x12 Cap Head Screws
-
4x M3 4040 Drop in T-nuts
-
Install the shiel panel on to the Z tower.
-
-
-
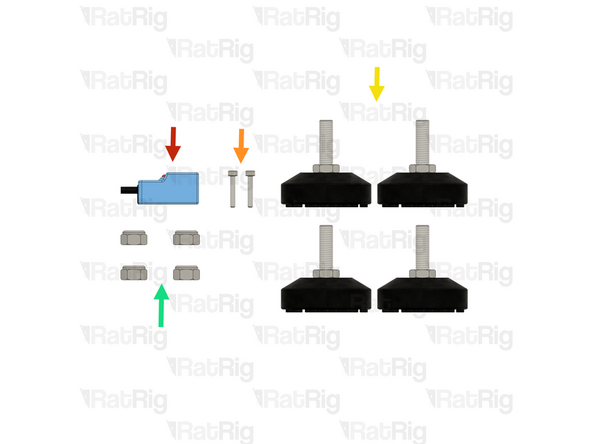
SN04-N2 Proximity Sensor
-
2x M3x18 Cap Head Screws
-
4x Leveling Feet for 3030 - M8 x 30mm
-
4x Hex Locking Nut - M8
-
-
-
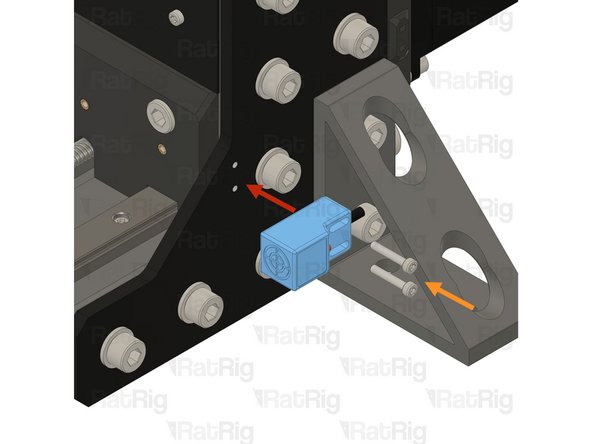
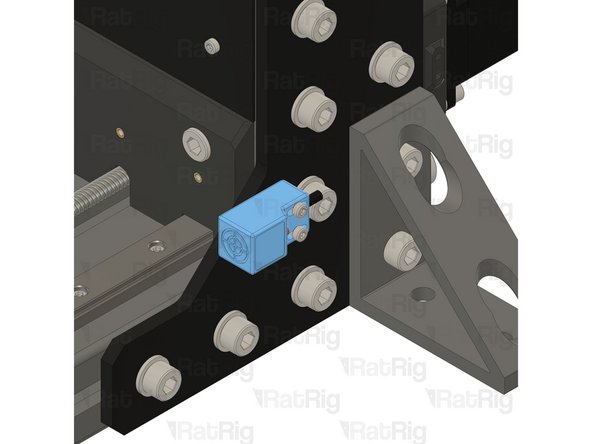
SN04-N2 Proximity Sensor
-
2x M3x18 Cap Head Screws
-
Using the M3x18 Cap Head screws, fasten the endstop to the right Z side plate.
-
-
-
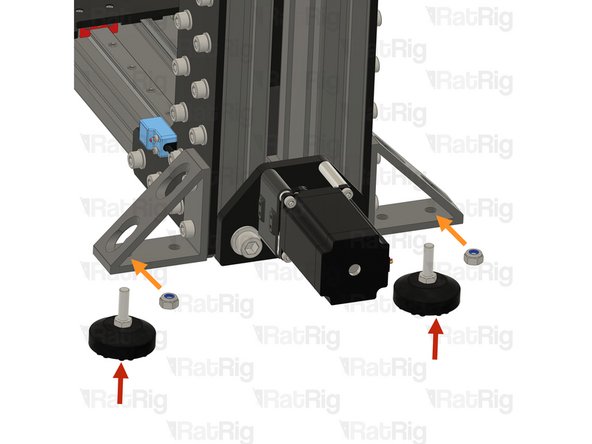
Leveling Feet for 3030 - M8 x 30mm
-
2x Hex Locking Nut - M8
-
Feed the feet screw trought the Extruded 90º Corner for 40 series - 8040 Tall - Black from the bottom and thread the Hex Locking Nut - M8, it's a tight space, needle nose pliers might be useful.
-
-
-
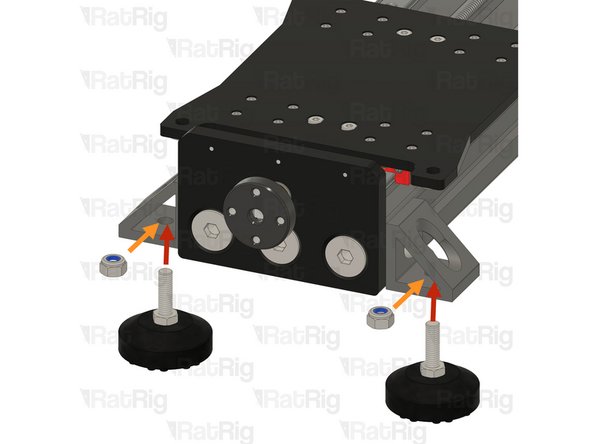
Leveling Feet for 3030 - M8 x 30mm
-
2x Hex Locking Nut - M8
-
Feed the feet screw trought the Extruded 90º Corner for 40 series - 8040 Tall - Black from the bottom and thread the Hex Locking Nut - M8, it's a tight space, needle nose pliers might be useful.
-
-
-
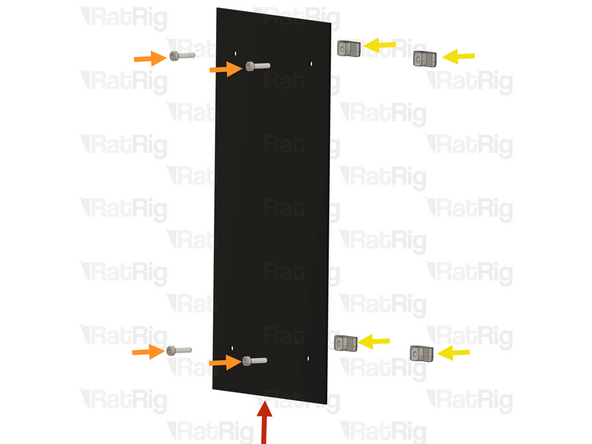
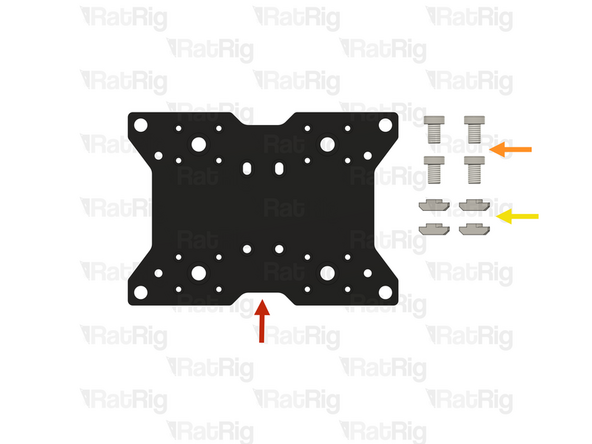
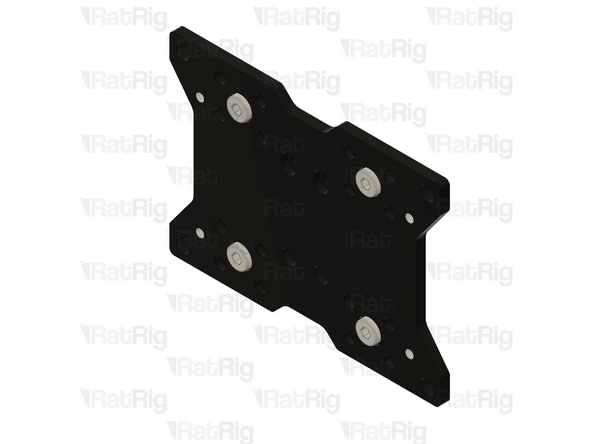
Rat Rig Mill - Z Plate
-
4x M8x12 Low Head Screws
-
Ensure that the screws are inserted from the same side as the M8 screw head slots on the plate.
-
2x M8 4040 Drop in T-nuts
-
-
-
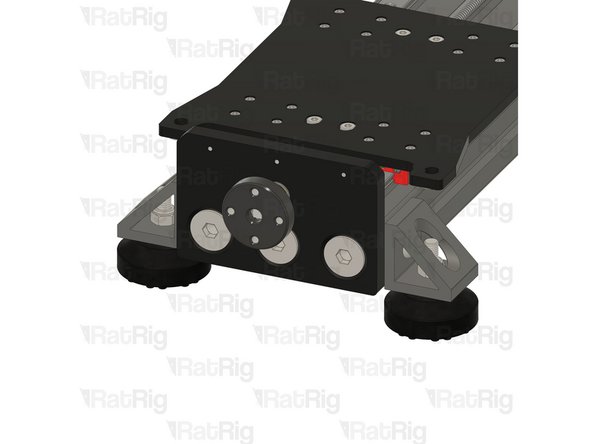
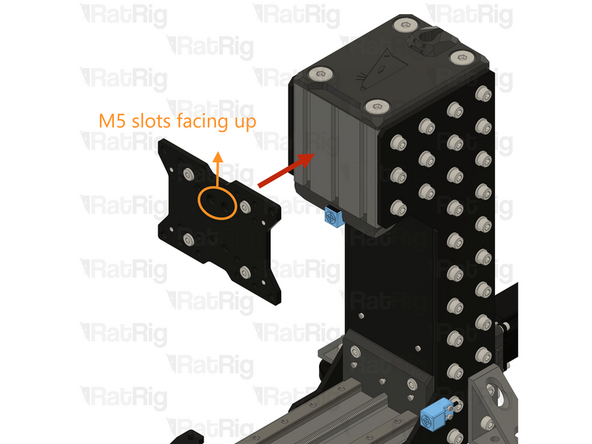
Place the Z plate on the Z tower as shown.
-
Ensure the M5 slots are facing upwards.
-
Ensure the Z plate is flush with both Z side plates before tightening the screws.
-
Tighten the M8 Screws to secure the assembly.
-