-
-
Unscrew the 4x Rubber Feet and remove them from your assembly.
-
Remove the T-Nuts from the Feet. You will not need these T-Nuts for this build.
-
-
-
3030 Drop-in T-Nut M5. Screw them into position, but don't tighten.
-
Acrylic Plate 540x492x3mm (NOT SUPPLIED). Source this locally. You can find a schematic of the cut-outs and drilling positions for your specific V-Cast variant here.
-
Bottom Panels (Printed Parts).
-
Cap Head Screw M5x12mm
-
Cap Head Screw M3x12mm
-
Cable Tunnel (Printed Part)
-
Hex Locking Nut M3
-
-
-
Rubber Foot. Screw them directly into the hole on the plastic part and it will create its own thread.
-
Plastic Foot (Printed Part)
-
Cap Head Screw M5x12mm
-
3030 Drop-in T-Nut M5. Screw them into position, but don't tighten.
-
-
-
Carefully turn your V-Cast upside down. You may want to support it on two flat surfaces (such as 2 desks), letting the Z axis hang between them.
-
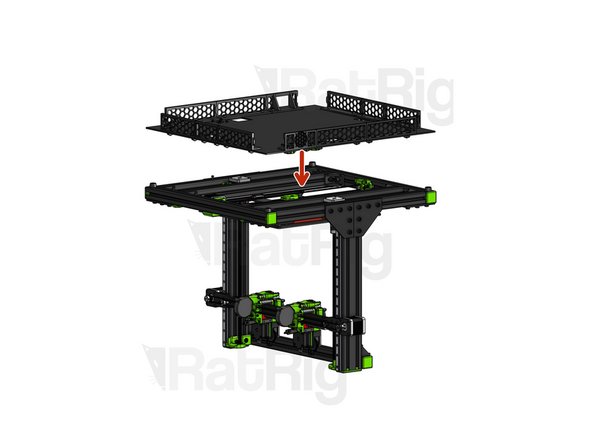
Carefully mount the Acrylic Plate on the T-Slot, making sure that all Drop-in T-Nuts are fitted inside the slot. Then, fasten all Cap Head M5x15mm screws.
-
Attach the plastic feet and fasten the Cap Head M5*12mm screws.
-
Mount your electronics and turn the printer over. You're done!
-
Move on to the Accessories Guide
-