-
-
Rat Rig Universal CNC Electronics Enclosure - rear
-
8x M5x12 Cap Head Screw
-
8x M5 Washer
-
8x 3030 Drop-in T-Nut - M5
-
3x rubber grommets
-
-
-
rubber grommets
-
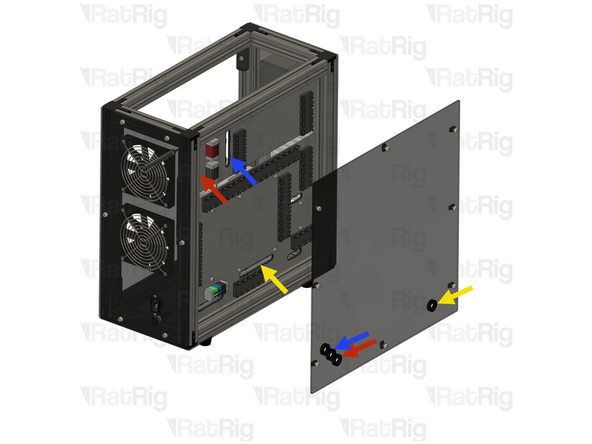
Insert a M5x12 Cap Head Screw and a M5 Washer into all the holes on the panel as shown
-
Loosely tighten a 3030 Drop-in T-Nut - M5 into each screw.
-
-
-
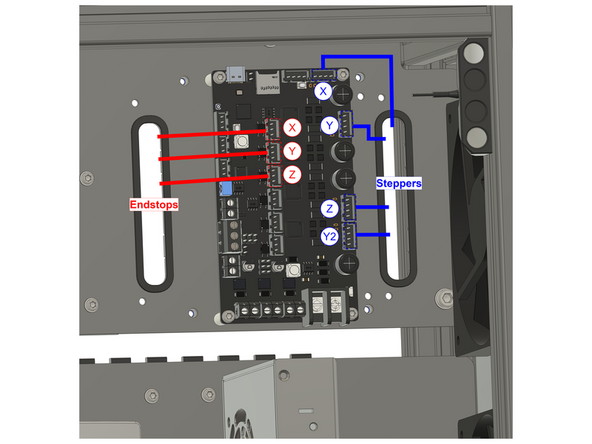
Feed all the stepper motor cables through the designated hole on the rear panel. Then insert them into the components upper panel slot, as shown.
-
Connect them into the designated slots.
-
Feed all the endstop cables through the designated hole on the rear panel. Then insert them into the components upper panel slot, as shown.
-
Connect them into the designated slots.
-
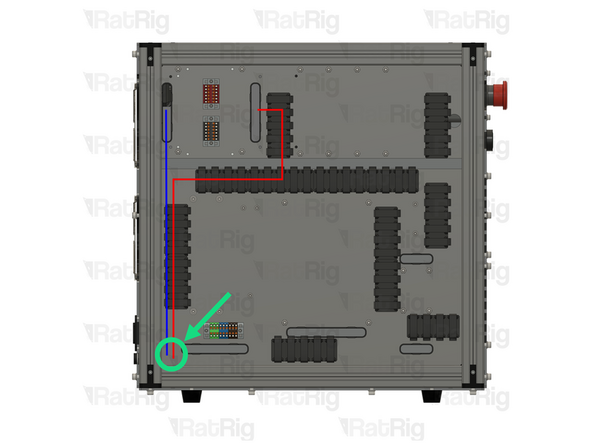
Feed the spindle cable through the designated hole on the rear panel. Then insert them into the components lower panel slot, as shown.
-
The cables should be inserted into the rear panel here.
-
Y2 Should only be connected if you are wiring a StrongHold Machine, it's not used in the Mill.
-
-
-
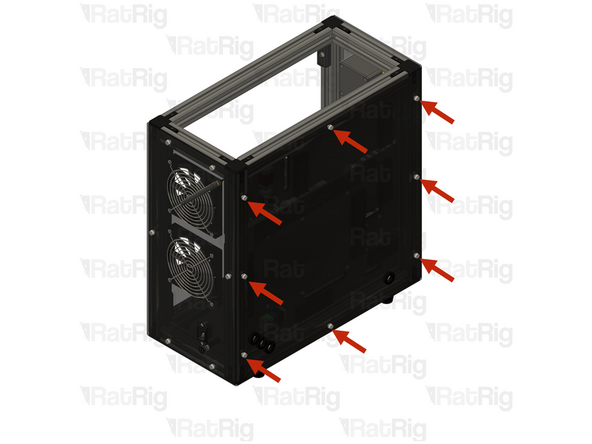
Place all T-nuts inside the T-slot extrusions an tighten the screws, securing the rear panel to the assembly.
-
-
-
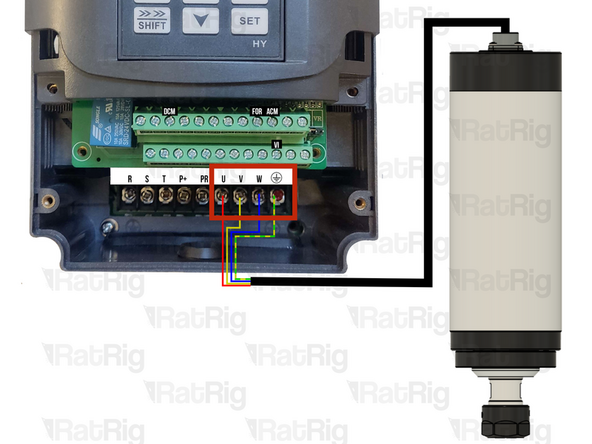
Connect the spindle cable to the VFD as shown, the wires are labed.
-
Crimp a Fork connector onto each wire before connecting it to the VFD
-
-
-
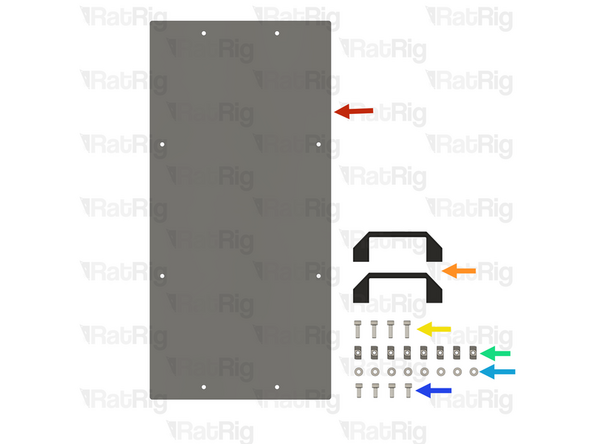
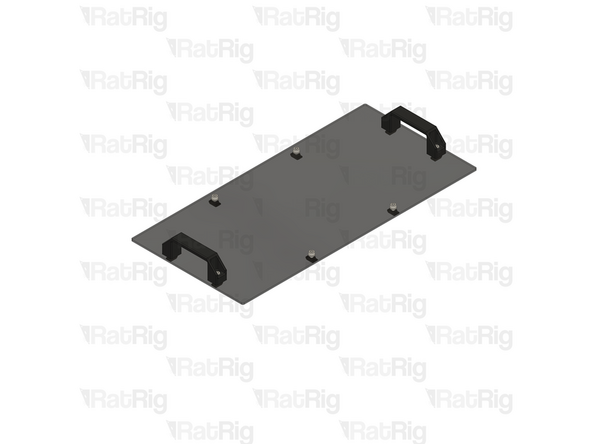
Rat Rig Universal CNC Electronics Enclosure - Single Panel - Top
-
2x V-Slot Door Handle
-
4x M5x16 Cap Head Screw
-
8x 3030 Drop-in T-Nut - M5
-
8x M5 Washer
-
4x M5x12 Cap Head Screw
-
-
-
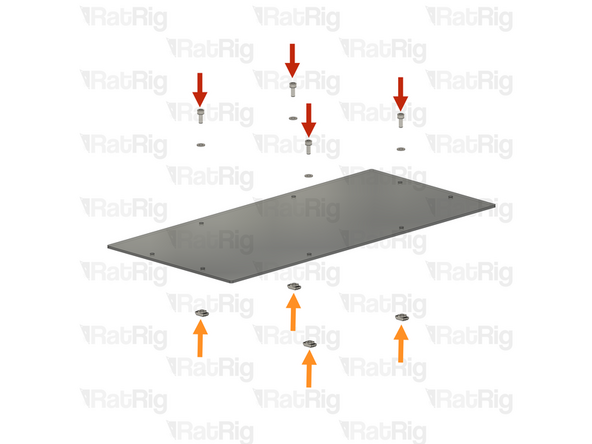
Insert a M5x12 Cap Head Screw and a M5 Washer into all the holes on the panel as shown
-
Loosely tighten a 3030 Drop-in T-Nut - M5 into each screw.
-
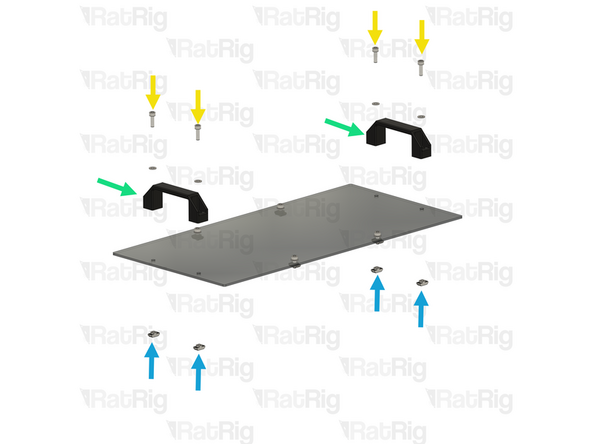
Insert a M5x16 Cap Head Screw and a M5 Washer into all the V-Handle holes and thought the holes in the panel, as shown.
-
V-Slot Handle
-
Loosely tighten a 3030 Drop-in T-Nut - M5 into each screw.
-
-
-
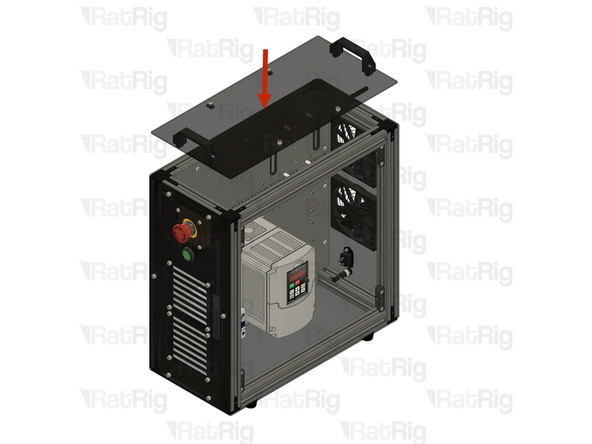
Place all T-nuts inside the T-slot extrusions an tighten the screws, securing the top panel to the assembly.
-
-
-
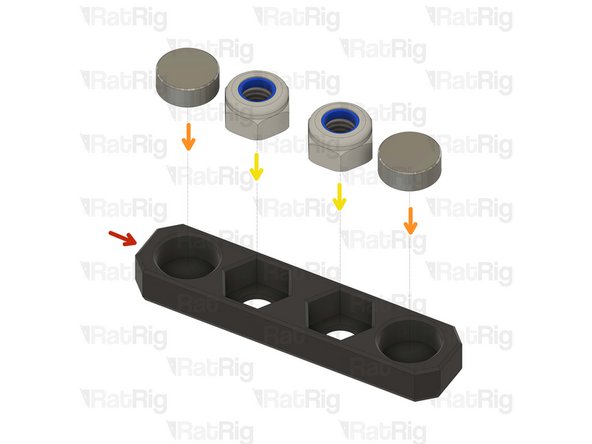
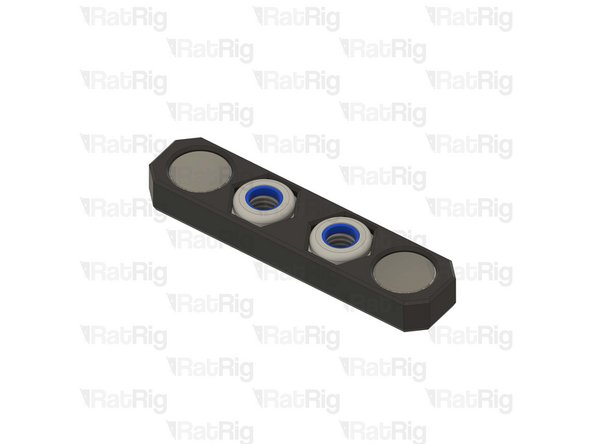
vc4_magnet_panel
-
Magnet - Neodymium disc 10x4mm
-
M6 Nylon Locking Hex Nut
-
Prepare four assemblies
-
Tip: Use a drop of super glue to prevent the magnets from coming off over time.
-
Please verify the magnet polarity in relation to the magnets on the door panel. If the polarity is inverted, the magnets will repel each other instead of attracting.
-
-
-
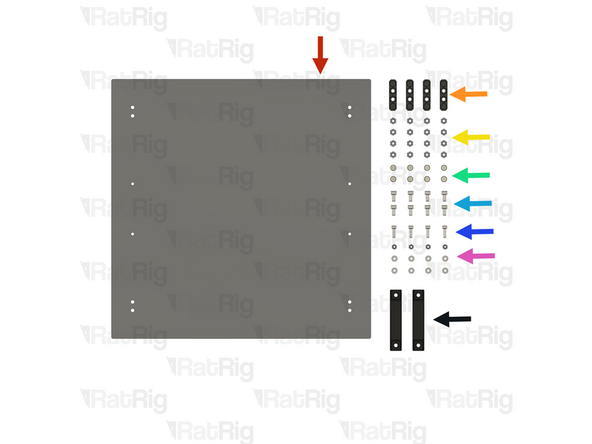
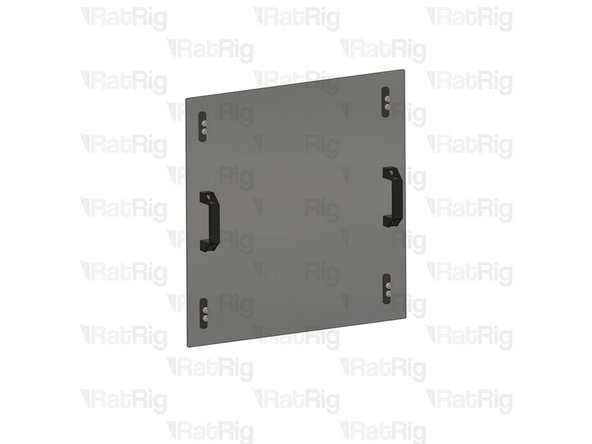
Rat Rig Universal CNC Electronics Enclosure - Door
-
4x Door magnet panel printed part
-
12x M6 Nylon Locking Hex Nut
-
12x M6 Washer
-
4x M5x16 Cap Head Screw
-
4x M5 Washer + 8x M5 Hex locking nut
-
V-Slot Door Handle
-
-
-
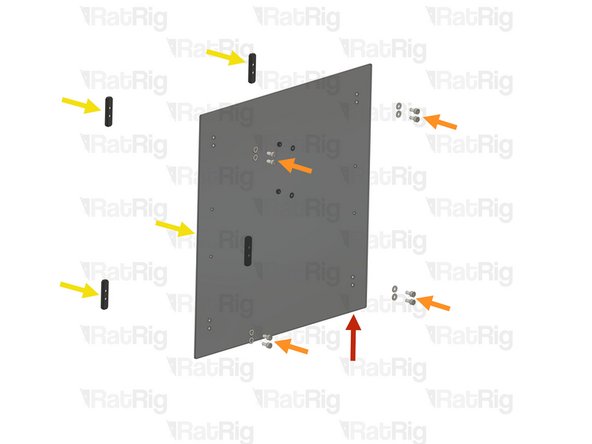
Rat Rig Universal CNC Electronics Enclosure - Door
-
(8x) M6x12 Cap Head Screw + M6 Washer
-
Door magnet panel assembly
-
Feed the M6x12 Cap Head screws through the M6 washers and into the door panel, then tighten them onto the hex locking nuts on the door magnet panel assembly.
-
Take care not to overtighten the M6x12 screw, as you may damage the printed parts.
-
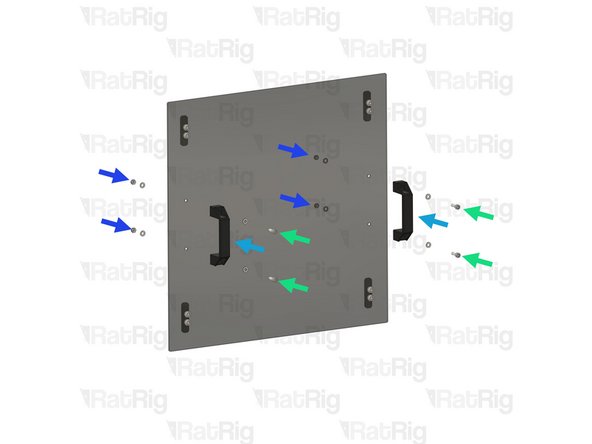
(4x) M5x16 Cap Head Screw + M5 Washer
-
V-Slot Door Handle
-
(4x) M5 Hex locking nut + M5 washer
-
-
-
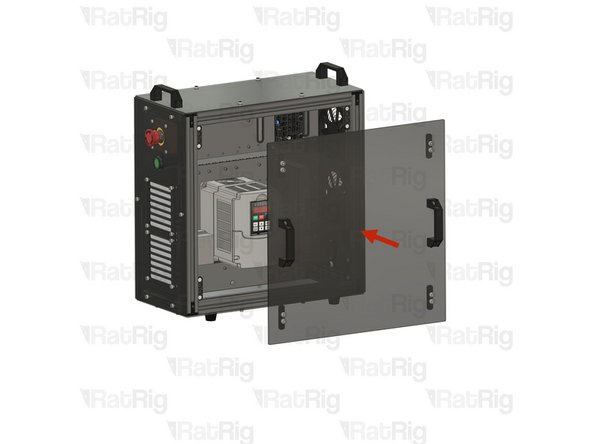
Place the door assembly on the frame.
-