Steps
20
- 06. X-Axis 20 steps

In Progress
This guide is currently being written. Reload periodically to see the latest changes.

Private
This guide will not appear in search results and can only be viewed by team members!
Quiz
0
-
-
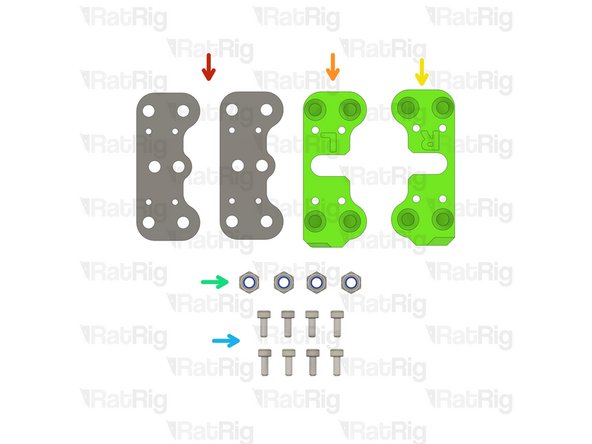
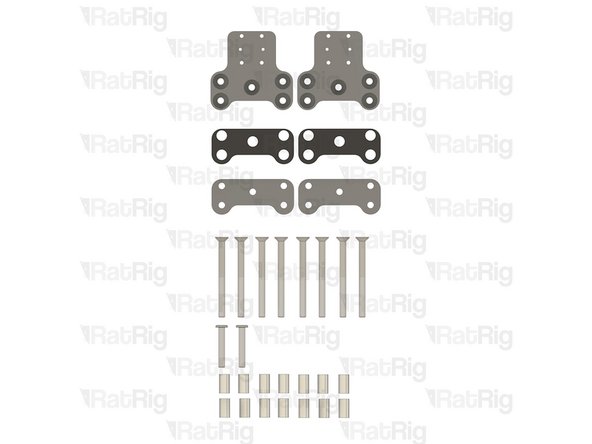
2x vc4_xy_joiner_upper plate
-
2x vc4_x_endstop printed part
-
2x vc4_xy_joiner_middle plate
-
8x M5x60 Countersink Screw
-
2x M5x30 Low Profile Screw
-
14x Aluminium Spacer 5x8x14mm
-
-
-
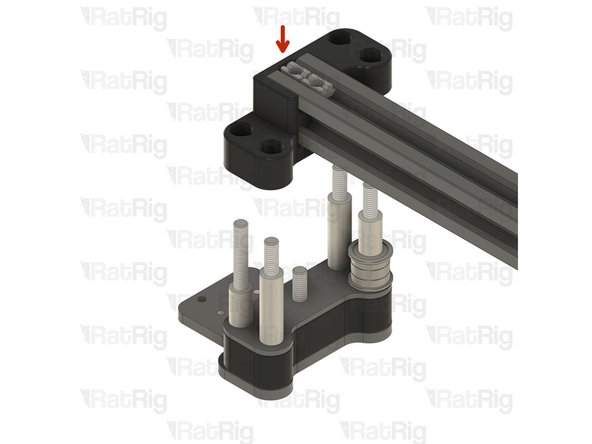
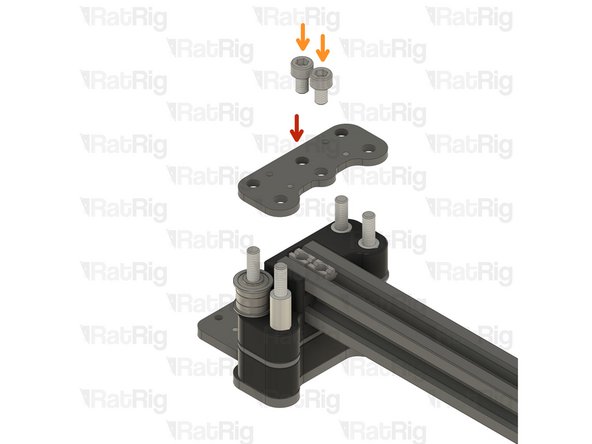
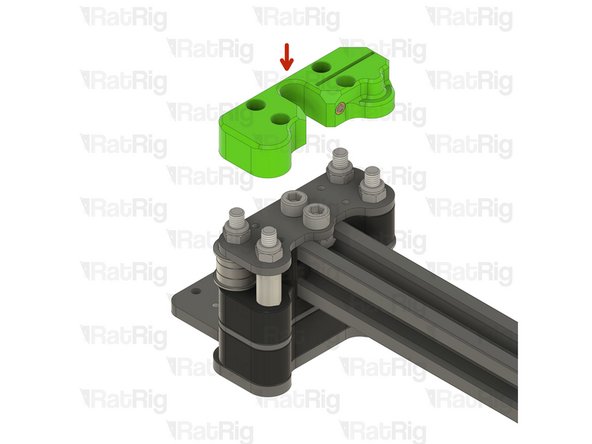
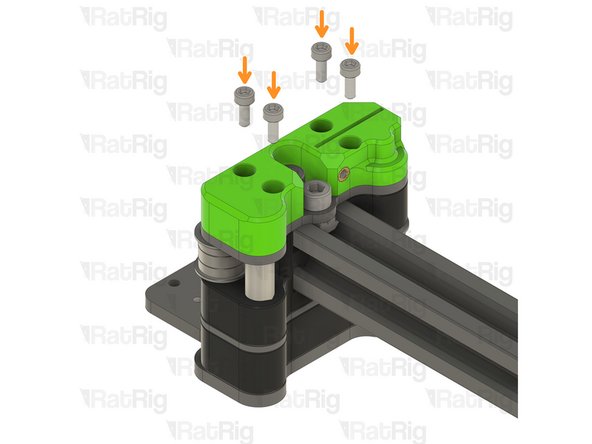
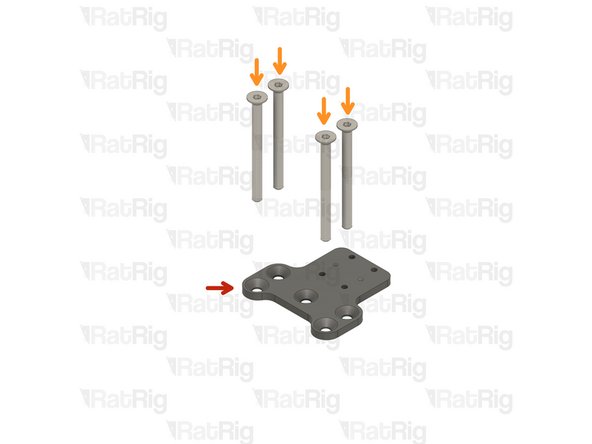
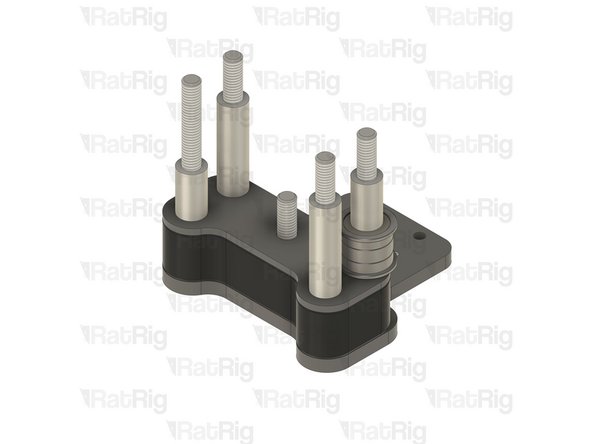
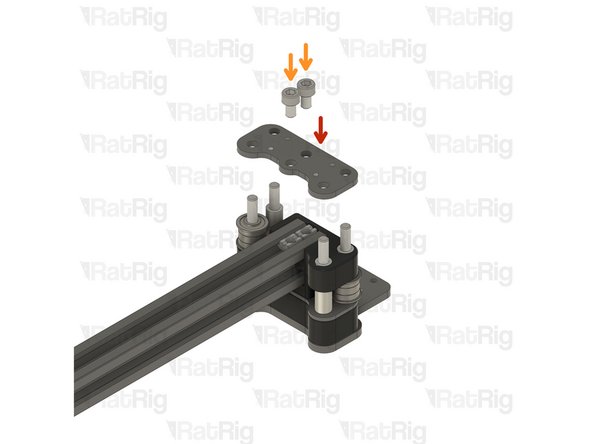
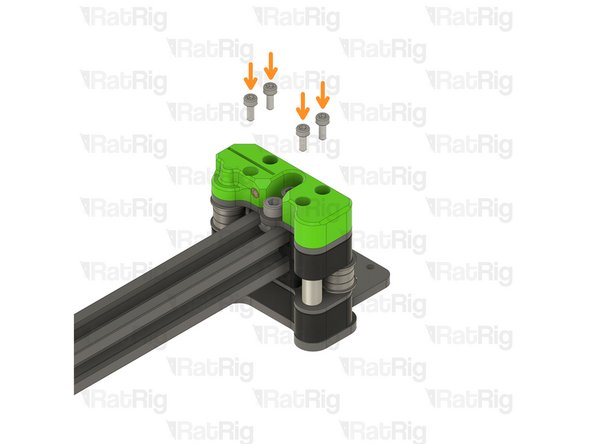
vc4_xy_joiner_upper plate
-
M5x60 Countersink Screw
-
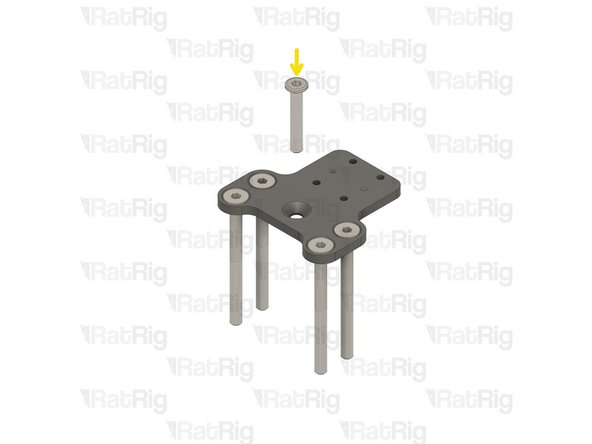
M5x30 Low Profile Screw
-
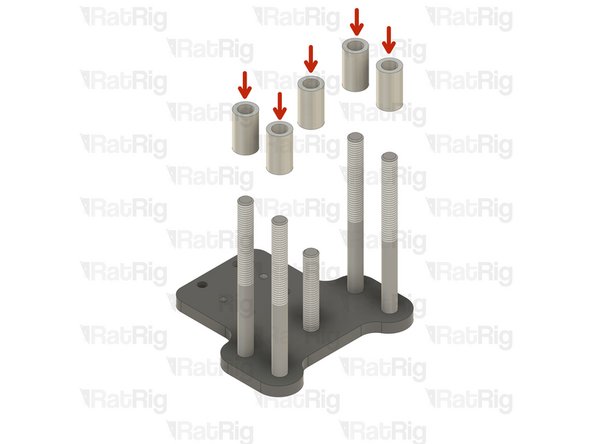
Insert the screws on the plate and flip the assembly upside down as shown.
-
-
-
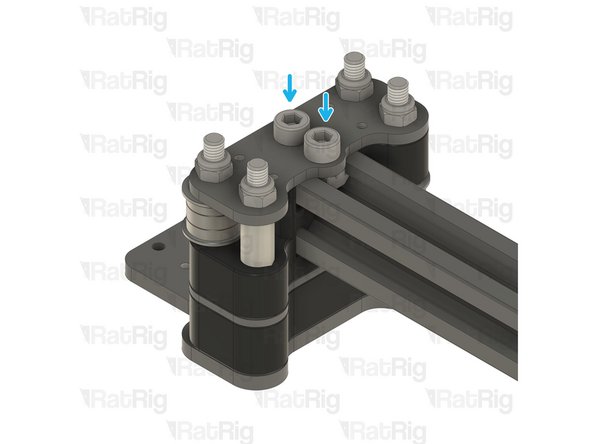
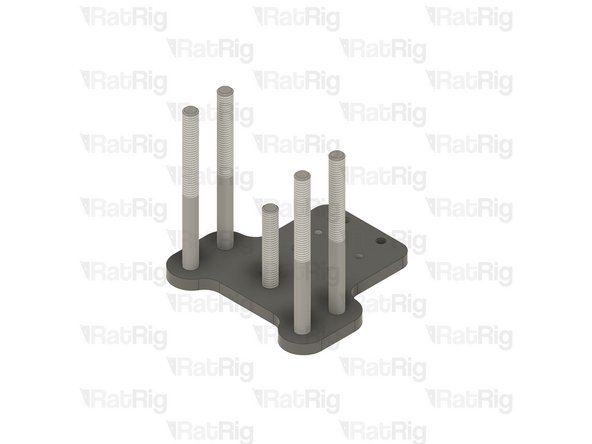
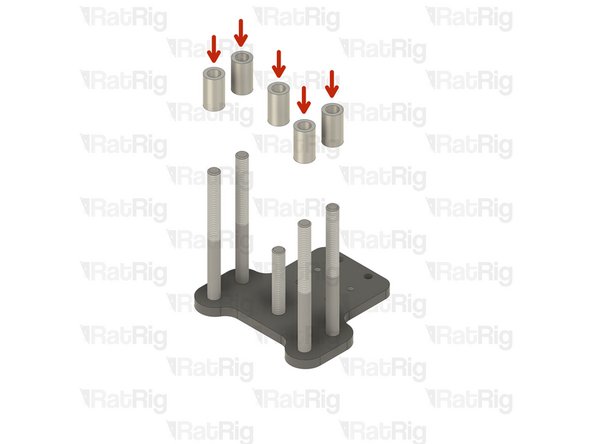
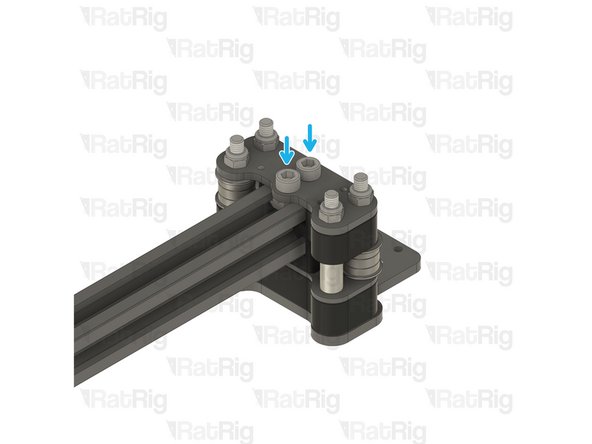
Aluminium Spacer 5x8x14mm
-
Insert one Aluminium spacer on each screw
-
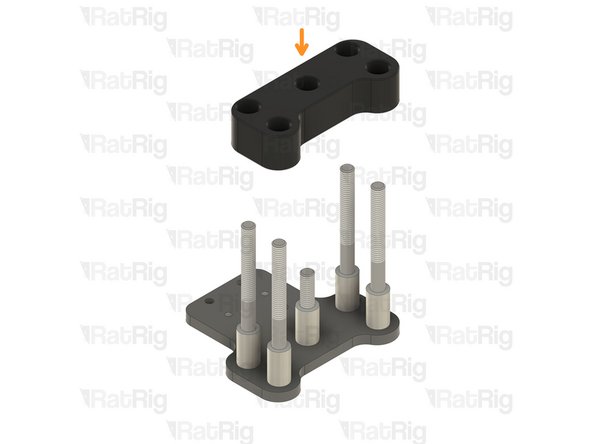
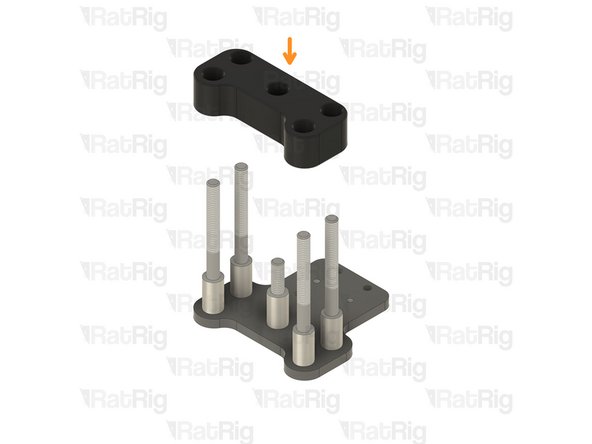
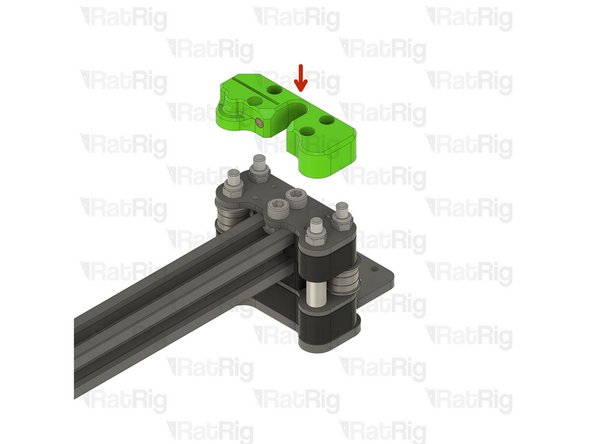
vc4_x_endstop printed part
-
Align the printed part and insert though the aluminium spacers.
-
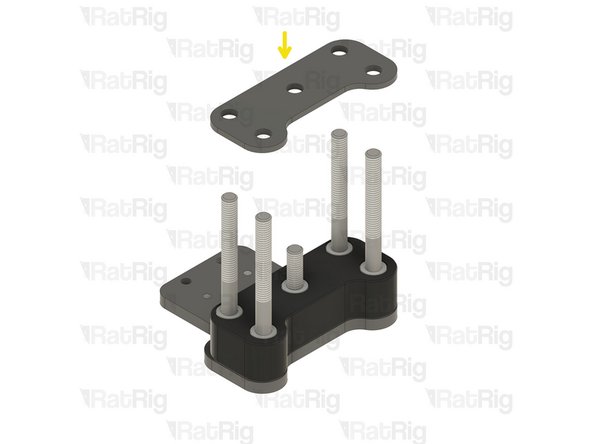
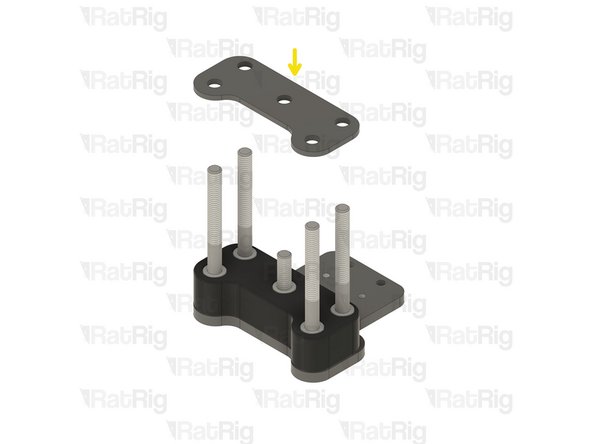
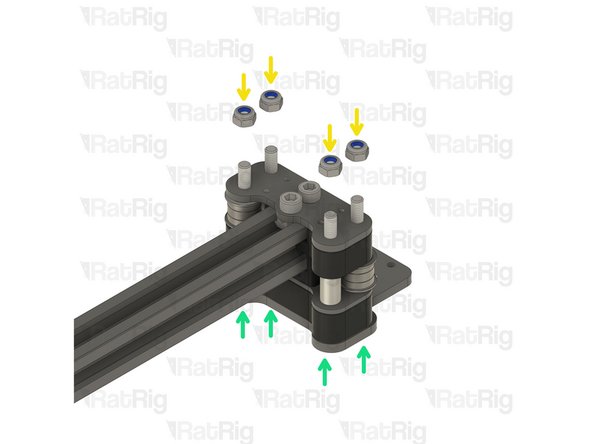
vc4_xy_joiner_middle plate
-
Align the plate and insert though the aluminium spacers.
-
-
-
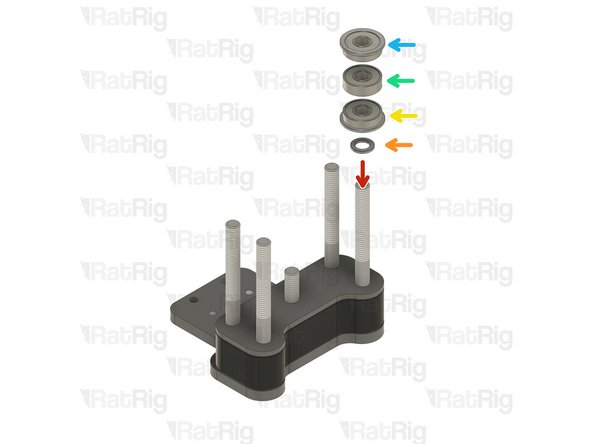
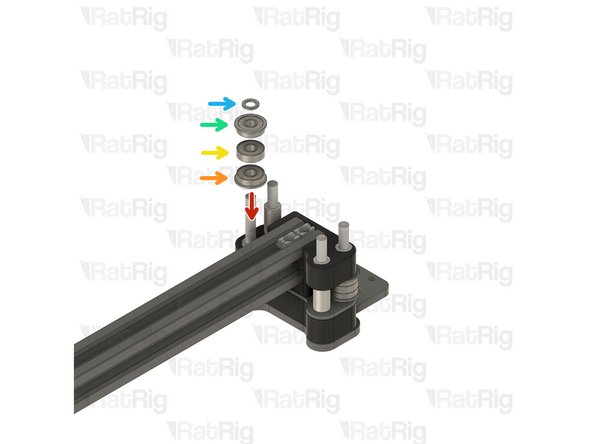
2x vc4_xy_spacer
-
4x Ball Bearing 695ZZ
-
8x Ball Bearing F695ZZ
-
4x Mini Precision Shim 8x5x1mm
-
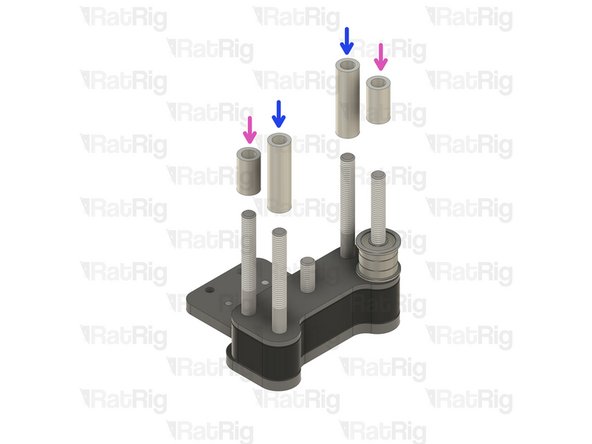
4x Aluminium Spacer 5x8x27mm
-
-
-
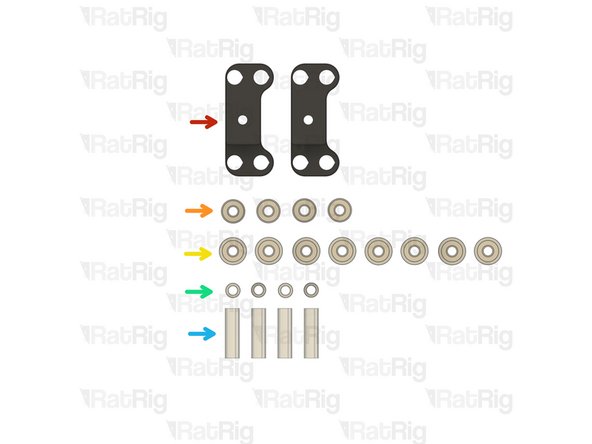
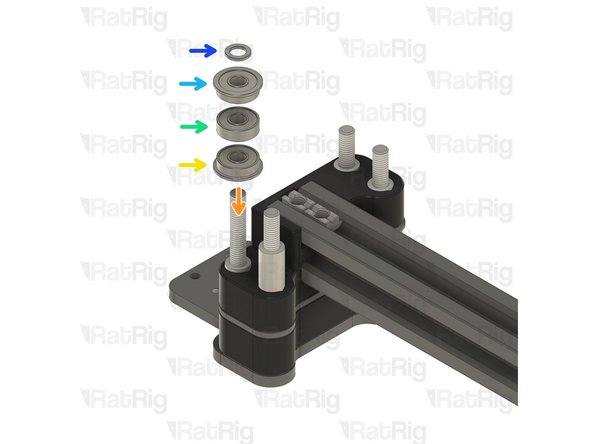
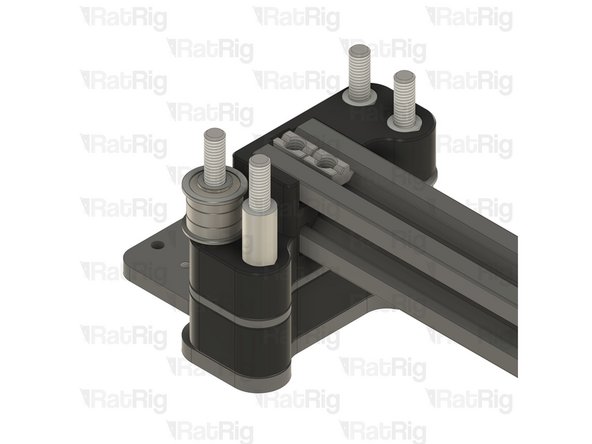
Install the following components in the order shown in the image:
-
Mini Precision Shim
-
F695ZZ Ball Bearing (Flange at the bottom)
-
695ZZ Ball Bearing
-
F695ZZ Ball Bearing (Flange at the top)
-
Aluminium Spacer 5x8x27mm
-
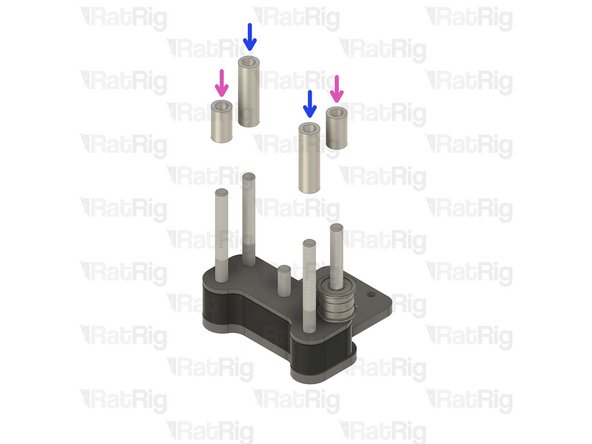
Aluminium Spacer 5x8x14mm
-
Insert the aluminium spacers on the designated screws.
-
-
-
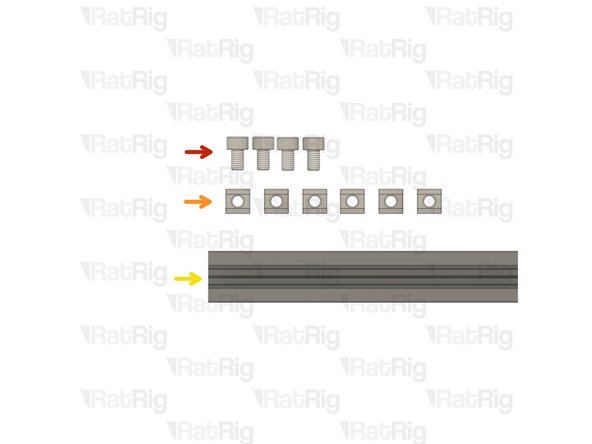
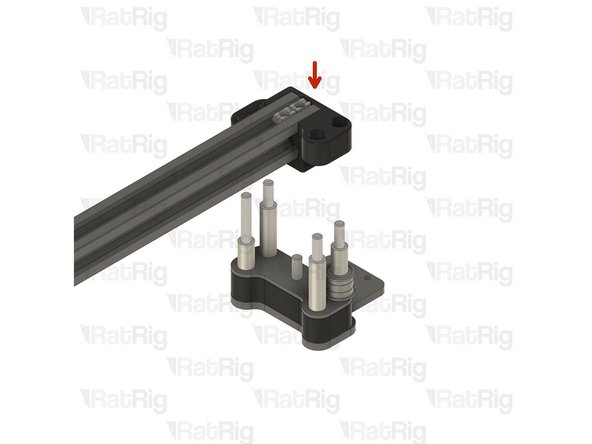
4x M5x8 Cap Head Screw
-
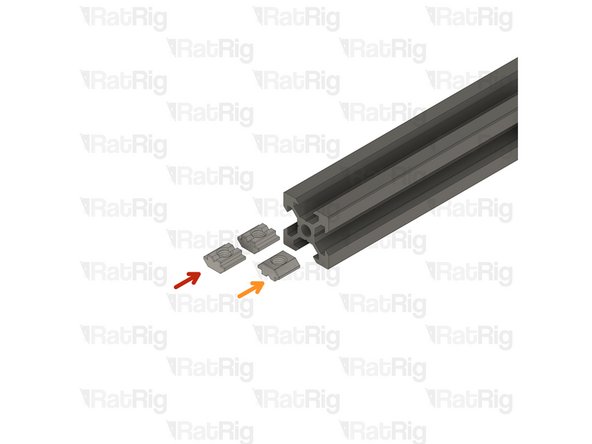
6x T-Nut Square type for 2020
-
V-Slot 2020 - 525mm
-
-
-
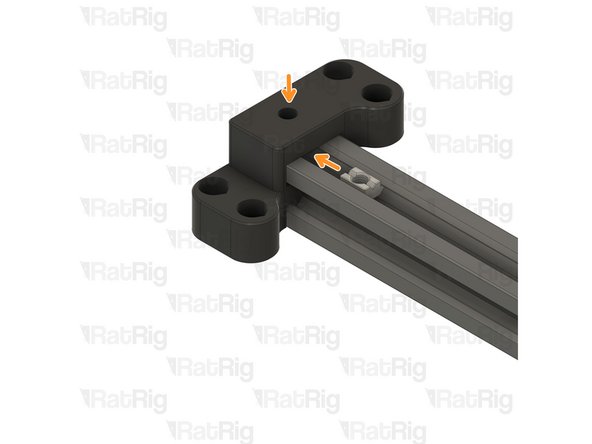
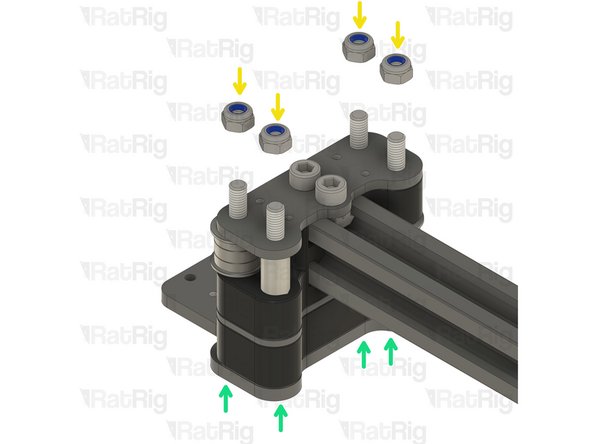
Insert two T-Nut Square type for 2020 on the top slot.
-
Insert one T-Nut Square type for 2020 on the lower slot.
-
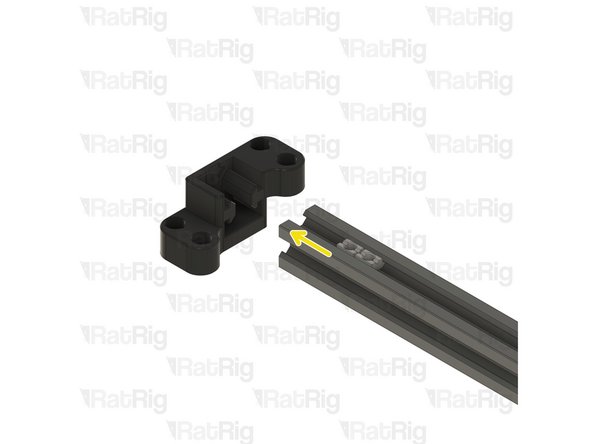
Gently insert the V-Slot 2020 extrusion inside the vc4_xy_spacer. The two square T-nuts must be facing the opening on the printed part, as shown.
-
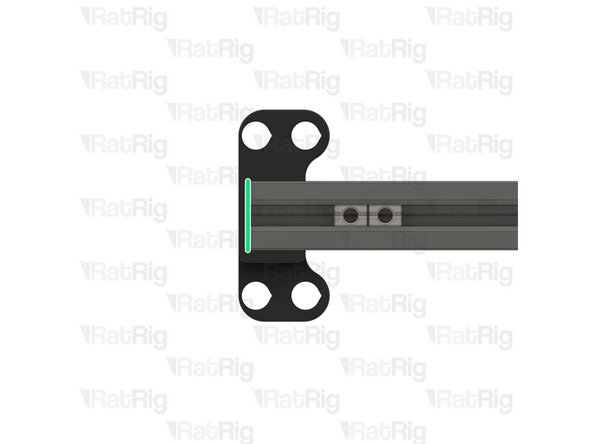
Ensure the extrusion and the printed part are flush.
-
-
-
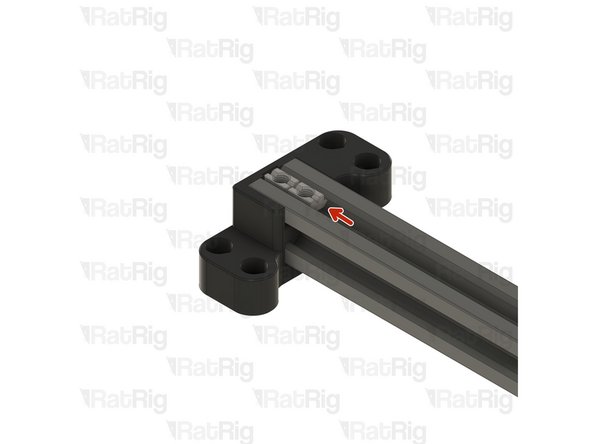
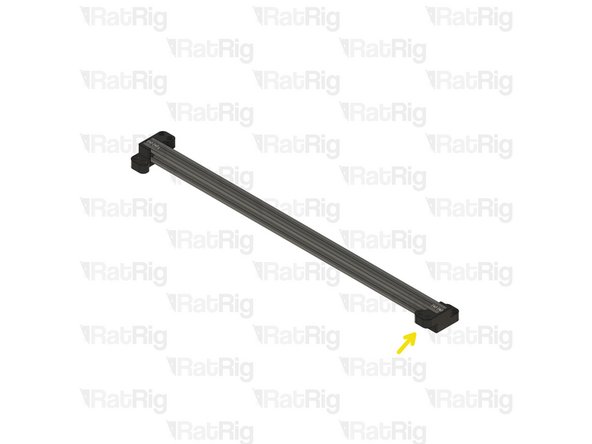
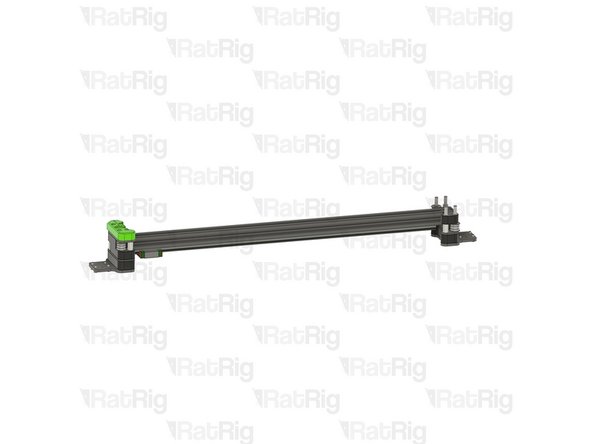
Push the two T-Nut Square type to the end of the assembly
-
Push the single T-Nut Square type underneath the printed part, ensuring it is aligned with the hole on the printed part.
-
Repeat Steps7 and 8 and prepare the other end of the assembly.
-
-
-
Insert wisdom here
-
-
-
Insert wisdom here
-
-
-
Insert wisdom here
-
-
-
Insert wisdom here
-
-
-
Insert wisdom here
-
-
-
Insert wisdom here
-
-
-
Insert wisdom here
-
-
-
Insert wisdom here
-
-
-
Insert wisdom here
-
-
-
Insert wisdom here
-
-
-
Insert wisdom here
-
-
-
Insert wisdom here
-