
-
-
Bed Plate 329x329x6mm
-
3x Steel Ball - 12mm Threaded M5
-
6x Aluminium Spacer 6mm
-
3x M5x25 Countersink Screw
-
2x M4 Nylon Locking Nut
-
2x Set Screw M4x16 - Dog Point
-
M4x6 Cap Head Screw
-
-
-
To prevent scratches, the bed plate is shipped with a protective film on both sides.
-
Gently peel off the protective film.
-
Repeat for the other side.
-
The magnetic sheet and heater pad will be installed later during the commissioning guide. Do not install them now.
-
-
-
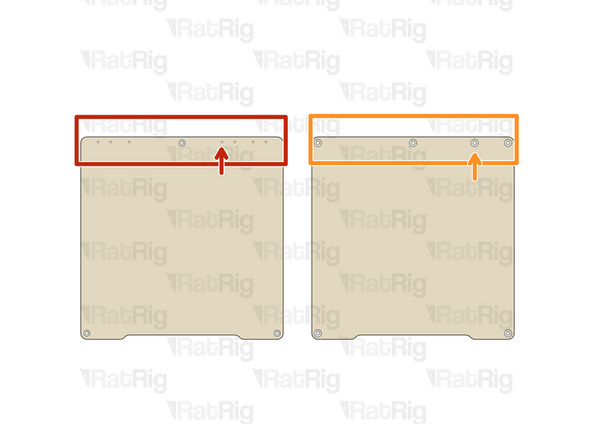
Identify your bed plate
-
7 threaded holes, 1 countersink hole
-
4 countersink holes [300mm size ONLY]
-
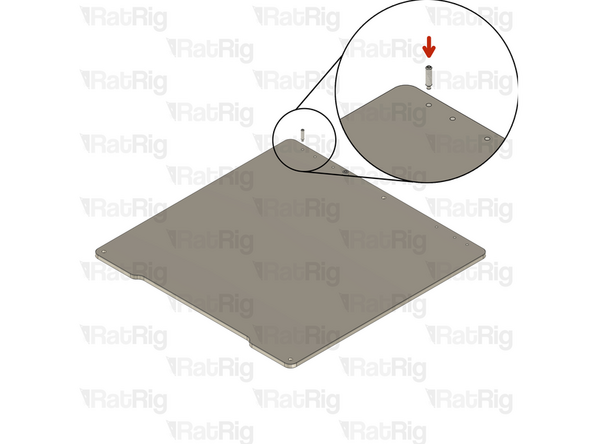
Flip the bed upside down (no countersink bores should be visible).
-
This screw will be later used to ground the bed assembly.
-
Install a M4x6 Cap Head Screw in the fourth hole, counting from the left.
-
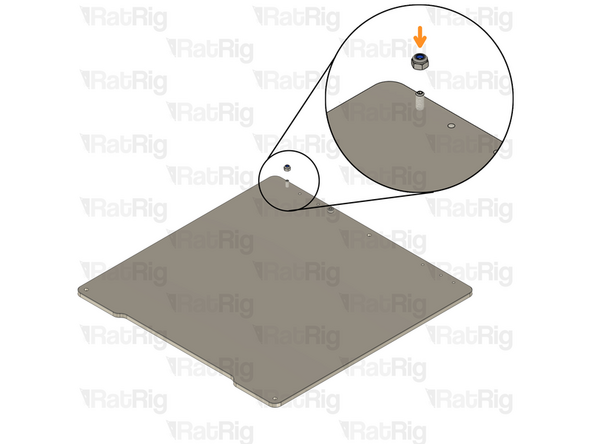
Install a M4x12 Countersink Screw in the available countersunk hole at the rear. Then proceed with Step 5.
-
-
-
Set Screw M4x16 - Dog Point
-
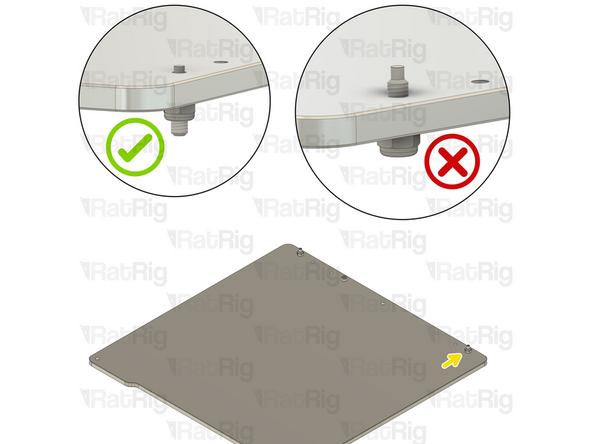
Thread the set screw on the bed from the bottom, with the Dog Point downwards.
-
Thread an M4 Locking nut on the set screw and tighten it.
-
The pin thread shouldn't be visible from the top of the bed plate
-
Repeat the previous steps and assemble another set screw + Locking M4 nut in the first hole counting from the right (as shown)
-
-
-
Flip the bed arround.
-
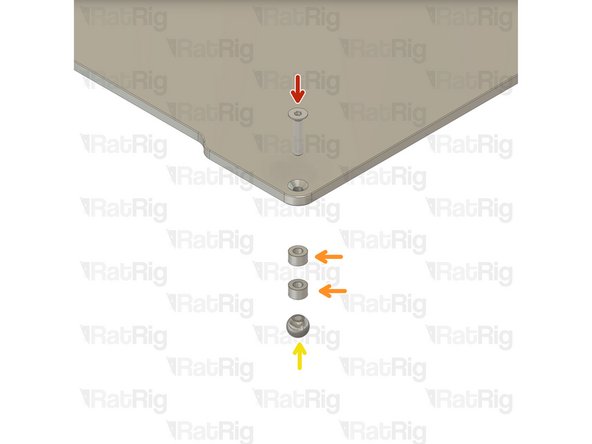
M5x25 Countersink Screw
-
Insert the screw in the Bed, from the top.
-
Insert two aluminium Spacer 6mm on the screw from the bottom.
-
Threaded steel ball
-
Thread the steel ball to the M5x25 screw.
-
Repeat the previous steps for each of the positions shown on the bed.
-
-
-
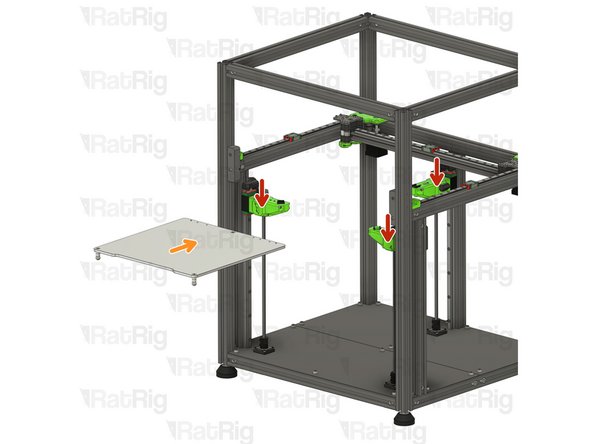
Rotate the lead screws by hand, to lower the Z arms 10-20mm, enough for the bed to be installed without hitting the gantry.
-
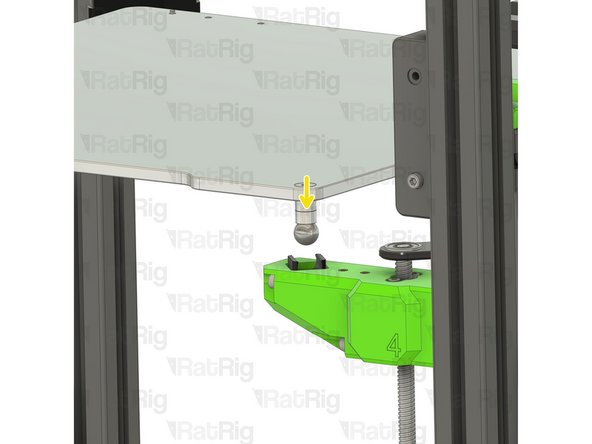
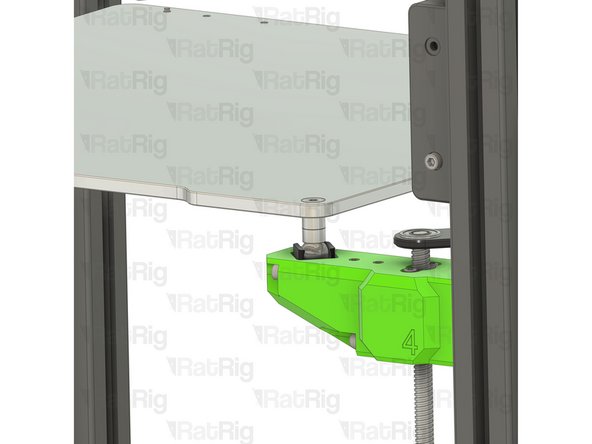
Insert the bed in the V-Core 4 frame
-
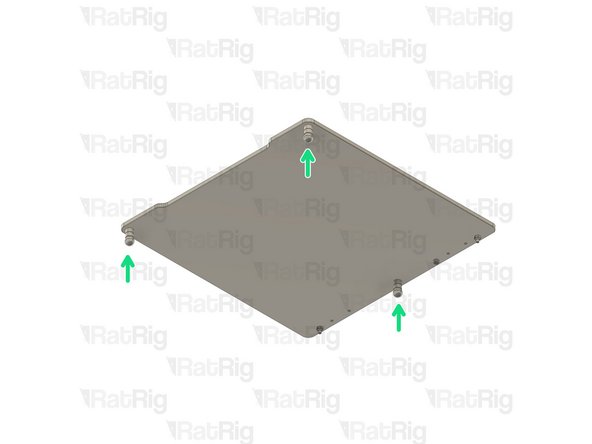
Carefully align the steel balls with the POM inserts
-
Click the Steel balls into the POM inserts on the V-Core bed arms, by pushing down on the bed assembly.
-
-
-
We hope you have tons of filament prepared, your V-Core 4 is anxious to start melting!
-
Best filament for the V-Core 4, PunkFil
-
-
-
Select your machine variant below:
-
CoreXY or Hybrid: 08. Toolhead - CoreXY or Hybrid
-
IDEX: 09. Toolheads - IDEX
-


![4 countersink holes [300mm size ONLY]](https://d3t0tbmlie281e.cloudfront.net/igi/ratrig/22bMNdRLB2CJkYKk.medium)
Cancel: I did not complete this guide.
40 other people completed this guide.
