-
-
If you are building and IDEX V-Core 4, skip to Step 2 NOW
-
This guide is meant to be followed along with the commissioning guide,
-
Do not install your Y belts before reading the commissioning guide. If you are assembling an hybrid machine.
-
Tuning all belts from the ground up is a nearly impossible job, so Rat Rig recommends that you first tune your CoreXY belts and only then proceed to add and tune the Y belts.
-
-
-
Both belts must be pre-cut to your machine size:
-
1110 mm - V-Core 4 300x300
-
1310 mm - V-Core 4 400x400
-
1510 mm - V-Core 4 500x500
-
Both belts must have the same length so they can be easily tensioned later.
-
-
-
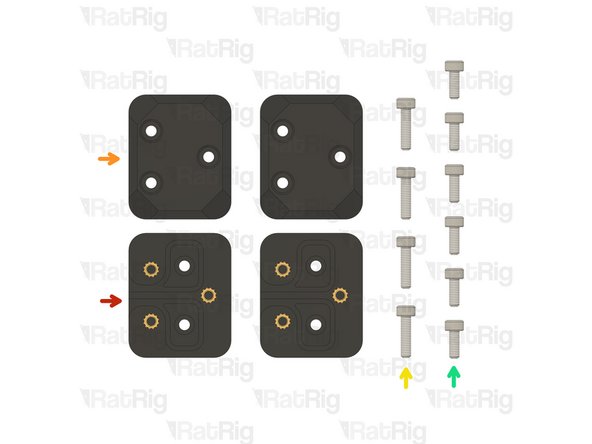
2x vc4_y_belt_body assembly
-
2x vc4_y_belt_clamp
-
4x M3x12 Cap Head Screws
-
6x M3x8 Cap Head Screws
4x M3x12 Cap Head Screws >>>> SKU: HW1292SC
6x M3x8 Cap Head Screws >>>>> SKU: HW1502SC
Vasco Rocha - Open Reply
-
-
-
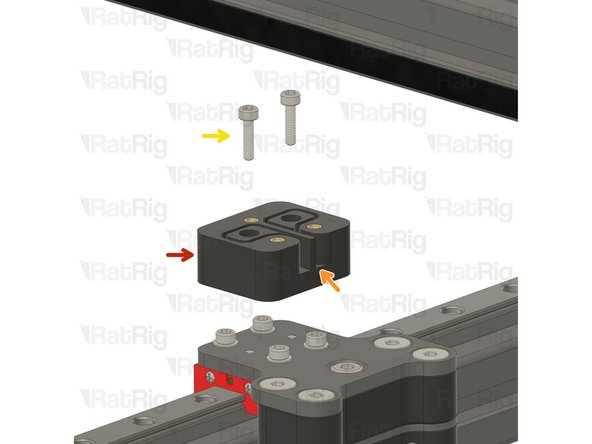
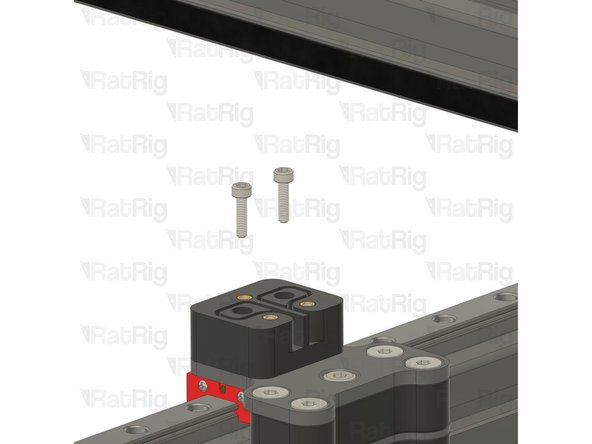
Install the vc4_y_belt_body on top of the joiner assembly
-
Ensure the belt grooves face the inside of the machine
-
2x M3x12 Cap Head Screws
-
Feed the M3x12 cap head screws through the vc4_y_belt_body assembly and tighten them into the threads on the joint plate.
-
Repeat the previous step and install the parts on the other Y Joiner assembly.
These vc4_y_belt_body parts are prone to splitting where the belts exit the slots. This is due to the orientation they are printed in, and perhaps Ratrig using either too low of a print temperature and/or too much cooling fan. IMO these parts need to be either injection molded, machined delrin or aluminum in the future.
-
-
-
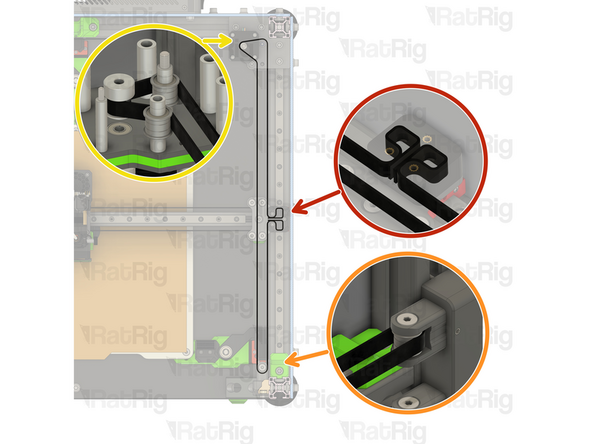
Ensure the belt teeth are facing the stepper motor pulleys.
-
Take one end of the top Y belt, and feed it as shown:
-
Insert one end in the printed part slot.
-
Feed the belt through the tensioner idler making sure the theeth are facing the idler.
-
Take the other end of the top Y belt, and feed it as shown:
-
Feed the belt through the top stepper motor bearing stacks. Ensuring the belt teeth face the stepper pulley.
-
Insert one end in the printed part slot.
-
Repeat the previous Steps and install the second Y belt.
-
-
-
vc4_y_belt_clamp
-
3x M3x8 Cap Head Screw
-
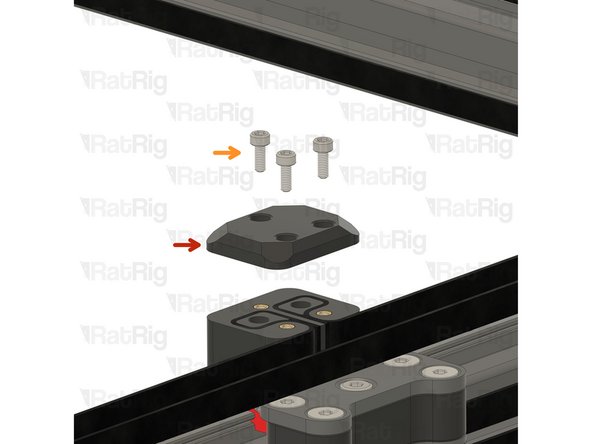
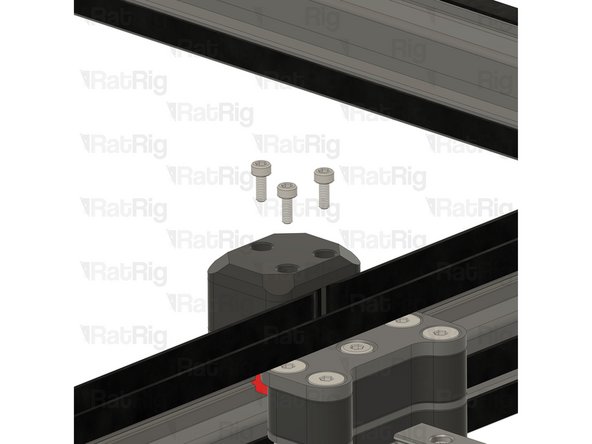
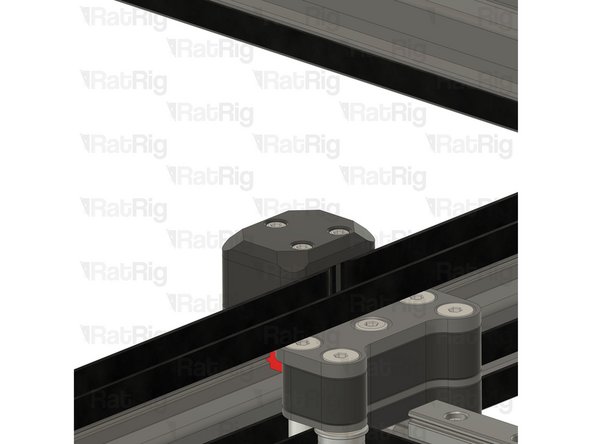
Install the vc4_y_belt_clamp on top of the vc4_y_belt_body. Insert the screws through the clamp and tighten them into the heat insets on the vc4_y_belt_body.
-
Repeat the previous step and install the parts on the other Y belt assembly.
-
-
-
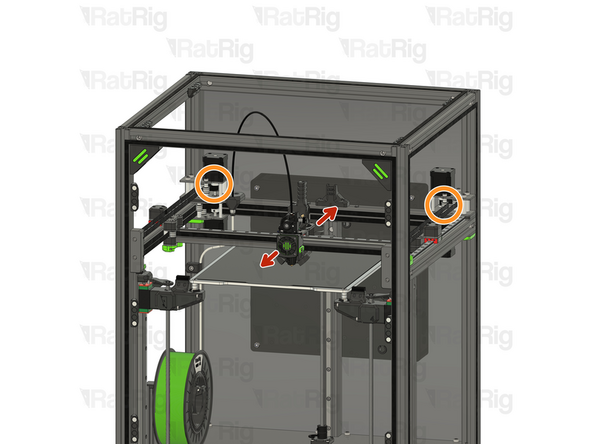
Please move the gantry back and forth a couple of times to allow the belts to assume their natural positions.
-
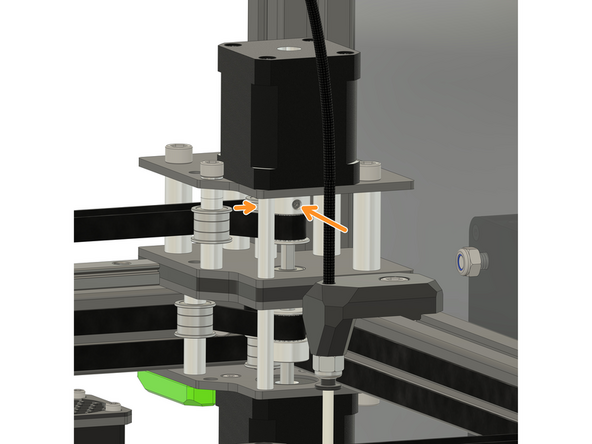
Tighten the two set screws on the stepper motor pulleys.
As recommended in Section 09_Gantry Alignment Step 4, be sure to rotate the pulley or motor shaft slightly to make sure that one of the two setscrews in the pulley tightens down squarely on the "flat" on the motor shaft.
Jim Sellon - Resolved on Release Reply
-
-
-
Adjust both belts tension in a progressive and equal way.
-
Do not overtighten your belts! it will result in poor machine performance
-
-
-
Continue with the next guide:16. IDEX Accessories
-
Ignore this if you are just Upgrading your CoreXY to Hybrid
-
Cancel: I did not complete this guide.
19 other people completed this guide.
One Comment
Please adapt these for to include building a printer with the idex upgrade to start with. There is no y-control without the hybrid motors. So the printer commissioning does not work without them.
Nick Dietrich - Resolved on Release Reply


if i go to the commisioning guide it says that all mechanical should have been done before... and the mechanical hybrid Y belts isn't done yet... so where do we stand?
Vasco Rocha - Open Reply
Skip to step 2 at step 1? So just follow logically?
Allitio - Resolved on Release Reply
This is very misleading, if building with the idex upgrade from the beginning you need the hybrid motors and belts to properly control the y-axis. I found out the hard way after an enormous amount of troubleshooting and things not working. Also caused me to damage an end stop which ratrig provides no spares for.
Nick Dietrich - Resolved on Release Reply
Hi! Sorry to hear your experience wasn't the smoothest. Although the guide currently instructs you to install the Y belts during the Idex accessories chapter. That being said we'll reinforce the documentation to ensure it's easier to follow.
Rat Rig -