Introduction
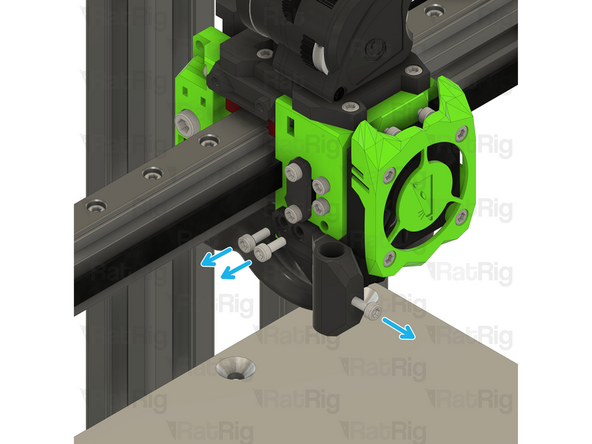
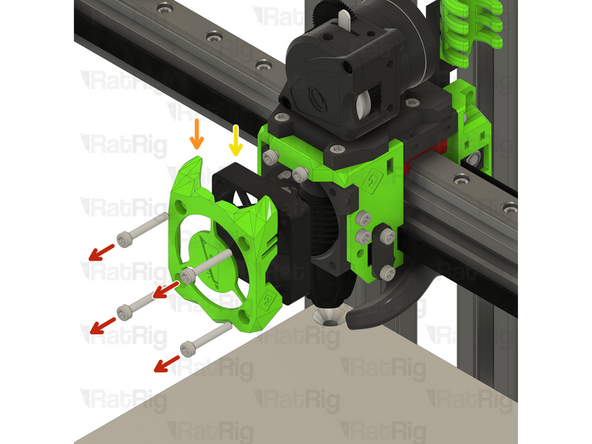
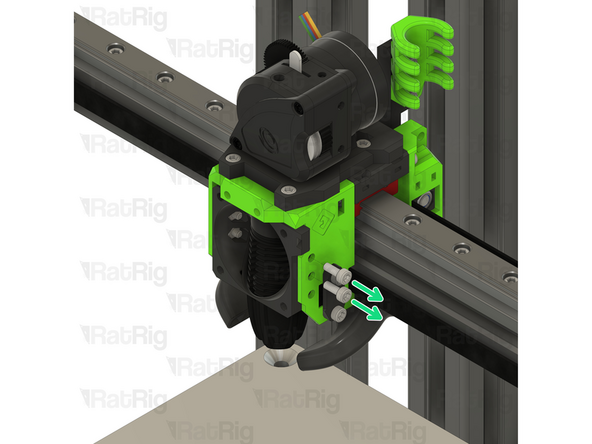
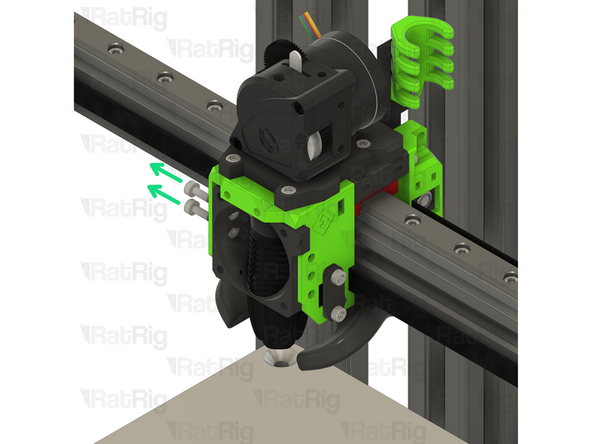
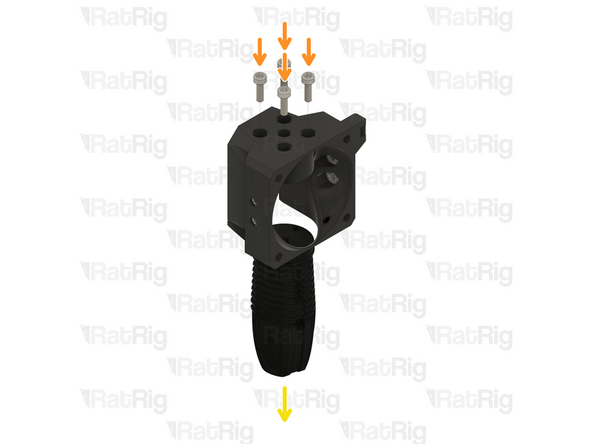
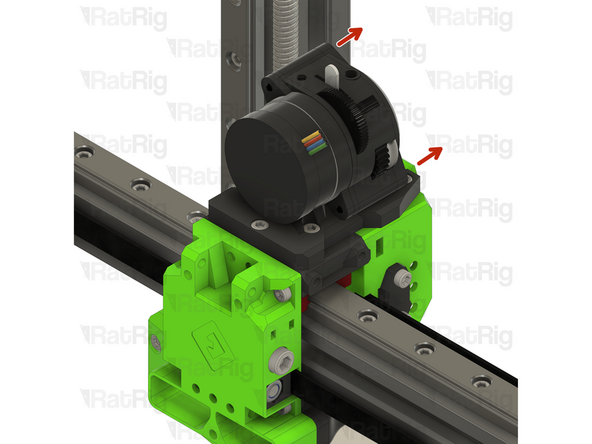
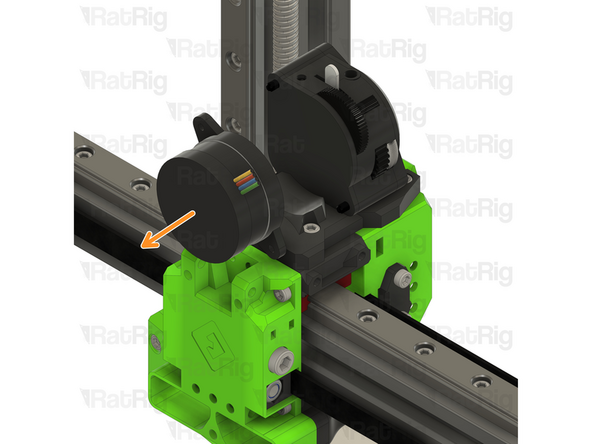
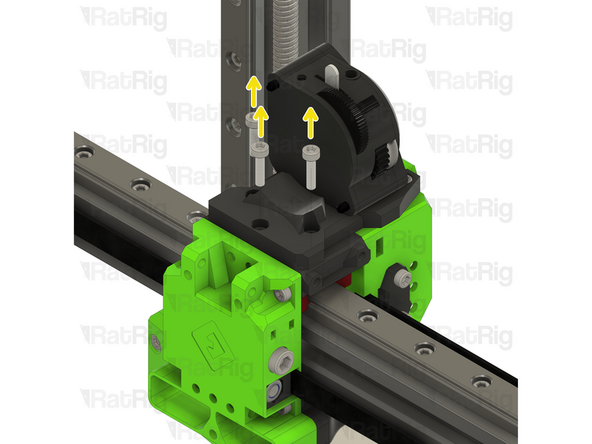
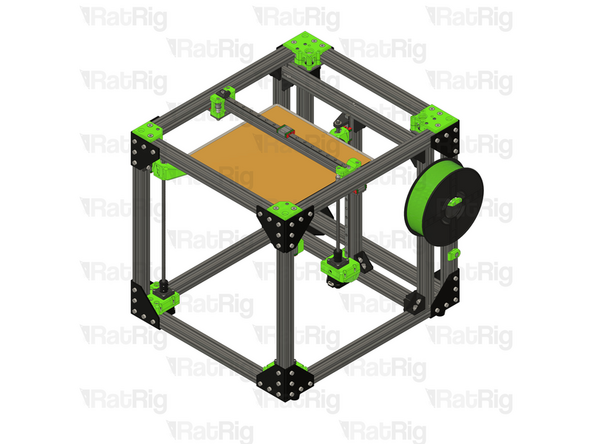
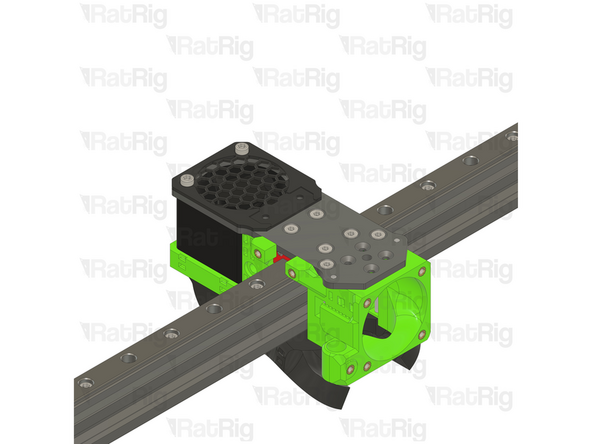
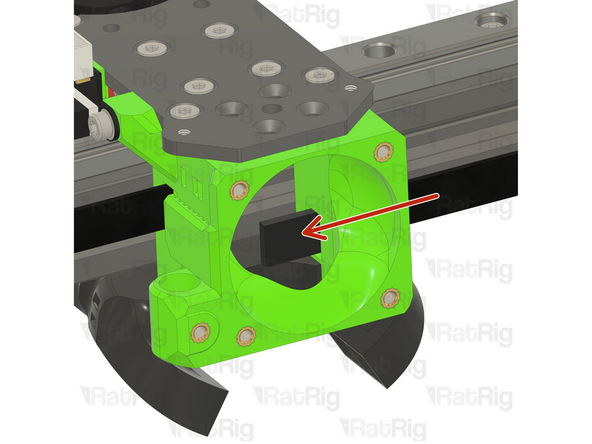
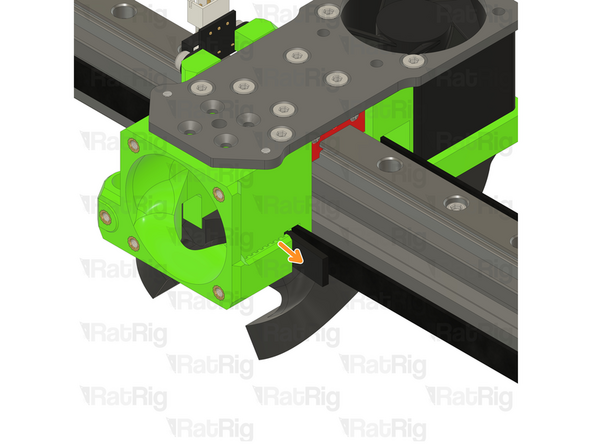
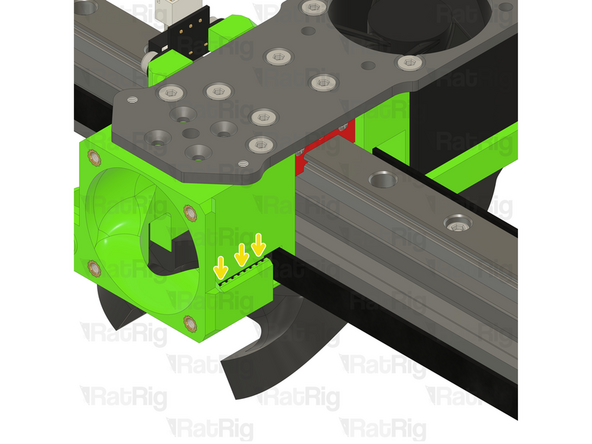
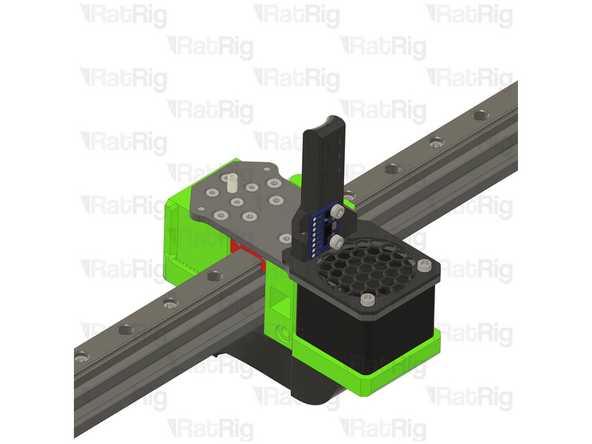
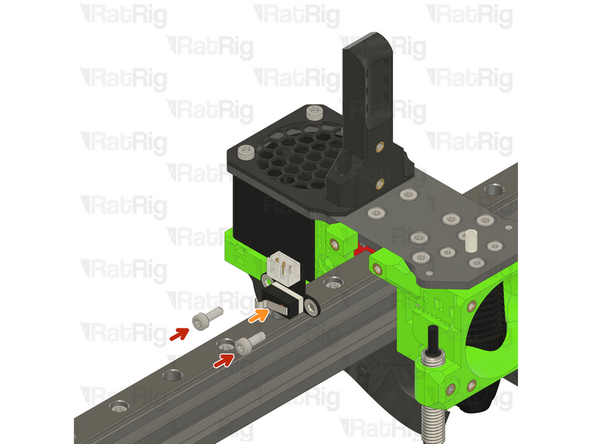
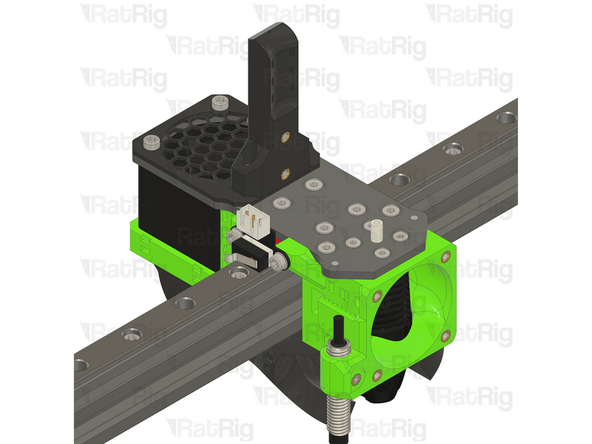
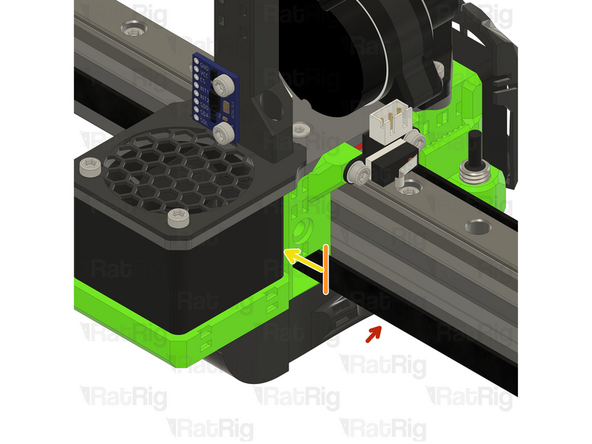
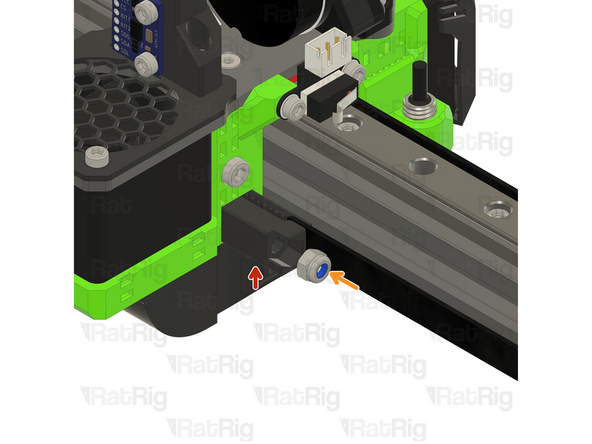
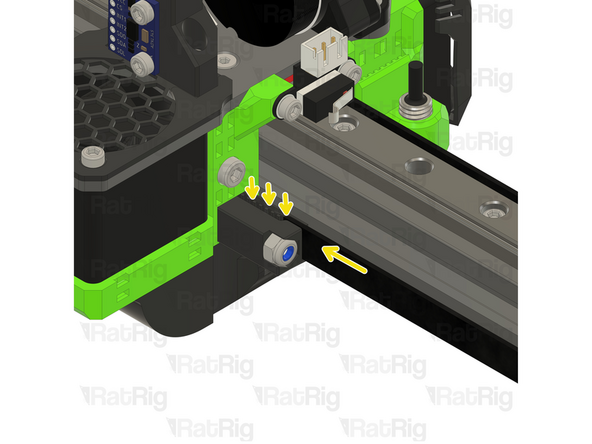
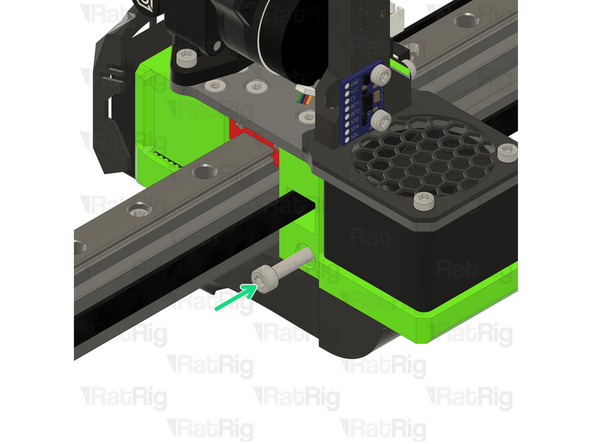
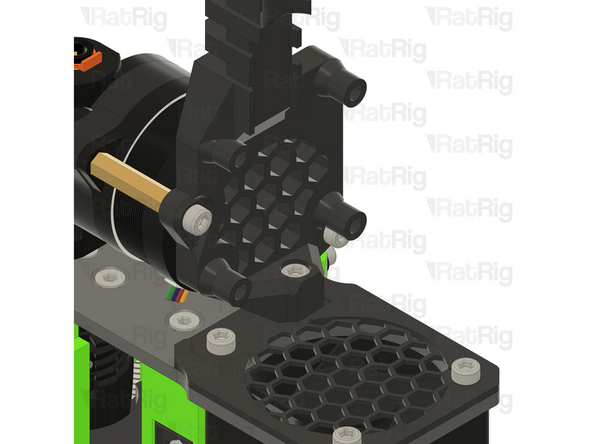
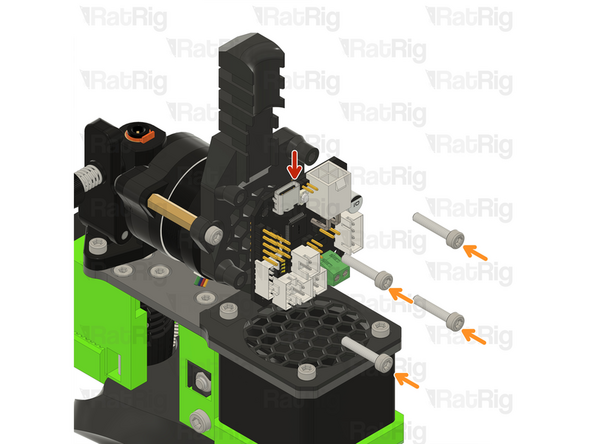
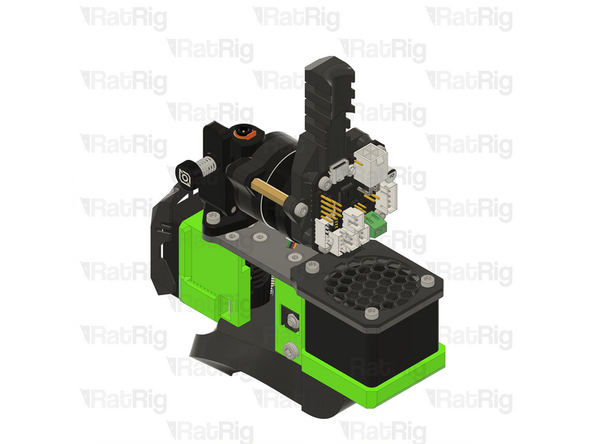
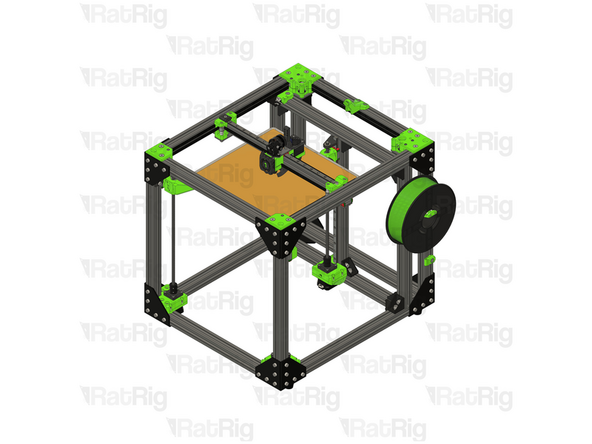
This guide provides a thorough overview of the disassembly of the EVA3, the preparation of the V-Core 3.1 frame, and the installation procedure for the Rat Rig toolhead V1.0 Upgrade Kit.
The Rat Rig Toolheads are streamlined to be used specifically with our favourite combination:
Orbiter V2
Phaetus Rapido UHF hot end
4028 part cooling fan
Rat Rig “SuperPinda” Probe by P&F
-
-
This guide is divided into 3 parts, to help you quickly find the instructions you need:
-
-
-
-
-
-
Remove the M3x25 Cap Head Screw
-
Remove the Hex Nut - M3
-
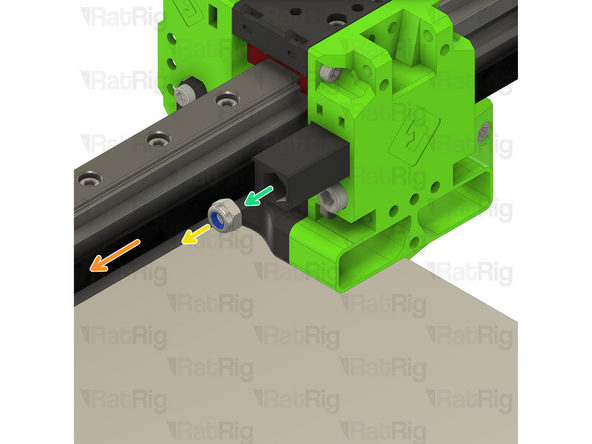
Remove the M3 Nylon Locking Hex Nut
-
Remove the M3x35 Cap Head Screw
-
Remove the 40mm_fan_duct assembly as shown
-
-
-
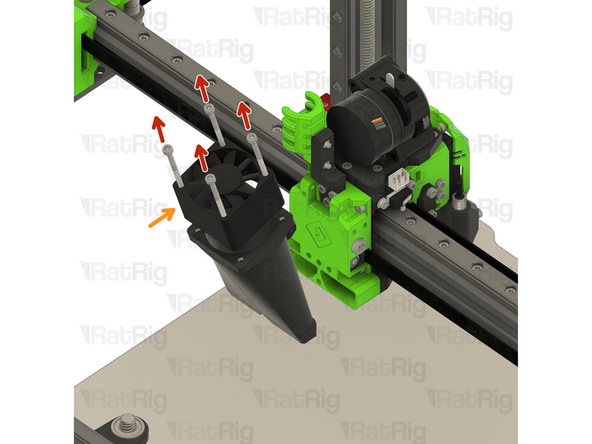
Remove the four M3x35 Cap Head Screws
-
Remove the 4028 Part Cooling Fan from the printed part, it will be re-used on the Rat Rig Toolhead V1.0
-
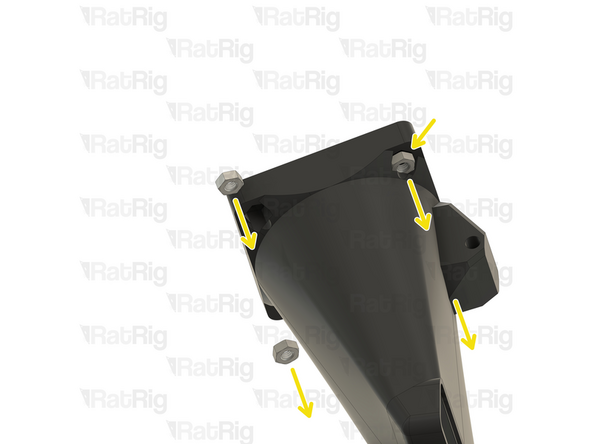
Remove the four Hex Nuts - M3
-
-
-
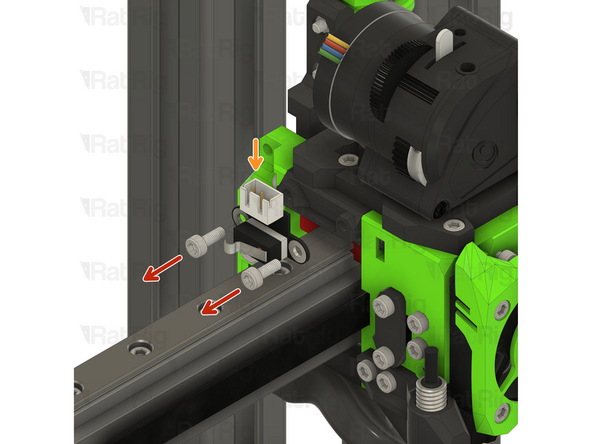
Remove the two M3x8 Cap Head Screws
-
Disconnect the Endstop Module and set it aside, it will be re-used on the Rat Rig Toolhead V1.0
-
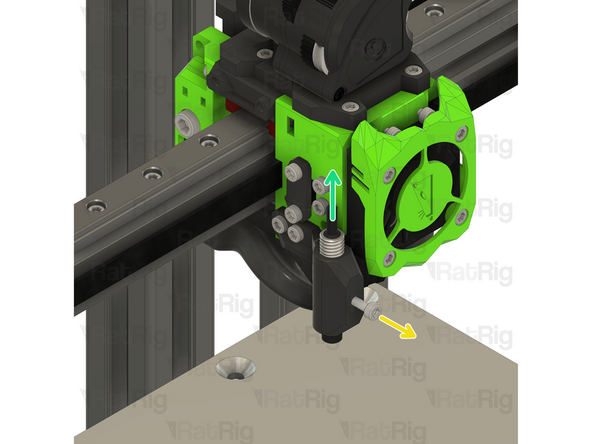
Loosen the M3x8 Cap Head Screw
-
Remove the Z-probe from the printed part, it will be re-used on the Rat Rig Toolhead V1.0
-
Remove the three M3x8 Cap Head Screws
-
-
-
Remove the four M3x20 Cap Head Screws
-
Remove the ratrig_eva3_shroud Printed Part
-
Remove the 4010 Axial Fan from the assembly, it will be re-used on the Rat Rig Toolhead V1.0
-
Remove the four M3x8 Cap Head Screws
-
-
-
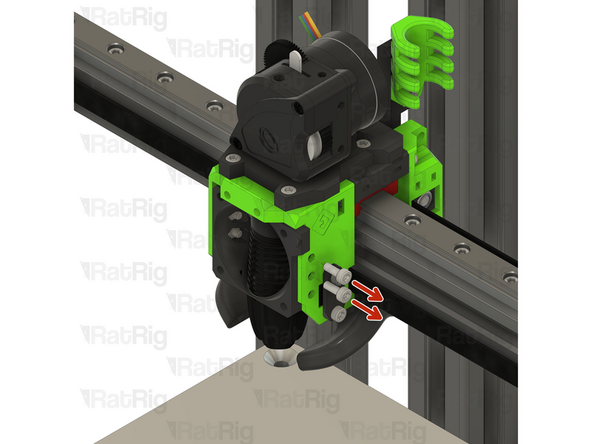
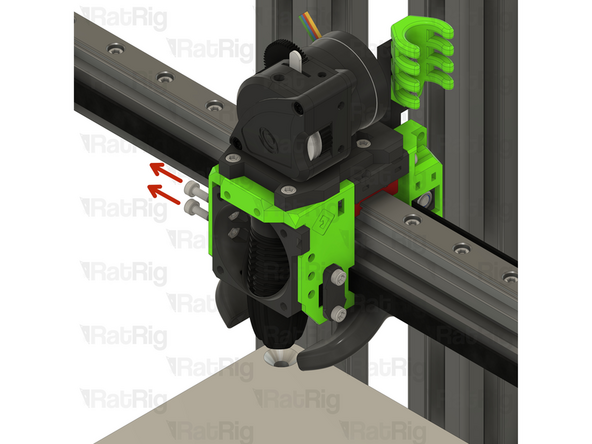
Remove the four M3x8 Cap Head Screws
-
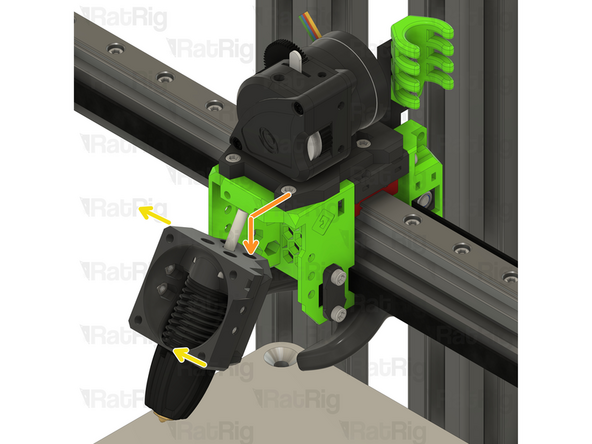
Gently push the hotend assembly down and away from the toolhead-
-
Rotate the hot end assembly into position as shown
-
-
-
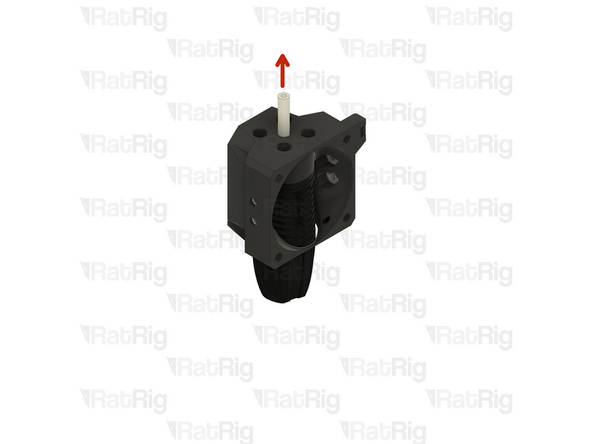
Remove the PTFE line
-
Remove the four M2.5x8 Cap Head Screws
-
Remove the Rapido hotend from the printed part, it will be re-used on the Rat Rig Toolhead V1.0
-
Tip: Insert the four M2.5x8 Cap Head Screws back in the Rapido hotend mounting points to avoid losing them.
-
-
-
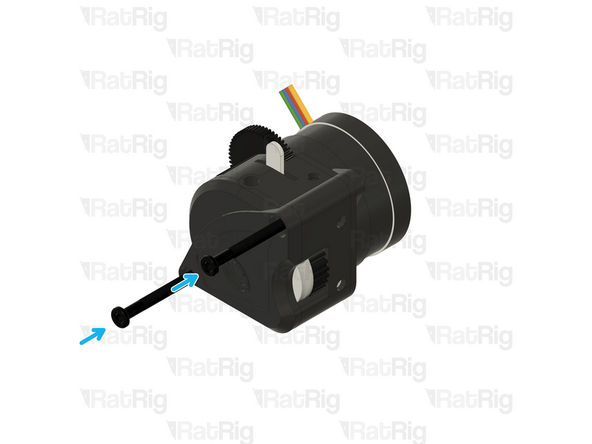
Remove the two M3x25 screws on the face of the LGX Lite which secure the motor in place
-
Remove the Bondtech LGX Lite motor from the back of the LGX Lite extruder
-
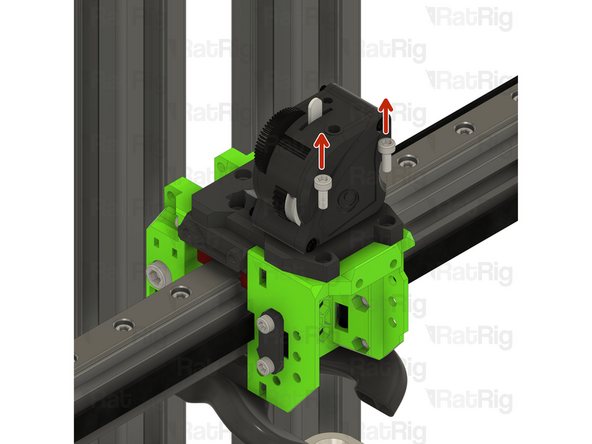
Remove the three M3x12 Cap Head Screws
-
-
-
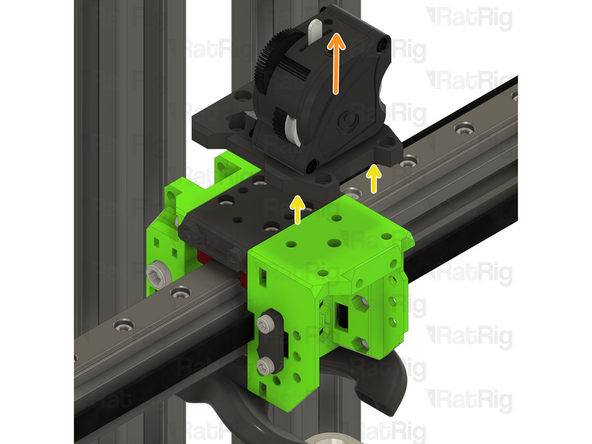
Remove the two M3x8 Cap Head Screws
-
Remove the extruder assembly
-
The new Rat Rig toolhead uses the Orbiter V2,
-
Remove the M3x8 Cap Head Screws holding the LGX Lite to the EVA3 drive_lgx_lite Printed Part
-
Reassemble the LGX Lite so you can safely store it.
-
-
-
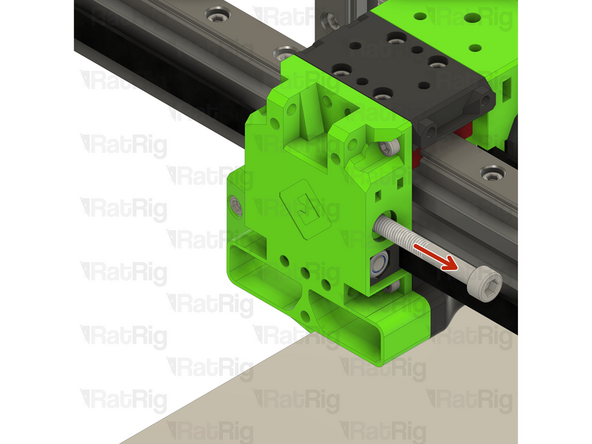
Loosen the M5x40 Cap Head Screw
-
Pull the belt to help remove the CoreXY belt grabber
-
Remove the M5 nylon locking nut
-
Remove the belt grabber from the toolhead
-
Repeat the previous steps and remove the other CoreXY belt grabber
In case it's wanted to have less work with screws and alignments please read comment from step 21 onwards. You would save quite some time and effort ;) And in case you need I have picture on how I did it
Samuel Lazea - Resolved on Release Reply
-
-
-
Remove the two M3x8 Cap Head Screws
-
Remove the belt front belt holder
-
Repeat the previous steps for the other front belt holder
In case it's wanted to have less work with screws and alignments please read comment from step 21 onwards. You would save quite some time and effort ;) And in case you need I have picture on how I did it
Samuel Lazea - Resolved on Release Reply
-
-
-
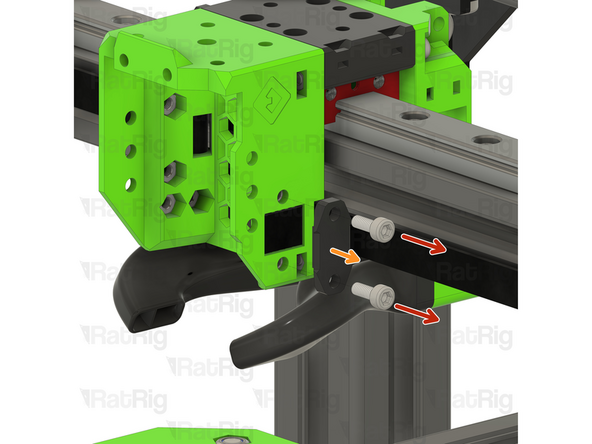
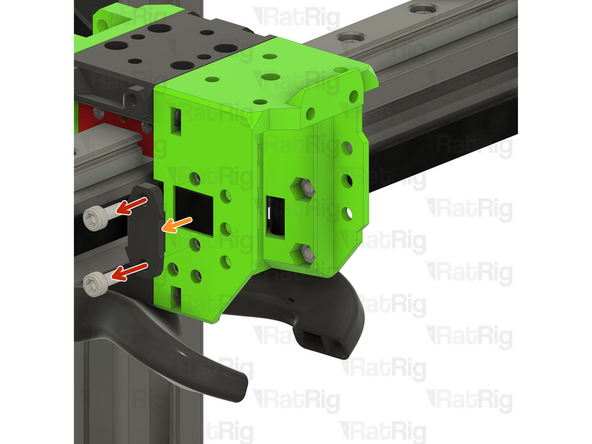
Remove the two M3x35 Cap Head Screws
-
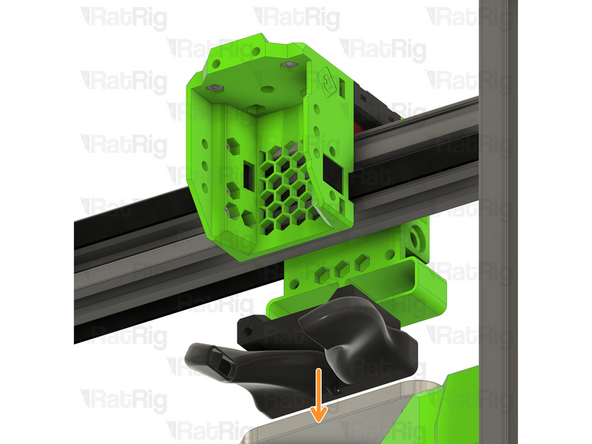
Pull down on the EVA horn ducts
-
-
-
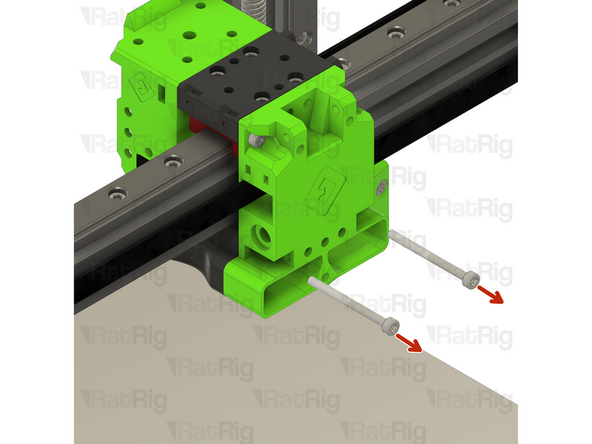
Remove the two M3x35 Cap Head Screws
-
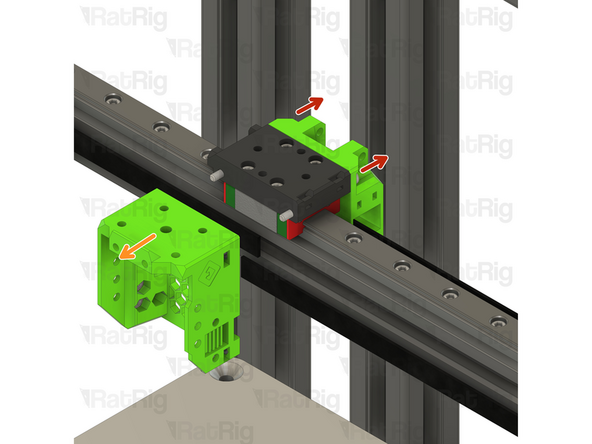
Pull on the EVA3 front assembly to remove it
-
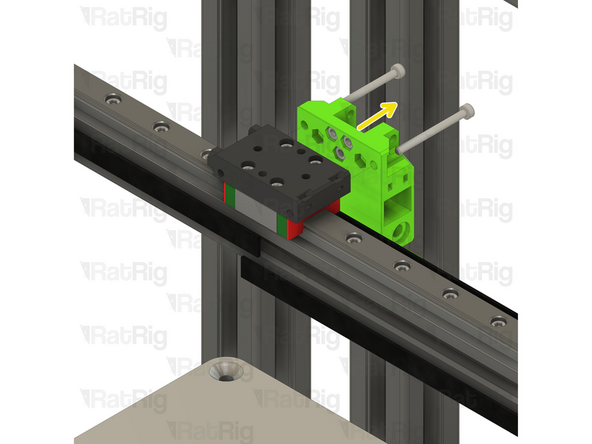
Pull on the EVA3 back assembly to remove it
-
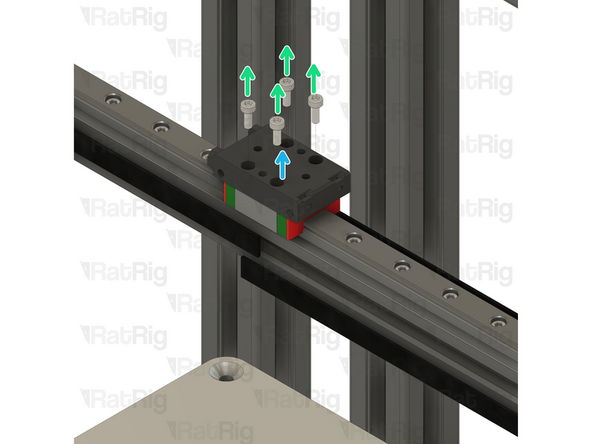
Remove the four M3x8 Cap Head Screws
-
Remove the EVA3 mgn12 mount
-
-
-
Some components of the V-Core 3.1 need to be upgraded to support the new Rat Rig Toolhead. The following steps will show you how.
-
-
-
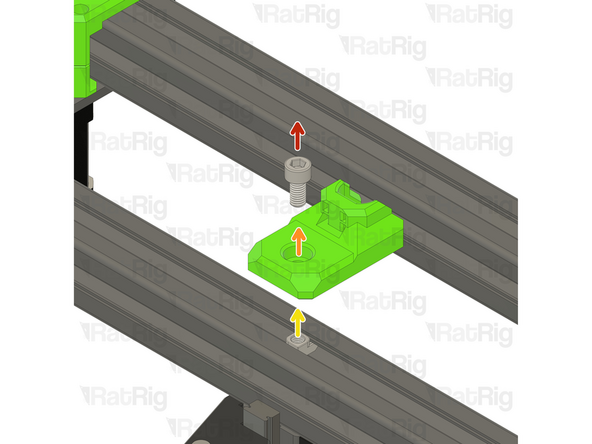
Locate the rear cable holder
-
Remove the M6x12 Cap Head Screw
-
Remove the electronics_wire_guide_rear printed part from the frame
-
Remove the M6 3030 Drop in T-nut
-
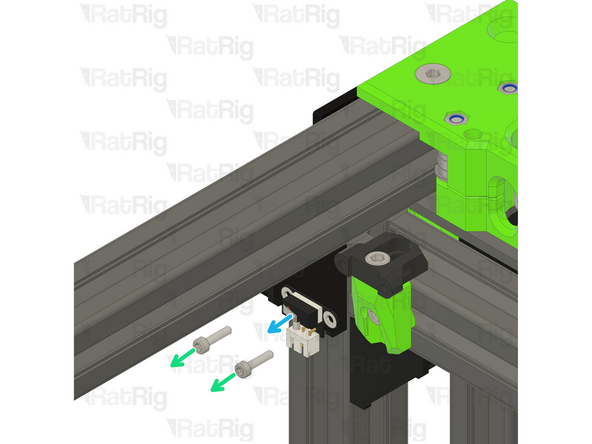
Locate the Y endstop mount
-
Remove the two M3x12 Cap Head Screws
-
Disconnect the Enstop Module and set it aside, it will be re-used on the Rat Rig Toolhead V1.0
-
-
-
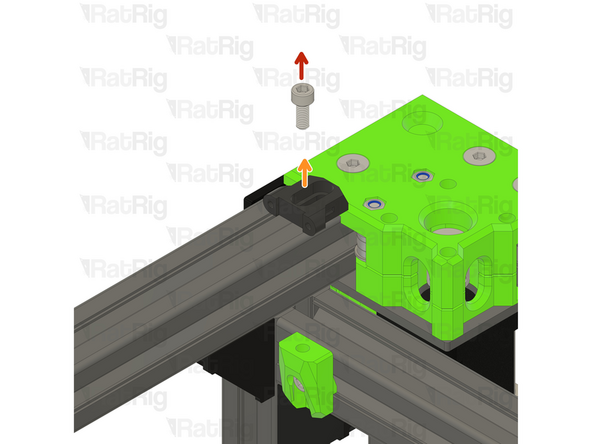
Remove the M5x12 Cap Head Screw
-
Remove the Y_max_endstop_slider printed part
-
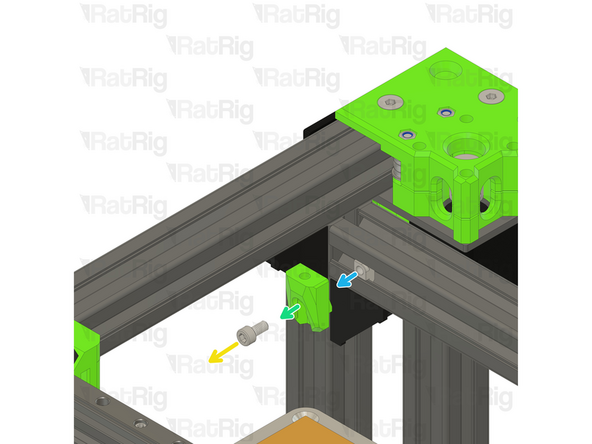
Remove the M5x10 Cap Head Screw
-
Remove the Y endstop_max_block printed part
-
Remove the M5 3030 Drop in T-nut
-
-
-
Remove the M5x18 Cap Head Screw
-
Remove the EVA3 endstop block
-
Avoid moving the machine around at this point, os the M5 Drop in T-nut doesn't slide around on the gantry extrusion.
-
-
-
The V-Core 3.1 is now ready to receive the Rat Rig Toolhead V1.0 Upgrade kit
-
-
-
The next steps will cover the assembly of the Rat Rig toolhead V1.0 upgrade kit
-
-
-
M5x18 Cap Head Screw
-
x_endstop printed part
-
Carefully insert the M5x18 Cap Head Screw into the already existing M5 Drop in T-nut
-
-
-
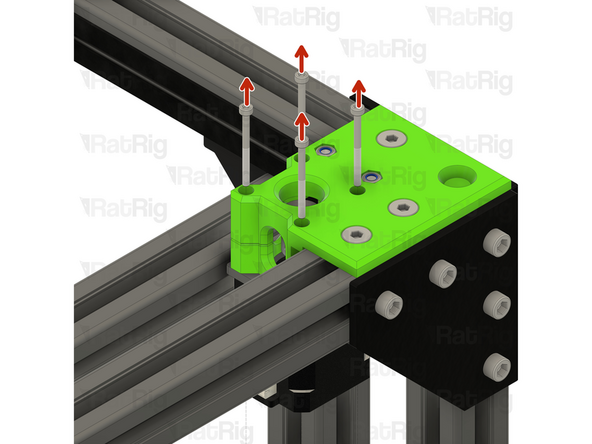
Remove the M3x45 Cap Head Screws
-
Remove the Stepper motor
-
Remove the M5x40 Cap Head Screws
Is the belt different or just a new belt becuase my current belt is new
Gerald Holle - Resolved on Release Reply
Superglue also works well, these belts are very easy to glue. Be sure the glue is fully dry before feeding.
Stefan Wilkens - Resolved on Release Reply
This step can be skipped if step 10 and 11 are not done yet. I put duct tape on actual end of the belts and continued with duct tape on the new ones ( NOT overlying the old and new belts cause it would not pass through the small space). I pulled the new belts without any issue using the old belts. Total time for both belts less then 5 minutes and no need to remove so many screws.
Samuel Lazea - Resolved on Release Reply
-
-
-
Remove the three M6x14 Screws
-
If the M6 Drop in T-nuts fall off, loosely thread them in the screws so you can easly reinstall the CoreXY motor cage top easily.
-
Remove the CoreXY motor cage top
-
Remove both of the old belts, then insert the two new ones following the same paths
-
Reinstall the CoreXY motor cage top
What is the required length for the two belts? I assume the new toolhead uses longer belts since the old ones are not reused.
Christos Karagiannis - Resolved on Release Reply
Yes, the new toolhead uses longer belts, the overall belt length varies with the machine size. All toolhead upgrade kits are shipped with enough belts for a V-Core 3.1 500x500mm
Rat Rig -
This step can be skipped if step 10 and 11 are not done yet. I put duct tape on actual end of the belts and continued with duct tape on the new ones ( NOT overlying the old and new belts cause it would not pass through the small space). I pulled the new belts without any issue using the old belts. Total time for both belts less then 5 minutes and no need to remove so many screws.
Samuel Lazea - Resolved on Release Reply
-
-
-
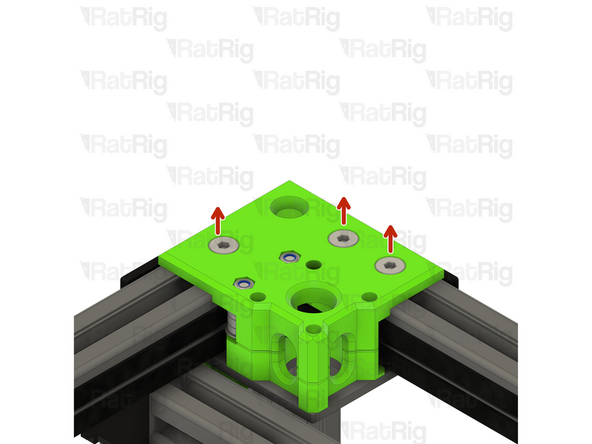
Tighten the three marked M6x14 screws to secure the CoreXY motor cage top to the frame
-
Tighten the M5x40 screws to secure the bearing stacks into the CoreXY motor cage top
-
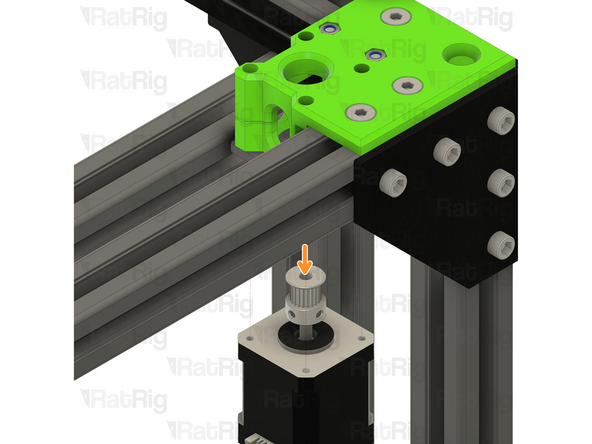
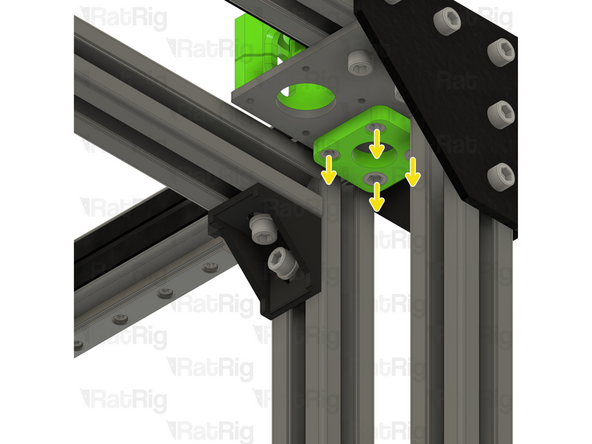
Position the NEMA17 motor up and into the motor cage from below, it will be secured in the next step
This step can be skipped if step 10 and 11 are not done yet. I put duct tape on actual end of the belts and continued with duct tape on the new ones ( NOT overlying the old and new belts cause it would not pass through the small space). I pulled the new belts without any issue using the old belts. Total time for both belts less then 5 minutes and no need to remove so many screws.
Samuel Lazea - Resolved on Release Reply
-
-
-
Insert the M3x35 screws into the xy_motor_cage_left_top as shown, and fasten them to secure the NEMA17 motor to the mount
-
Check the alignment of the timing pulley, the belt should be on the middle of the pulley as shown
-
Adjust the pulley up or down if required to make sure the belt is in the middle of the pulley
-
Fasten both M3 grub screws to securely mount the timing pulley to the NEMA17 motor shaft
-
Repeat Steps 21 - 24 for the other CoreXY motor mount cage.
This step can be skipped if step 10 and 11 are not done yet. I put duct tape on actual end of the belts and continued with duct tape on the new ones ( NOT overlying the old and new belts cause it would not pass through the small space). I pulled the new belts without any issue using the old belts. Total time for both belts less then 5 minutes and no need to remove so many screws.
Samuel Lazea - Resolved on Release Reply
-
-
-
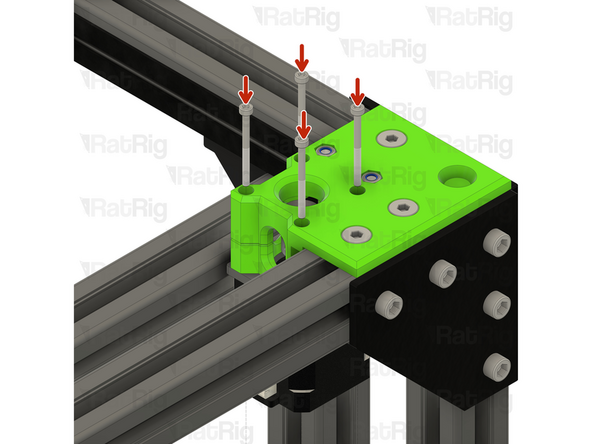
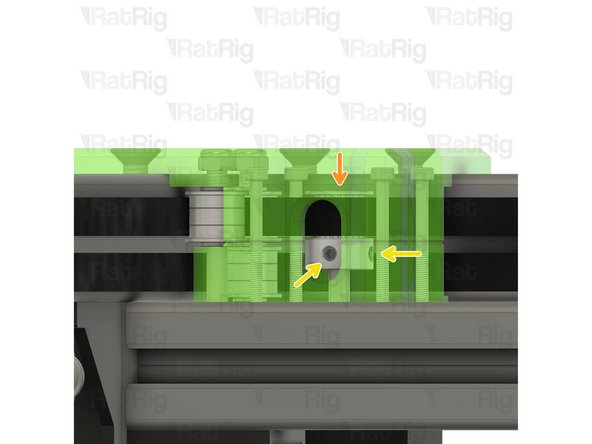
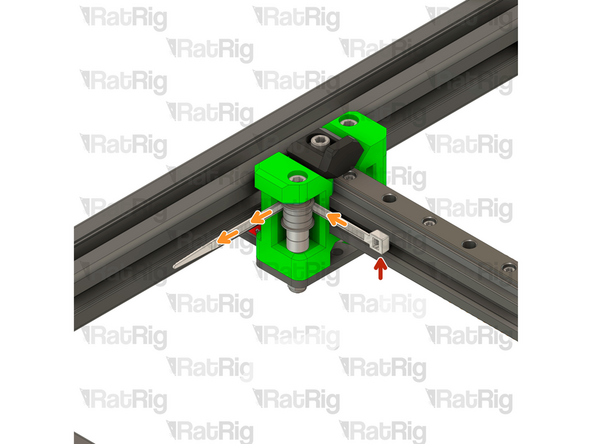
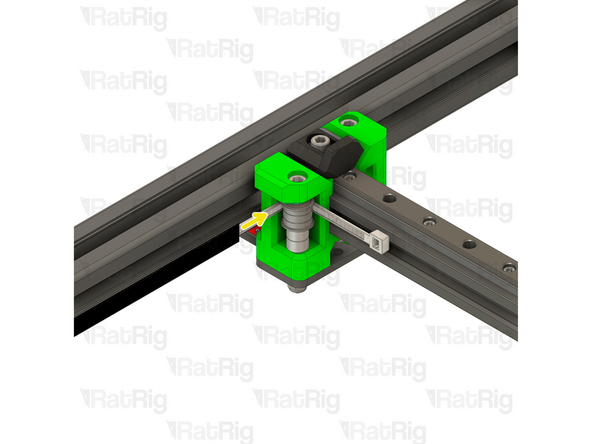
This step is not mandatory, it's just a Rat Rig tip on how to feed the belts on the idlers.
-
Zip Tie
-
The wider the zip tie is, the easier the process will be
-
Bend the tip of the zip tie a little bit and feed it between the printed part and the idler, as shown
-
Insert the belt between the zip tie and the idler
-
Slowly feed the belt and pull the zip tie at the same time
-
-
-
Take the loose end of the top CoreXY belt on the left hand side:
-
Feed the belt behind the left xy_joiner
-
Down and around the front xy_idler
-
Around the front bearing stack on the left xy_joiner
-
Take the loose end of the bottom CoreXY belt on the left hand side:
-
Feed the belt around the rear bearing stack on the xy_joiner
-
-
-
Take the loose end of the bottom CoreXY belt on the right hand side:
-
Feed the belt behind the right xy_joiner
-
Down and around the front xy_idler
-
Around the front bearing stack on the right xy_joiner
-
Take the loose end of the top CoreXY belt on the right hand side:
-
Feed the belt around the rear bearing stack on the xy_joiner
-
-
-
3x M6x12 Cap Head Screw
-
2x M3x8 Cap Head screw
-
3x 3030 M6 Drop In T-nut
-
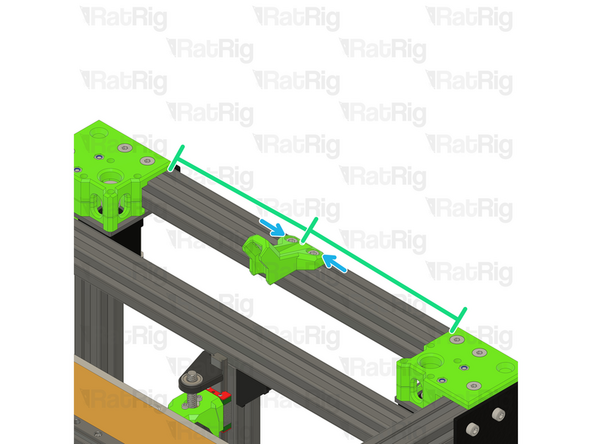
Y endstop
-
Y_endstop printed part
-
Umbilical_frame printed part
-
-
-
2x M6x12 Cap Head Screw
-
Install the M6 cap head screws into the printed part as shown.
-
Umbilical_frame printed part
-
3030 M6 Drop In T-nut
-
Loosely thread a 3030 M6 T-Nut onto the M6x12 screws. Do not tighten it at this point
-
Make sure the printed part is on the middle of the rear extrusion.
-
Tighten the M6x12 screw to secure the umbilical mount to the frame.
-
-
-
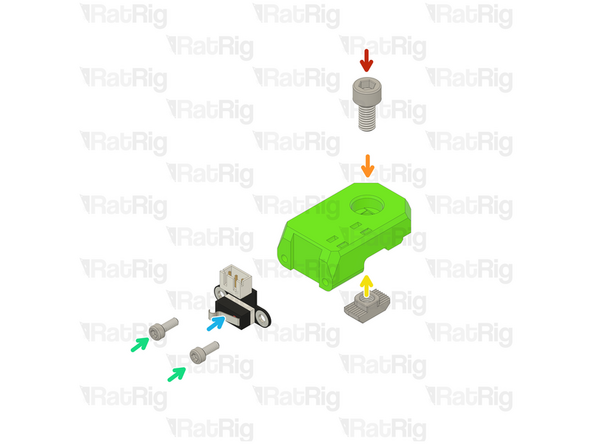
M6x12 Cap Head Screw
-
Y_endstop printed part
-
3030 M6 Drop In T-nut
-
Loosely thread a 3030 M6 T-Nut onto the M6x12 screw. Do not tighten it at this point
-
2x M3x8 Cap Head Screw
-
Y Endstop
-
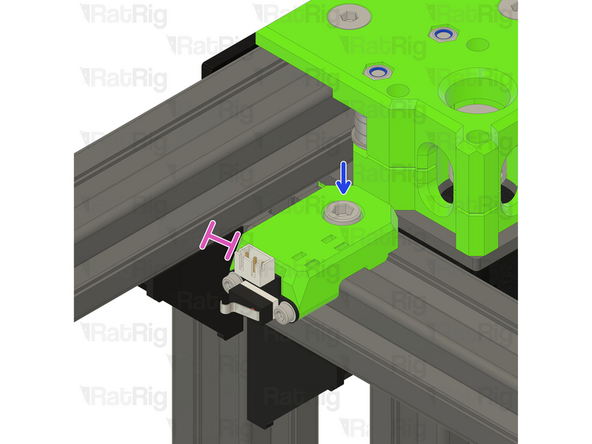
Tighten the M6x12 screws to secure the endstop mount.
-
Ensure a 5mm gap between the 3030 extrusion and the Y_endstop printed part, this distance is required for the belts to operate smoothly.
-
-
-
Rat Rig toolhead plate
-
Rat Rig toolhead front printed part
-
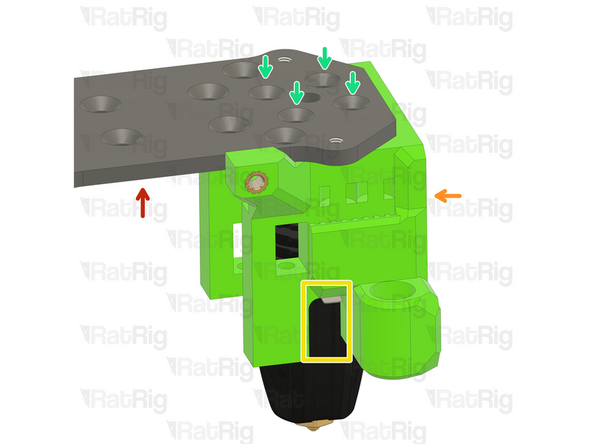
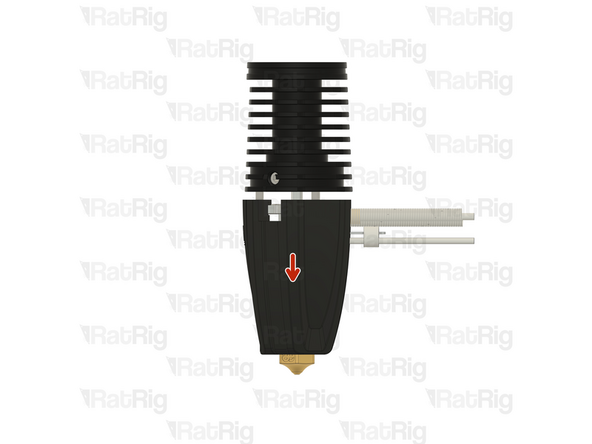
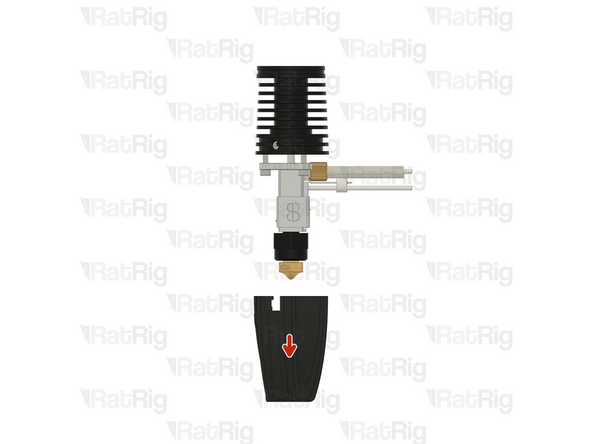
Insert the rapido on the printed part as shown, and make sure the cables are positioned in the designated slot.
-
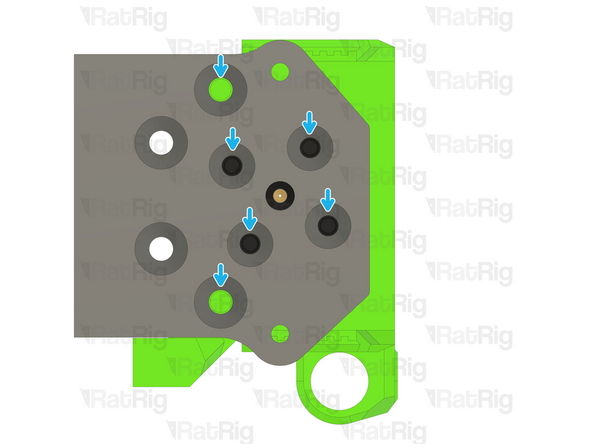
Look from above and see if all the holes line up correctly.
-
All the holes on the plate, hotend and printed part should line up:
-
If they align skip to step 35
-
If they don't align follow the next steps
@ratrig I guess here you meant step 36 instead of step 26 ;) Link is ok but text is wrong
Samuel Lazea - Resolved on Release Reply
-
-
-
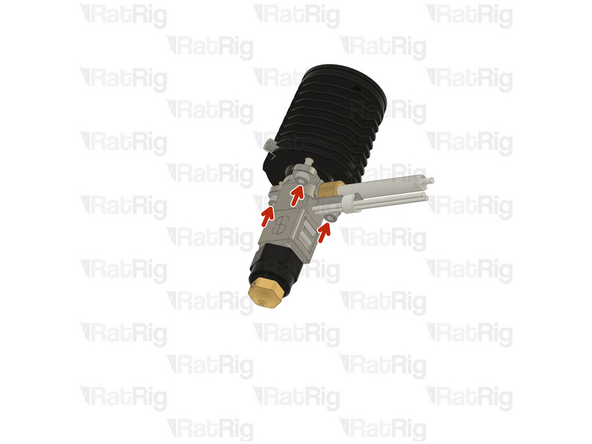
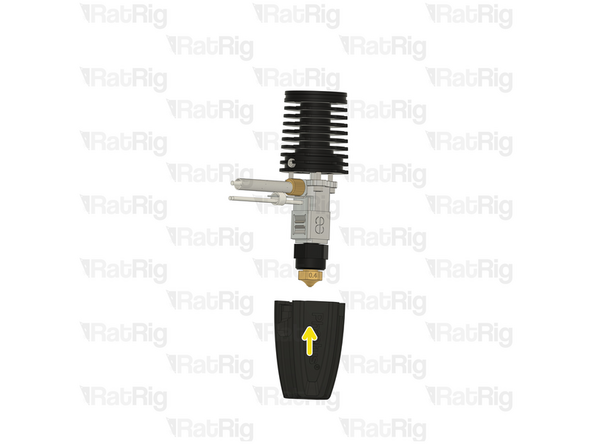
If the cables of your Rapido 2 hotend don't align perfectly with the toolhead slot, please follow the next steps:
-
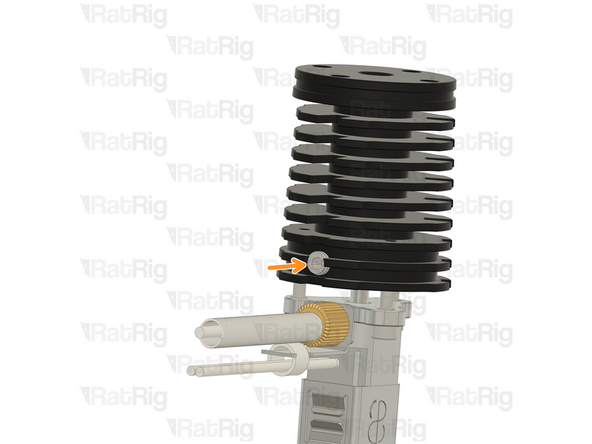
Push down on the silicone sock to remove it
-
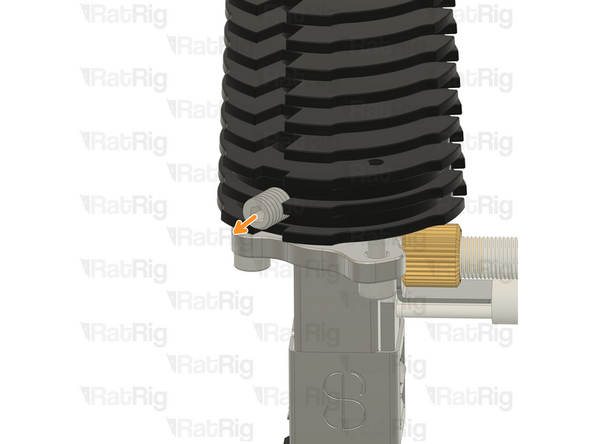
Loosen the set screw on the heatsink
-
Do not remove it completely to avoid losing it
-
-
-
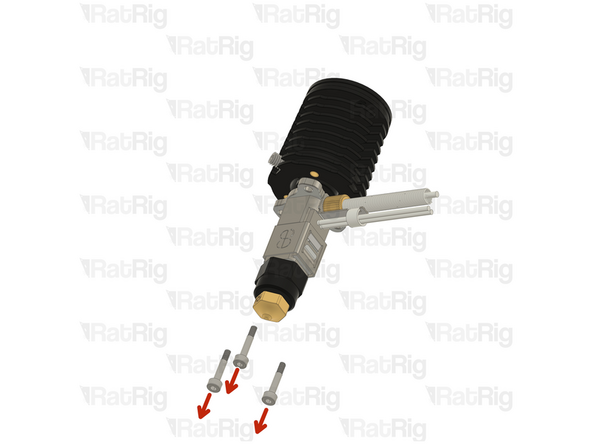
Remove the 2.5 Cap Head Screws from the hotend
-
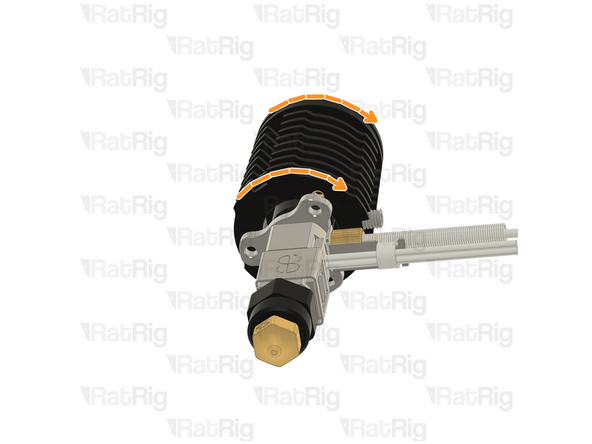
Carefully rotate the heatsink until the three screw holes align again.
-
There isn't a way to teel how much you need to rotate you hotend, it might be just 120º or it might be 240º. It's a matter of trial and error.
-
-
-
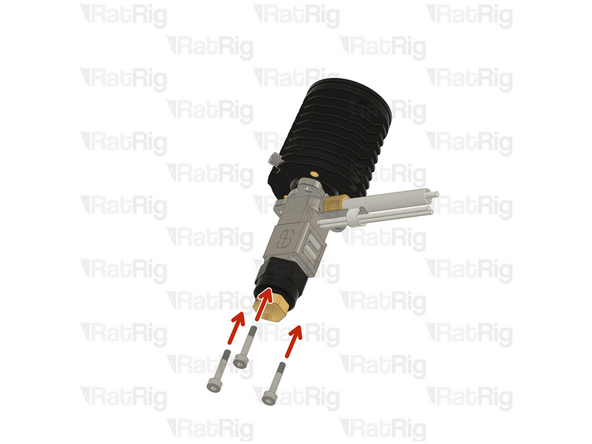
Insert the 2.5mm Cap Head Screws back in and tighten them.
-
DO NOT overtighten the screws, they are only 2.5mm and will break if excessive force is applied.
-
Tighten the set screw back in
-
DO NOT overtighten the screw, if excessive force is applied the heatbreak will be permanently damaged.
-
Put the socket back on
-
Try to insert the hotend on the toolhead and see if the cables align with the designated slot, if not, repeat steps 32-34 and try a different angle in step 34
-
-
-
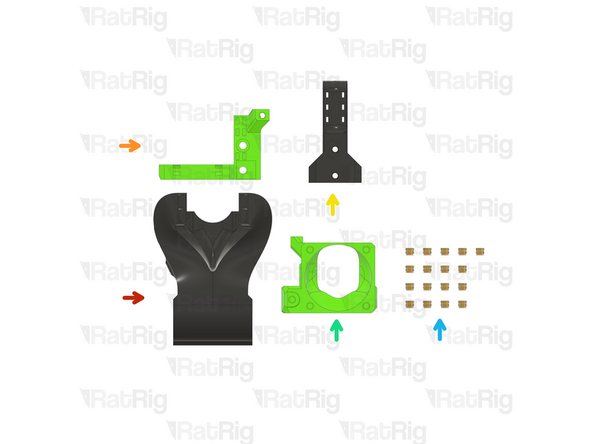
1x Rat Rig toolhead duct printed part
-
1x Rat Rig toolhead back printed part
-
1x Rat Rig toolhead umbilical printed part
-
1x Rat Rig toolhead front printed part
-
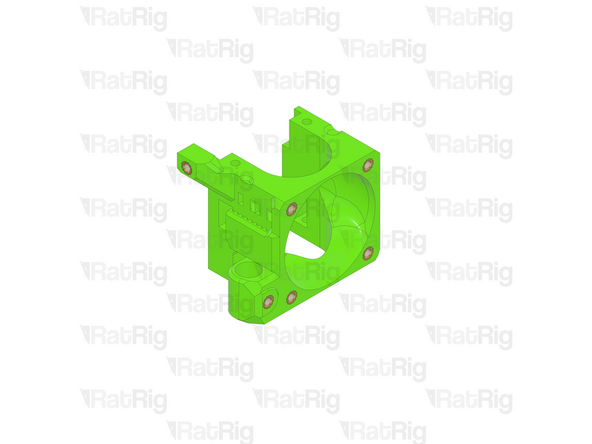
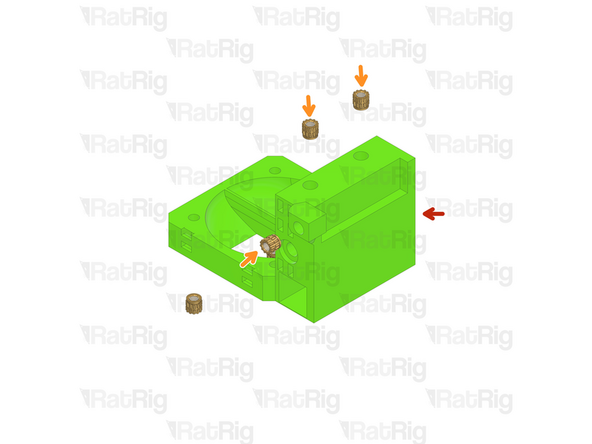
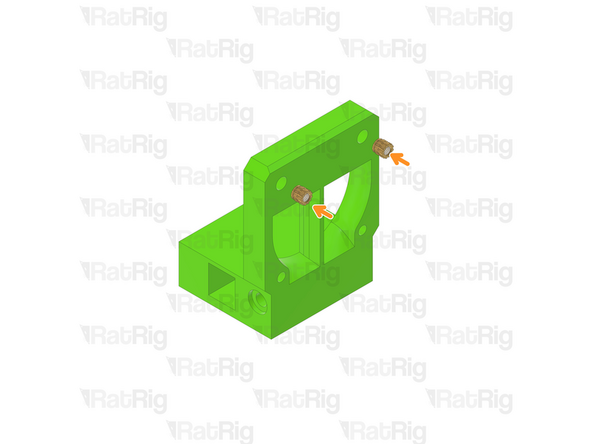
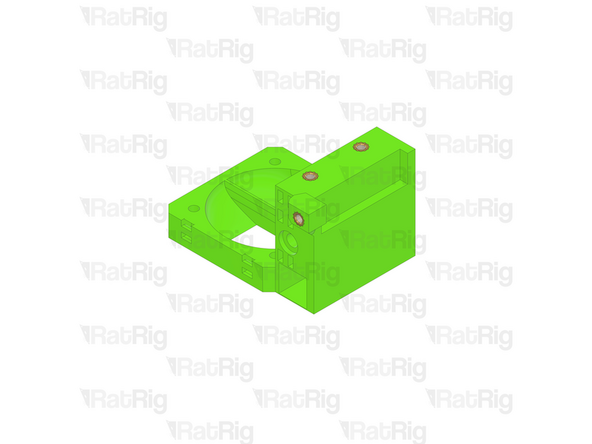
17x Heat insert M3
-
If you bought the printed parts from Rat Rig, the heat inserts are already in place. Skip to Step 40.
-
-
-
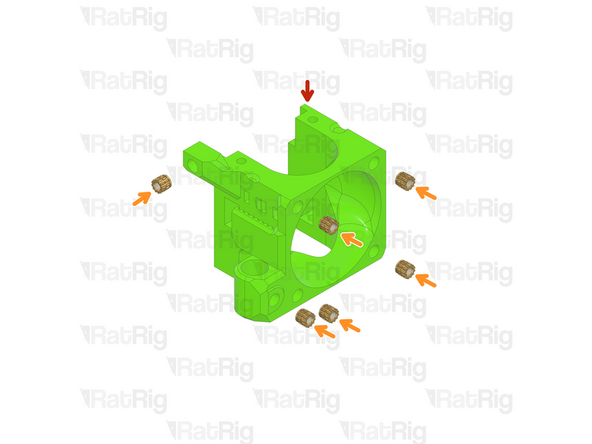
Rat Rig toolhead front printed part
-
6x Heat insert M3
The hole is meant for an M3x4 heat insert, which avoids collision with the probe, it has been tested and you can check on the CAD as well https://docs.ratrig.com/v-core-3-1/ratri...
-
-
-
Rat Rig toolhead back printed part
-
5x Heat insert M3
-
-
-
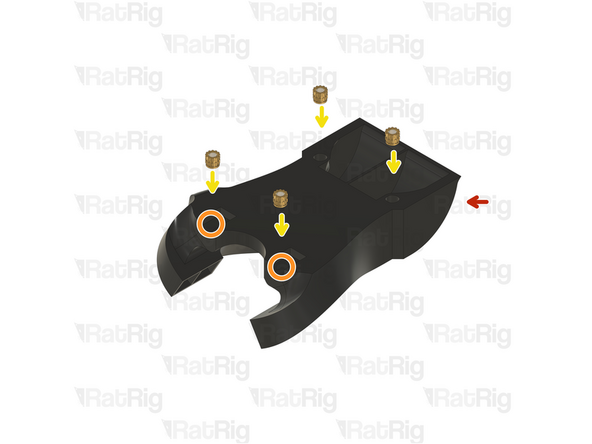
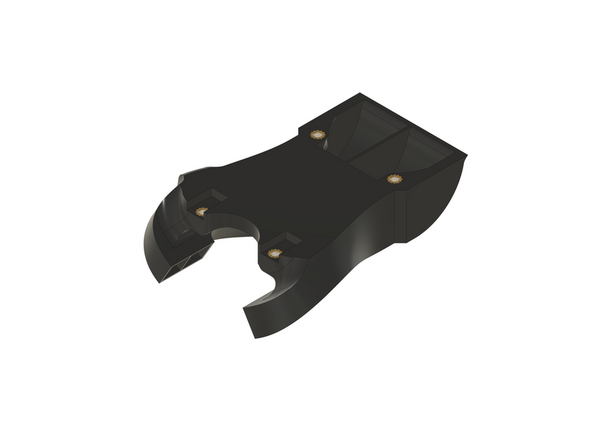
Rat Rig toolhead duct printed part
-
This printed part has sacrificial layers. It is recommended to remove them by using a screwdriver, a hex key, or a drill, to push through the layers. This clears the holes for the screws.
-
4x Heat insert M3
You can not get heat inserts into the duct at the vents without melting the vents.
The heat inserts are meant to be placed on the top side, you need to remove the sacrificial layer to gain access for the head insert. Thank you for your feedback, the mistake on the image was corrected.
Rat Rig -
-
-
-
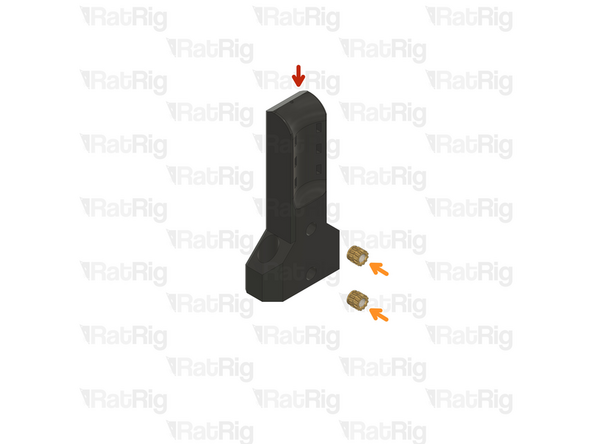
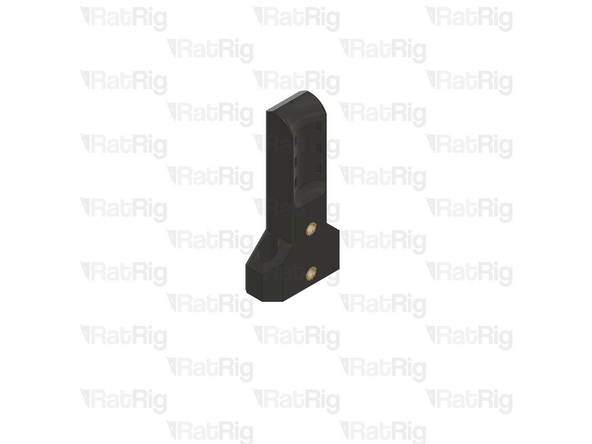
Rat Rig toolhead umbilical printed part
-
2x Heat insert M3
-
-
-
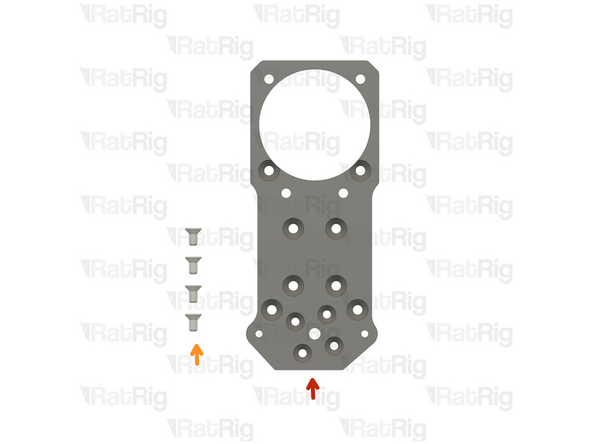
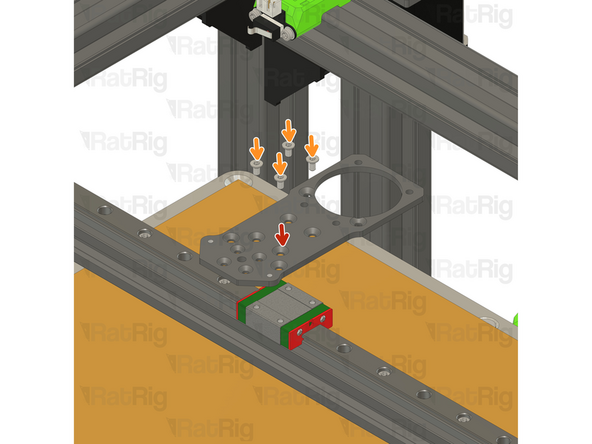
Rat Rig toolhead plate
-
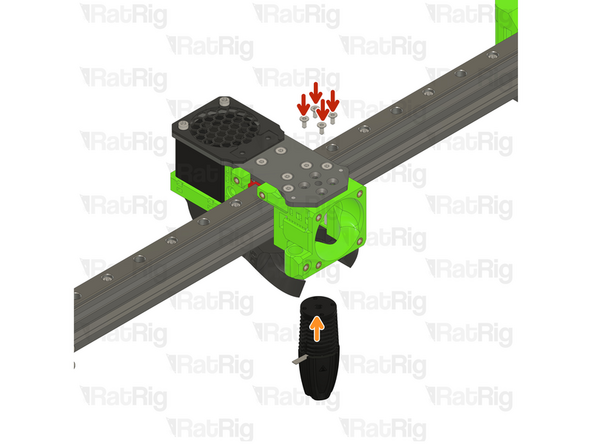
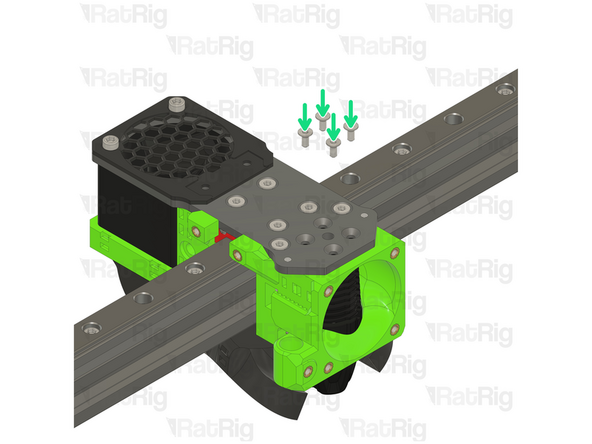
4x M3x6 Countersink Screw
-
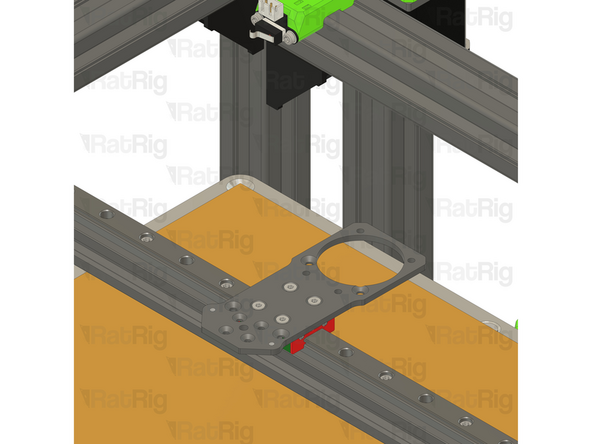
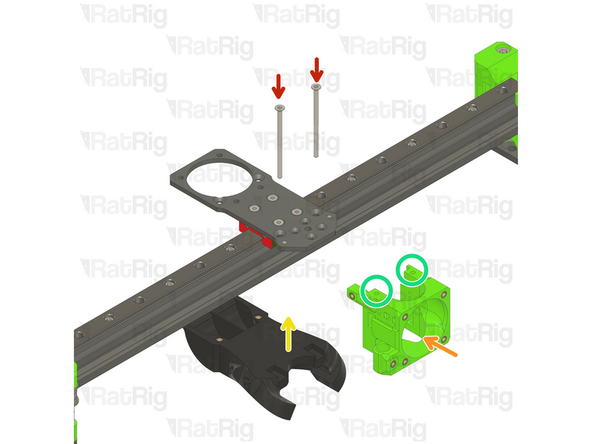
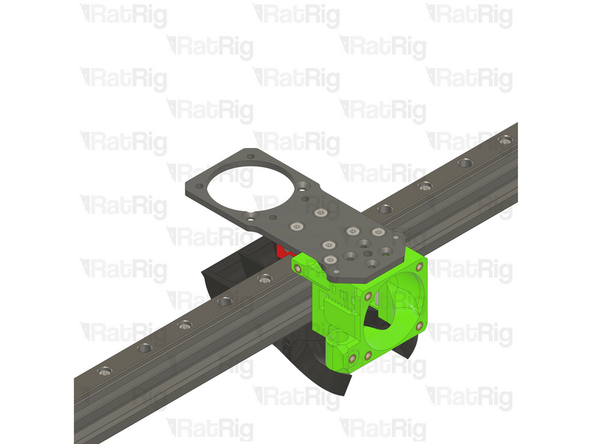
Tighten the M3x6 Countersink Screws to secure the plate to the carriage.
-
Avoid using a ball end hex key, as they are more prone to damaging the sensitive M3 countersink screw head.
-
-
-
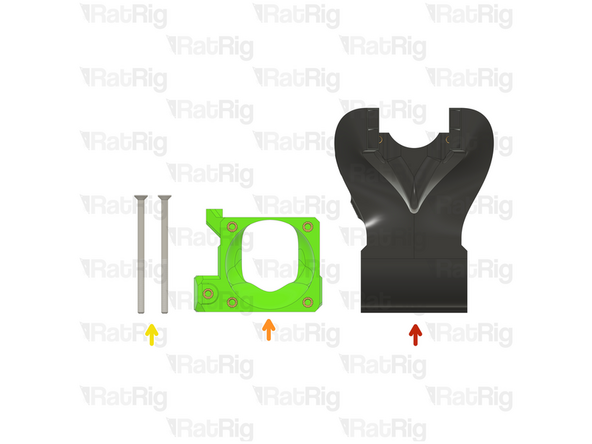
1x Rat Rig toolhead duct assembly
-
1x Rat Rig toolhead front assembly
-
2x M3x50 Countersink Screw
-
-
-
2x M3x50 Countersink Screw
-
Rat Rig toolhead front assembly
-
Rat Rig toolhead duct assembly
-
The M3x50 countersink screws must go through the holes on the front assembly
-
Take care not to over tighten the M3x50 screw as you can damage the printed parts
-
Avoid using a ball end hex key, as they are more prone to damaging the sensitive M3 countersink screw head.
You may want pre thread the screw through the bottom of the Rat Rig toolhead front assembly to make it easier to thread it through all the way through. The amount of resistance is very high otherwise and you risk snapping/damaging the Countersink screw otherwise
Ross Sigworth - Resolved on Release Reply
-
-
-
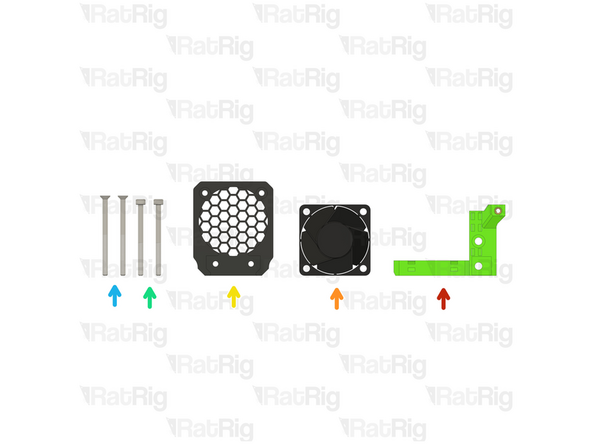
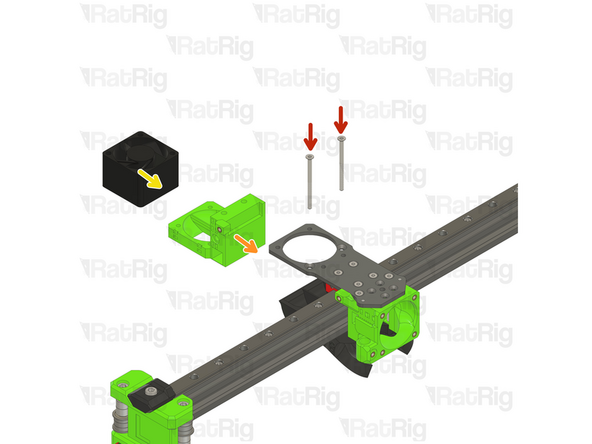
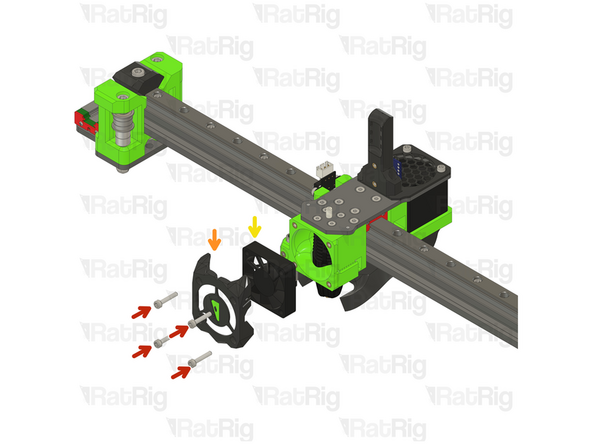
1x Rat Rig toolhead back assembly
-
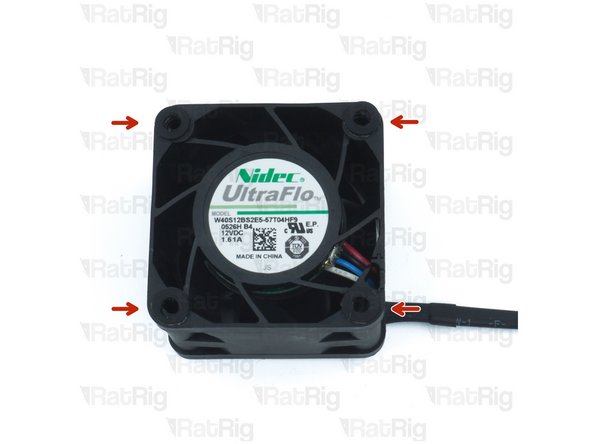
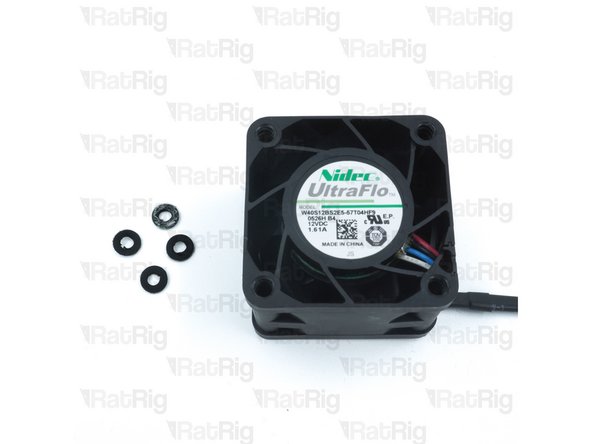
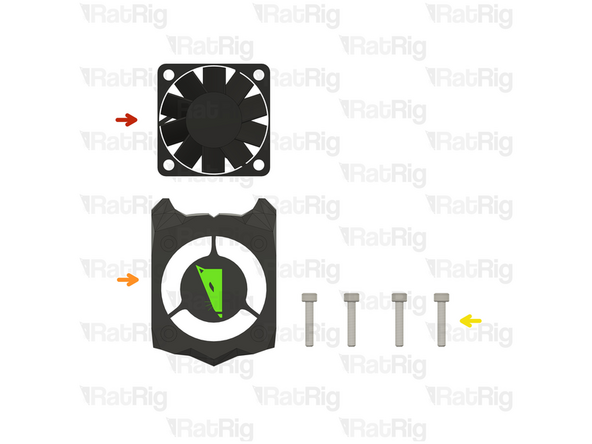
1x 4028 Part Cooling Fan
-
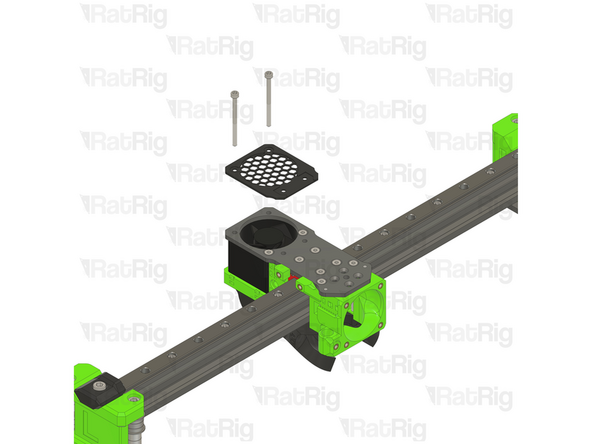
1x Rat Rig toolhead fan grille printed part
-
2x M3x40 Cap Head Screw
-
2x M3x45 Countersink Screw
-
-
-
2x M3x45 Countersink Screw
-
Rat Rig toolhead back assembly
-
4028 Part Cooling Fan
-
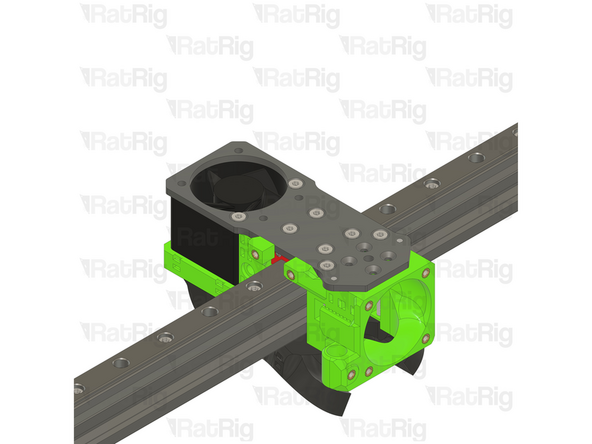
Tighten the M3x45 screws.
-
Take care not to over tighten the M3x45 screws as you can damage the printed parts
-
Avoid using a ball end hex key, as they are more prone to damaging the sensitive M3 countersink screw head.
-
-
-
2x M3x40 Cap Head Screw
-
Rat Rig toolhead fan grille printed part
-
Take care not to over tighten the M3x45 screws as you can damage the printed parts
-
-
-
Insert the belt on the toolhead slot, behind the screw.
-
Reverse the belt around the screw and then reinsert it into the slot.
-
Insert the belt on the toolhead grabber.
-
Repeat for the other front belt end.
It's easier if you take out the M3x50 Countersink Screw from Step 43 again (one by one), put your belt in and a loop through the slot, and then screw the M3x50 Countersink Screw back in place, then reverse the belt around the screw. Be careful not to damage your belt.
Inserting the belt into the toolhead grabber is far easier if you pull the belt through much more then needed. This gives you enough length to bend the belt and fit it into the grabber. After it's in place, you can pull the overlength back. I'm not sure how secure this is, the EVA clamp felt much more secure.
Stefan Wilkens - Resolved on Release Reply
-
-
-
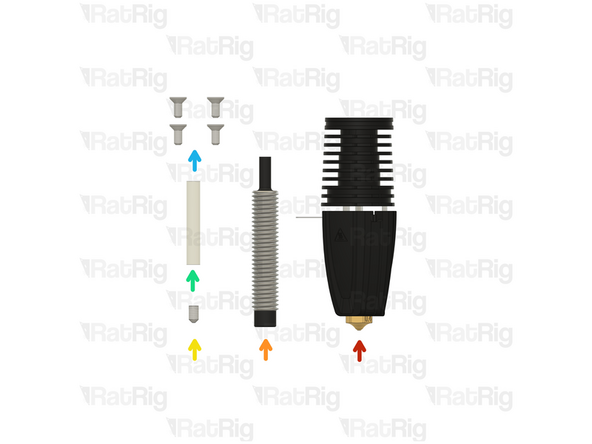
1x Phaetus Rapido UHF Hotend
-
1x Rat Rig SuperPinda Probe by P&F
-
1x M3x5 Set Screw
-
1x PTFE tube - 24.5mm
-
4x M2.5x6 Countersink Screw
-
-
-
4x M2.5x6 Countersink Screw
-
Phaetus Rapido UHF Hotend
-
Place the Phaetus Rapido UHF Hotend on the plate, making sure to route the cables through the designated slot
-
Tighten the M2.5x6 Countersink Screws to secure the hotend to the plate
-
Avoid using a ball end hex key, as they are more prone to damaging the sensitive M2.5 countersink screw head.
-
-
-
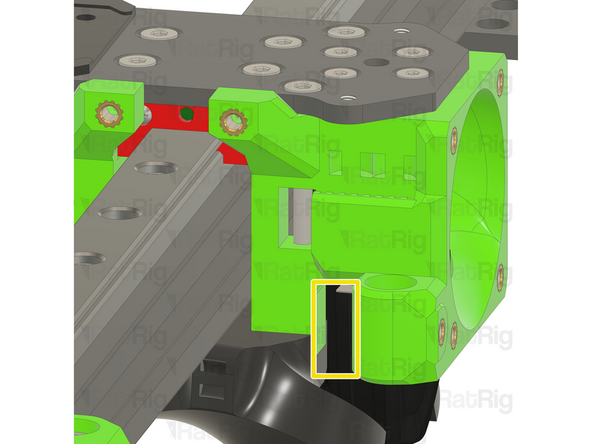
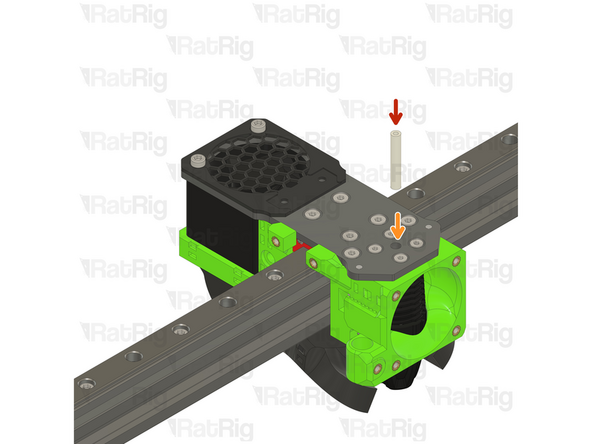
PTFE tube - 24.5mm
-
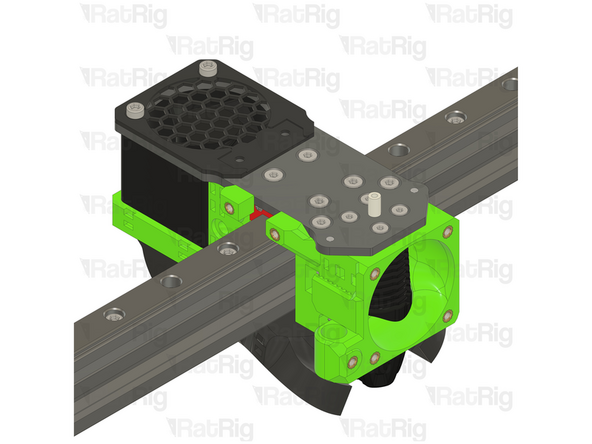
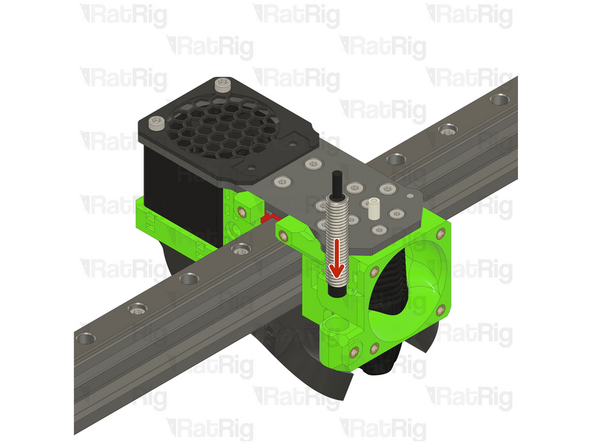
Insert the PTFE tube in to the marked hole and push it until it stops
-
-
-
Rat Rig SuperPinda Probe by P&F
-
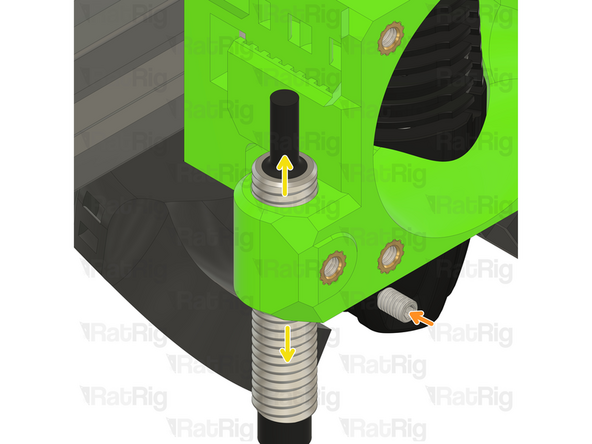
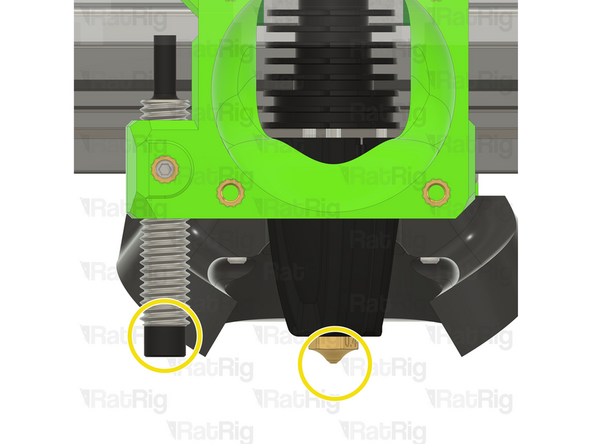
The Rat Rig SuperPinda Probe needs to be at the correct height to trigger properly
-
A recommended method to set the correct height is to rest the hot end nozzle on the bed, and then place a cable tie between the bed and the tip of the probe
-
Adjust the probe up to down as necessary to position the tip 1mm higher than the hot end nozzle
-
M3x5 Set Screw
-
Tighten the M3x5 to secure the probe in place
-
Do not over-tighten the M3x5 screw, doing so can damage the probe or printed probe mount
-
-
-
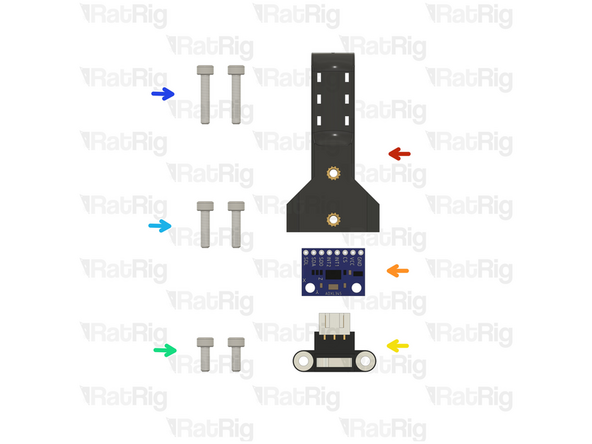
1x Rat Rig toolhead umbilical assembly
-
1x ADXL 345 Accelerometer
-
1x X Endstop
-
2x M3x8 Cap Head Screw
-
2x M3x12 Cap Head Screw
-
2x M3x16 Cap Head Screw
-
If your configuration uses a toolboard, you can skip to Step 56. The toolboard mount will be installed later.
-
-
-
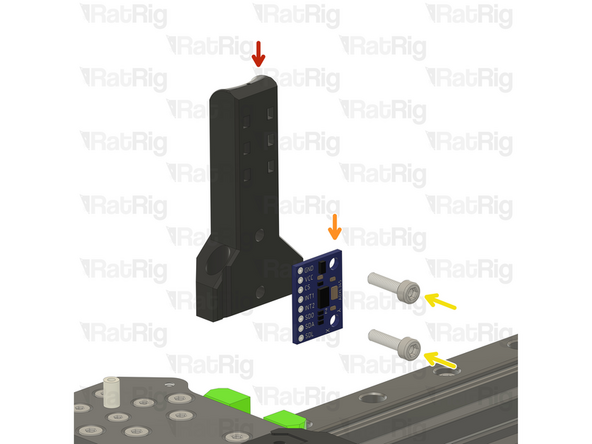
Rat Rig toolhead umbilical assembly
-
ADXL 345 Accelerometer
-
2x M3x12 Cap Head Screw
-
Mount the ADX 345 to the umbilical assembly
-
Take care not to over tighten the M3x12 screws as you can damage the printed parts
-
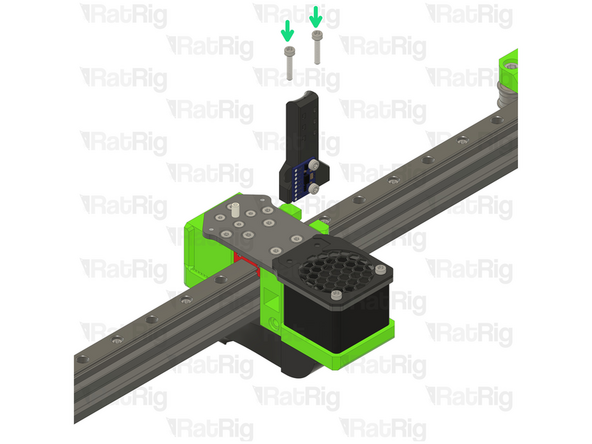
2x M3x16 Cap Head Screw
-
Tighten the M3x16 screws to secure the umbilical assembly to the plate.
-
Take care not to over tighten the M3x16 screws as you can damage the printed parts
-
-
-
2x M3x8 Cap Head Screw
-
X Endstop
-
Tighten the M3x8 screws to secure the X endstop to the toolhead.
-
Take care not to over tighten the M3x8 screws as you can damage the printed parts
-
-
-
1x 40x10mm 24V Axial Fan
-
1x Rat Rig toolhead shroud printed part
-
4x M3x16 Cap Head Screw
-
-
-
4x M3x16 Cap Head Screw
-
Rat Rig toolhead shroud printed part
-
40x10mm 24V Axial Fan
-
Insert the M3x16 screws into the Rat Rig toolhead shroud printed part, through the 40mm fan, and fasten them into the Rat Rig toolhead front
-
-
-
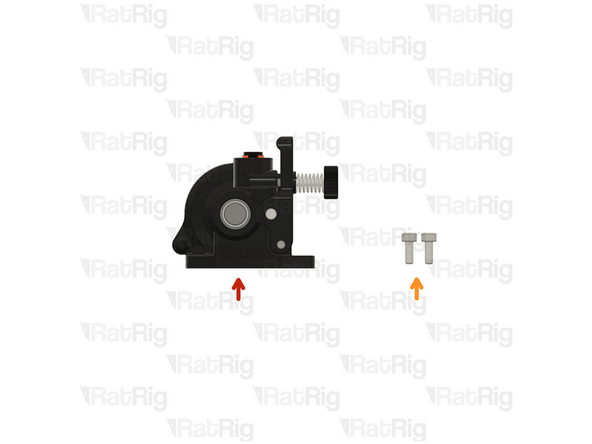
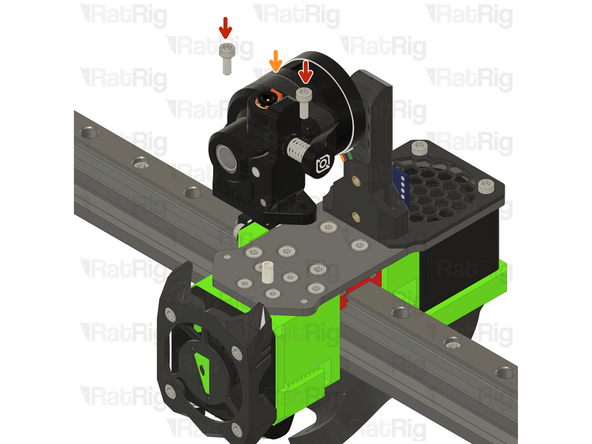
2x M3x8 Cap Head Screw
-
LDO Orbiter V2
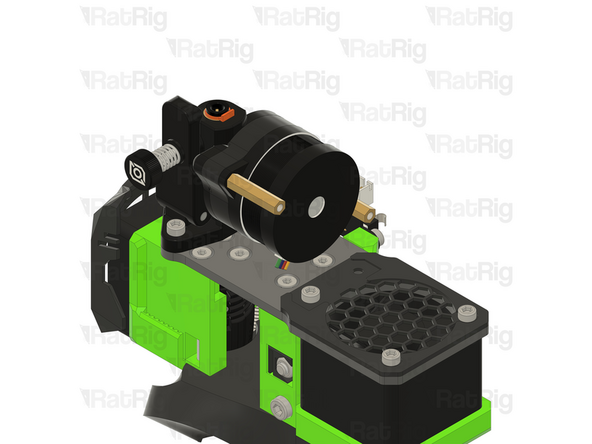
-
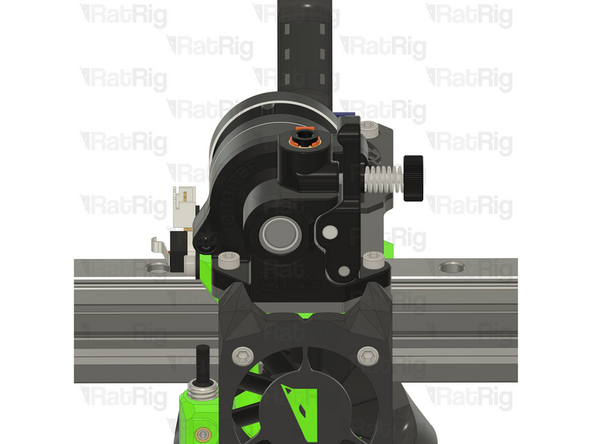
Insert the M3x8 screws into the LDO Orbiter V2 and fasten them to the Rat Rig toolhead plate.
If you were unlucky, you got a toolhead plate where the mounting holes for the LDO Orbiter have not been threaded. Contact RatRig for a replacement or go buy an M3 tap from the hardware store and take care of it yourself.
Ken Kirchner - Resolved on Release Reply
-
-
-
Make sure the belt is properly seated on all idlers and pulleys.
-
Mark the belt where it meets the Rat Rig toolhead assembly. This can be done with a marker, or simply by holding it.
-
From the mark, towards the loose end of the belt, measure 23mm (or count 12 teeth)
-
It is better to cut the belt too long than too short! If you are unsure, cut it longer than expected, you can always remove more if needed
-
Double check your measurements and then cut the belt at this point
-
-
-
Rat Rig toolhead belt tensioner
-
M4 Nylon Locking Hex Nut
-
Insert an M4 nylon locking nut into the Rat Rig toolhead belt tensioner as shown
-
Insert the end of the belt inside the belt tensioner, and make sure the teeth are secured.
-
M4x40 Cap Head Screw
-
Tighten the M4x40 Cap Head just enough to hold the M4 Nylon Locking Hex Nut
-
The belts should not be tighten at this point.
-
Repeat Steps 60 and 61 to cut and insert the other belt.
@ratrig are you sure this are M5 screws and nuts? supplied ones are M4
Samuel Lazea - Resolved on Release Reply
-
-
-
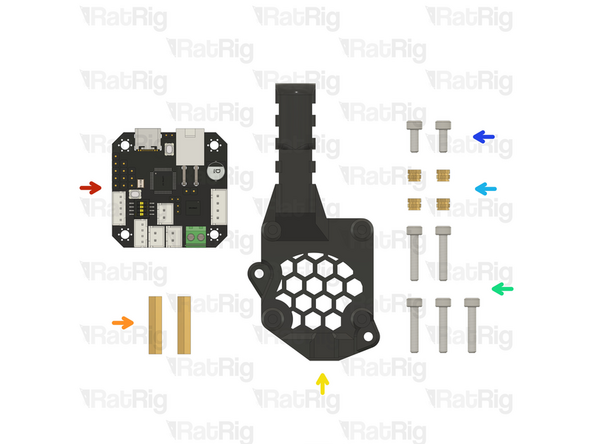
The toolboard configuration is optional, please skip to Step 68 if you are not using it.
-
BIGTREETECH EBB42 USB/CAN TOOLBOARD V1.2
-
2x Hex standoff brass M3x20x4.5
-
Rat Rig toolhead_vc3_ebb42_vertical
-
5x M3x16 Cap Head Screw
-
4x Heat insert M3
-
2x M3x8 Cap Head Screw
-
-
-
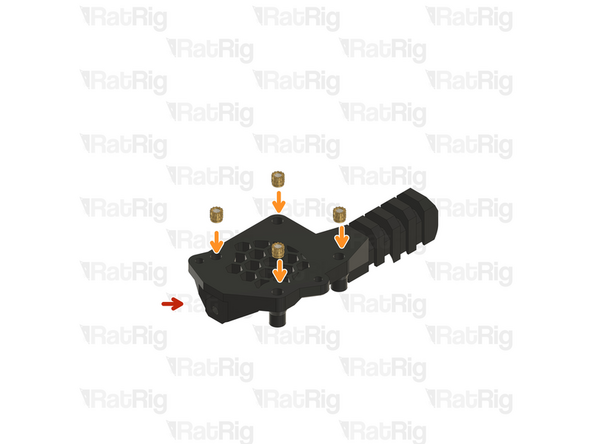
Rat Rig toolhead_vc3_ebb42_vertical
-
4x Heat insert M3
-
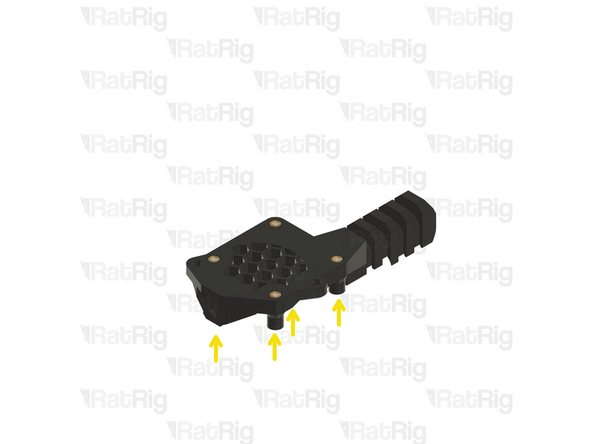
This printed part has sacrificial layers which need to be removed prior to assembly.It is recommended to remove them by using a screwdriver, a hex key, or a drill, to push through the layers. This clears the holes for the screws to thread in to the head inserts
-
-
-
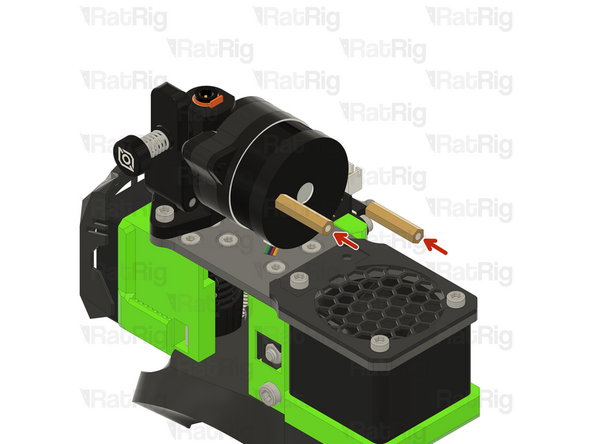
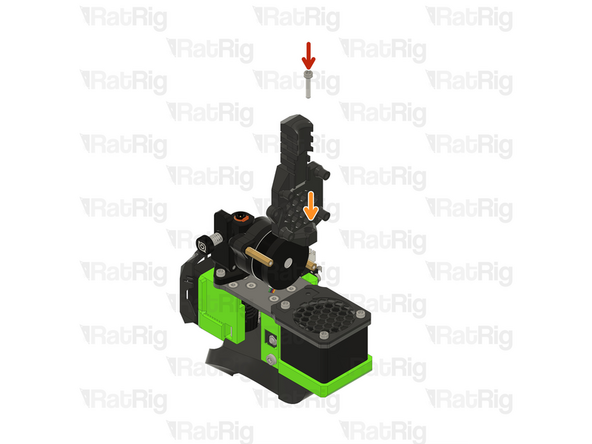
Thread the hex standoffs on to the LDO Orbiter V2 screws.
-
Do not overtighten the hex standoffs as they are brass and it is possible to strip the threads.
-
-
-
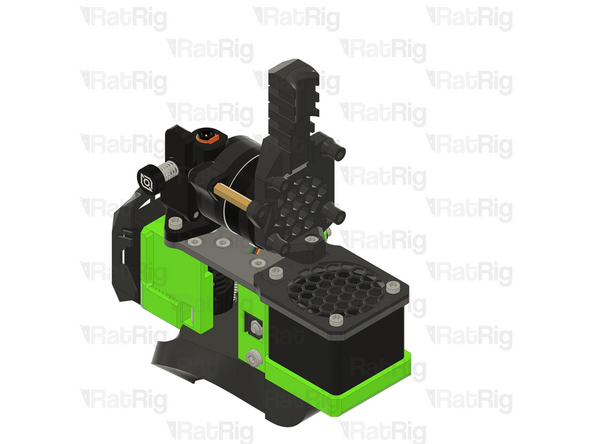
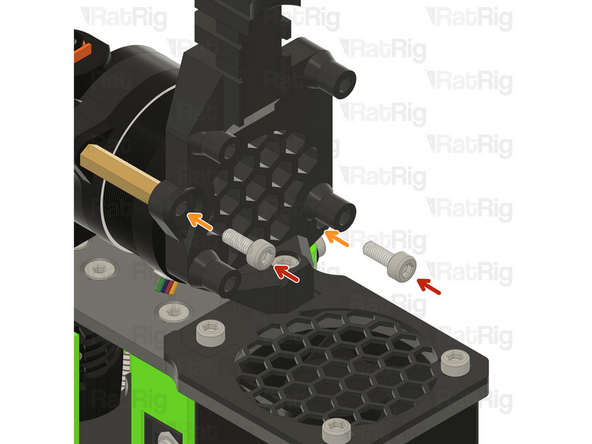
Insert the M3x16 Cap Head Screw in to the Rat Rig toolhead_vc3_ebb42_vertical printed part and thread it on the toolhead.
-
Assembly from Step 63
-
Take care not to over tighten the M3x16 screws as you can damage the printed parts
-
-
-
2x M3x8 Cap Head Screw
-
Insert the M3x8 Cap Head Screws in to the printed part and thread them to the hex standoffs
-
Take care not to over tighten the M3x8 screws as you can damage the printed parts
-
-
-
BIGTREETECH EBB42 USB/CAN TOOLBOARD V1.2
-
Insert the M3x16 Cap Head Screws into the toolboard and thread them into the vertical toolboard mount
-
Take care not to over tighten the M3x16 screws as you can damage the printed parts and the toolboard
-
-
-
Follow this guide to correctly align the X-Axis Gantry: 11. X-Axis Gantry Alignment
-
-
-
Your V-Core 3.1 is now upgraded with the Rat Rig Toolhead V1.0 and it's ready to melt some filament!
-
A new toolhead is a big change for any 3D printer, make sure to follow the commissioning guide to properly tune it.
-
Cancel: I did not complete this guide.
One other person completed this guide.
One Comment
Come on RatRig you can do better than this. At least give us a hint to where the wires are routed because it isn't obvious from your instructions. The toolhead has been designed without a thought of wire routing. I have tried everything with this over several nights and I am very disappointed.


