-
-
The linear rails are supplied with a protective oil coating on them. It is strongly recommended to prepare your work surface with paper towels and to wear disposable gloves.
-
Paper Towels
-
Linear Rail
-
The oil on the rails protects them from rusting. You must either replace this oil after cleaning (as directed below), or make sure not to remove all of the original oil during preparation
-
An easy solution to both protect, and lubricate the rails, is using a light oil such as 3-in-1 or sewing machine oil
-
Apply a small amount of oil to a paper towel and then apply the oil to the rail by wiping it with the oiled paper towel. This may be done prior to, or after the installation of the linear rails.
-
Remove the plastic stops installed in the ends of the linear rail
-
More advanced users may wish to fully grease the rails & carriage with a specialised bearing lubricant. It is important to use the correct grade and make sure there are no additives such as PTFE, graphite, molybdenum disulfide, etc. The recommended grade of grease is EP00 or EP000 as these lubricate well, without being too viscous.
-
-
-
With the rail still on the absorbent paper towels, carefully and slowly move the carriage from one end of the rail to the other
-
The carriage should move smoothly over the entire length of the rail
-
Small changes in resistance are normal, but the carriage becoming much harder to push, or binding completely are not
-
Repeat the previous test whilst applying a small amount of force downwards on the carriage
-
The carriage will likely travel more smoothly when applying a downwards force, this is normal
-
If the carriage does not move smoothly, or binds completely, refer to the Linear Rail Troubleshooting Guide
-
-
-
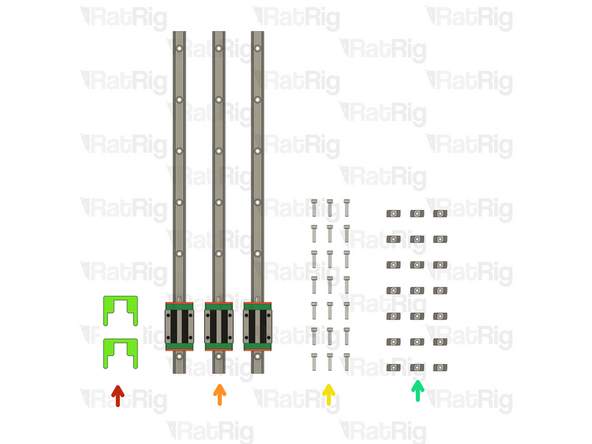
2x HG15 3030 alignment tool
-
3x Linear rail - HG15 400mm
-
Do not allow the linear rail carriage to leave the end of the rail
-
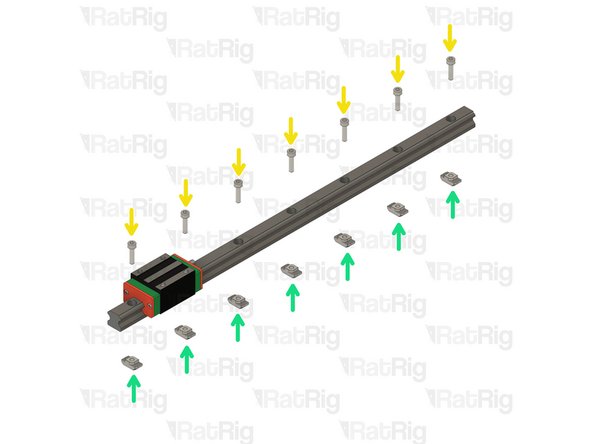
21x M4x16 Cap Head Screw
-
21x 3030 M4 Drop in T-Nut
-
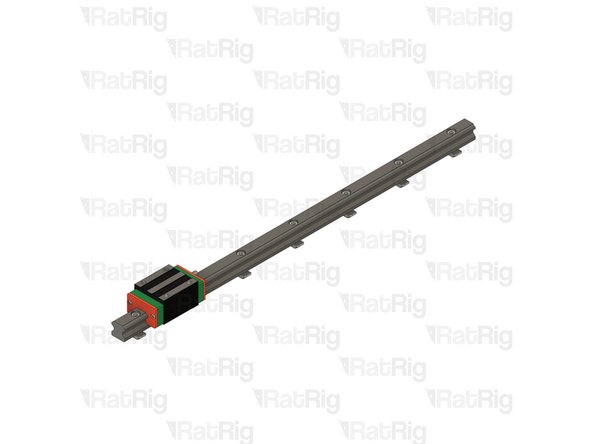
Loosely thread T-nut and a screw to every hole in the linear rails
-
V-Core 4 400 - 24 T-Nuts and Screws; V-Core 4 500 - 30 T-Nuts and Screws;
-
Repeat these steps for the other 2 rails
Are the linear rails in need of extra length if building the larger V-Core 4 500?
-
-
-
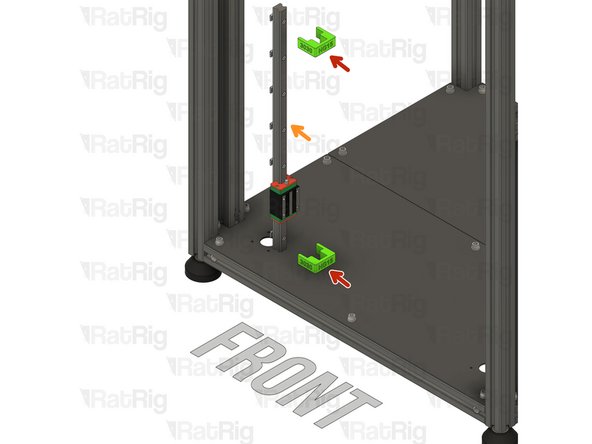
Install the two HG15 3030 alignment tools as shown, this will make sure the linear rail is positioned correctly
-
Insert the linear rail into the 3030 extrusion
-
Do not allow the linear rail carriage to leave the end of the rail
-
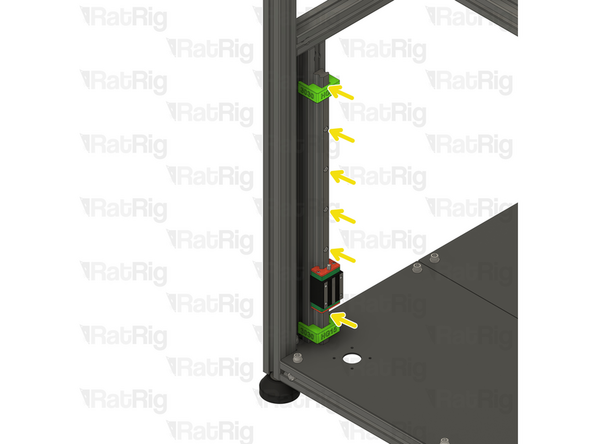
Fasten the marked M4x16 screws, starting from the bottom
-
Remove the MGN12 3030 alignment tools
-
Repeat these steps for the other 2 Z rails
-
-
-
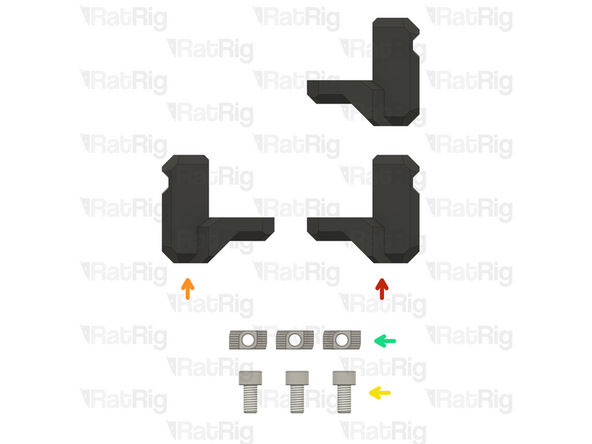
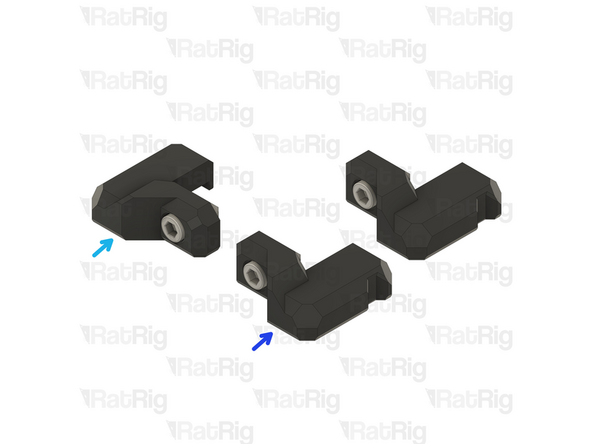
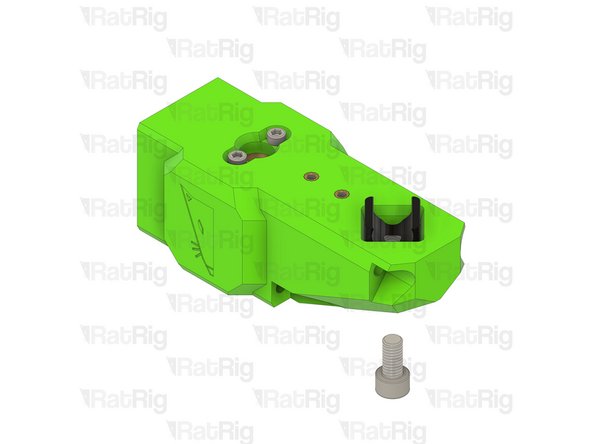
2x vc4_z_limit_right
-
1x vc4_z_limit_left
-
3x M6x12 Cap Head Screw
-
3x 3030 M6 Drop in T-Nut
-
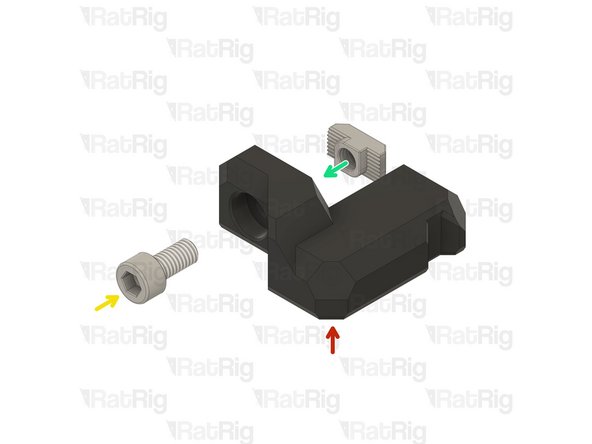
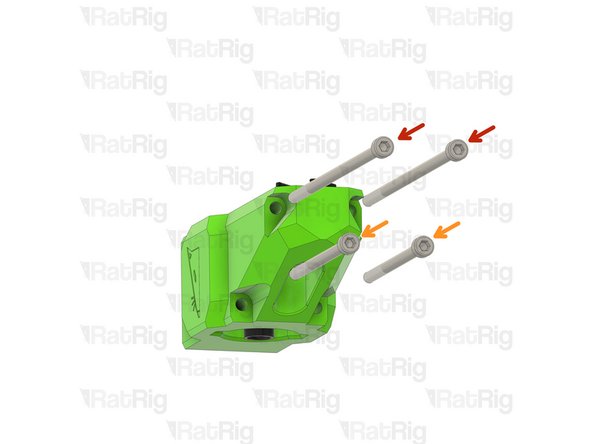
Loosely thread the 3030 T-Nuts onto the M6x12 screws. Do not tighten them at this point.
-
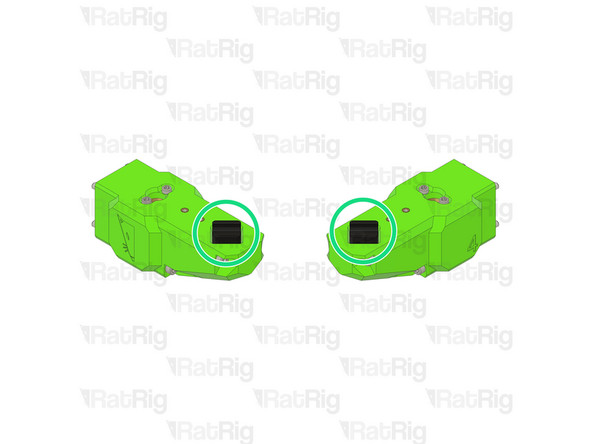
Prepare the all 3 Z-axis limit assemblies
-
1x left z limit assemblies
-
2x right z limit assembly
I think this should be 2x right and 1x left
Correct, the image has been corrected, Thank you for your feedback!
Rat Rig -
-
-
-
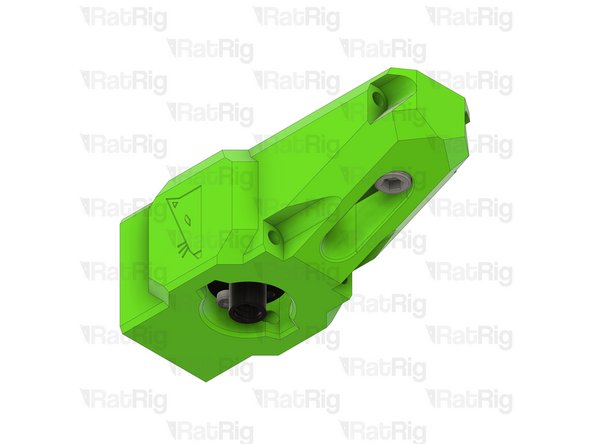
vc4_z_limit_left assembly
-
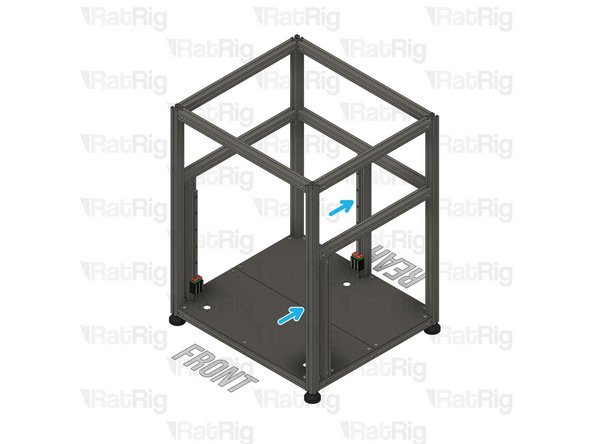
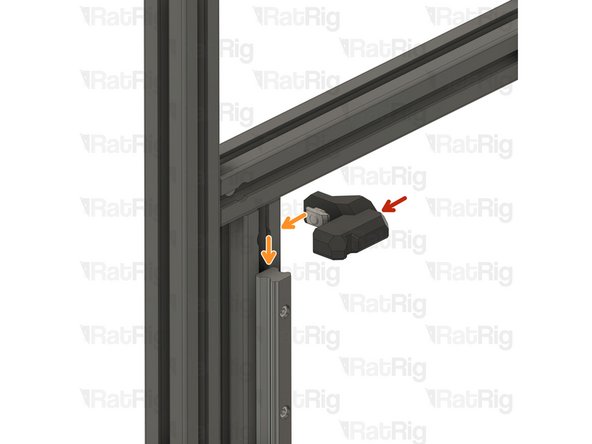
Insert the 3030 T-nut on the side of the extrusion and slide it down, until the vc4_z_limit_left assembly is flush with the linear rail
-
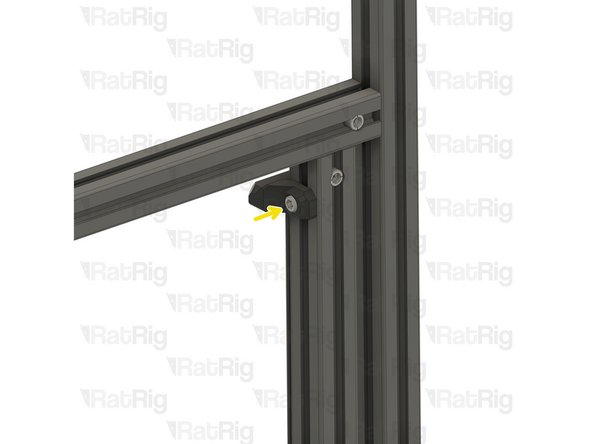
Tighten the M6x12 Cap Head Screw to secure the assembly
-
Take care not to over-tighten the M6x12 screws as you can damage the printed parts
-
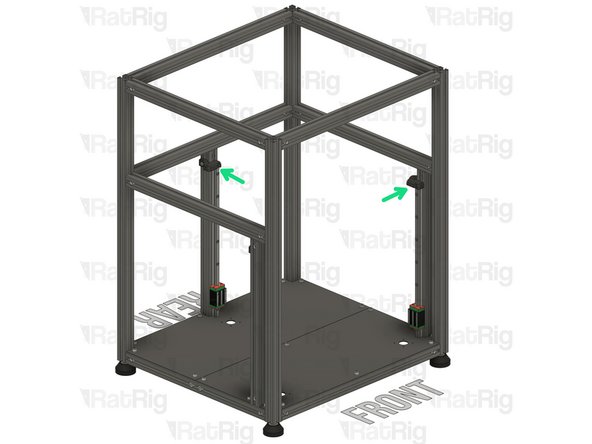
Repeat the previous steps and install the remaining vc4_z_limit_right assemblies
The tolerances on my printed parts were so tight they started to thread so be careful!!! Threading the plastic part will cause it to double tighten when installing increasing the chance it fails. I pushed the screw in and out multiple times to clear out the hole better and make sure it was open enough it would slide in and not thread in.
I recommend pressing the screw all the way into the plastic part, so that the screw head is almost aligned with the plastic (On some parts you have to apply some force here, as they have manufacturing tolerances).
Then screw the T-Nut onto the screw by JUST ONE turn.
Now place the part on the printer and tighten the screw SLOWLY.
Observe that the T-nut rotates 90 degrees. If not, DO NOT tighten, try again instead.
The part shown in the picture is left, not right.
The picture has been corrected, thank you for your feedback!
Rat Rig -
-
-
-
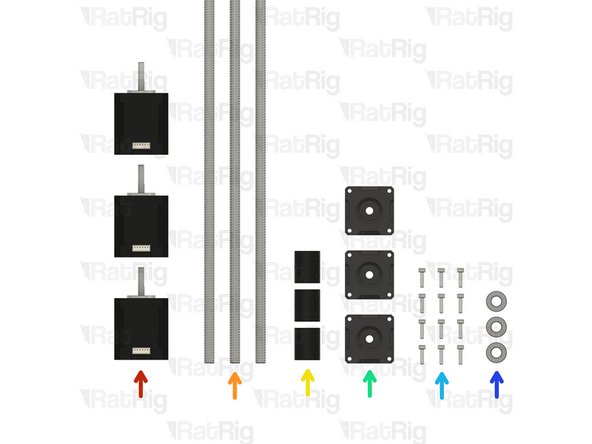
3x 48mm NEMA17 Stepper Motor
-
3x 375mm TR8x4 Lead Screws
-
3x Rigid Lead Screw Coupler
-
3x pillow_block printed part
-
More recent kits have this part injection molded, which is more accurate and easier to install.
-
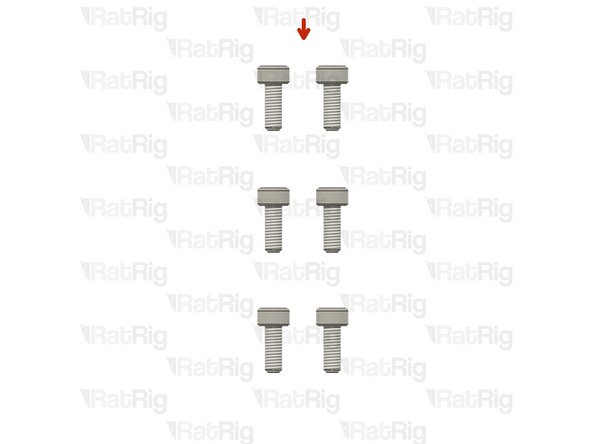
12x M3x12 Cap Head Screw
-
3x Axial Thrust Bearing
The bag with the thrust bearings is labelled: Thrust Bearing F8-16M (SKU: HW2118WC)
It contains three sub-bags which each contain
- 2 × silver washers (6 washers in total)
- 1 × brass ball cage with captivated bearing-balls (3 cages in total)
The bag with the rigid couplers is labelled: Coupler Rigid Type BLK (SKU: HW2990GC)
Have one of the new kits and looks like the pillow blocks are injection molded now.
On my motors it's written "1.8 Hybrid Stepper Motor" and NOT "Nema 17 Motor". Is it normal like this? @ratrig
-
-
-
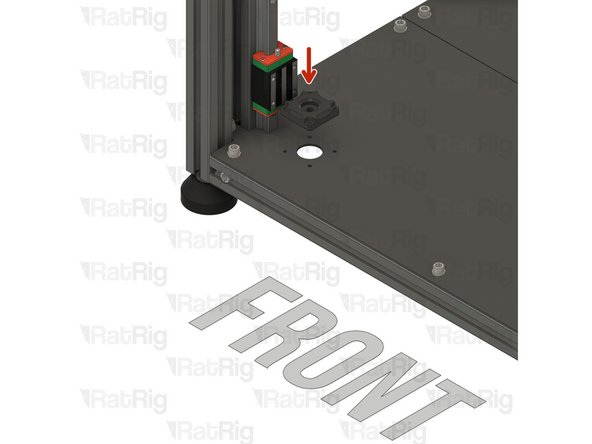
pillow_block printed part
-
48mm NEMA17 Stepper Motor
-
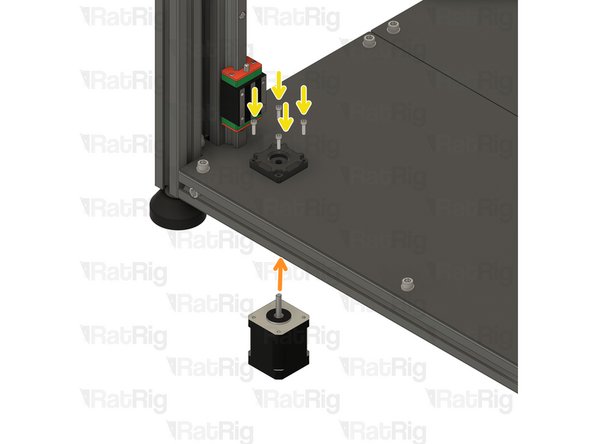
Insert the NEMA17 motor into the base plate, as shown
-
M3x12 Cap Head Screw
-
Insert each M3x12 cap head screw through the pillow block, the base plate, and fasten them into the NEMA17 motor
While you are working on the bottom and running the wires it is a good time to install the panels holders for the door if you are doing an enclosure Chapter13 Steps 14 & 20. Note these panel holders in the parts kit are for 3mm panels if you are using 6mm then you will have to print different parts.
If you decide to do the Z-Motor cable routing now check the cable clips to affix the motor-wires as instructed in Chapter 12, Step 46.
You can check cable preparation and cable routing in Chapter 12, Steps 52 and 53.
As little builder stated, doing the 3 z motors now would be easier, also just route the cables too.
This has been updated for the step 53 of the same chapter https://d3t0tbmlie281e.cloudfront.net/ig...
Chapter 12, step 68 have your answer. But, basically, the front motors have their connectors facing the back and the back motor has it's connector facing the front.
adding the 3 Z motors with cusion in frame assembly step 35 would be far easier, in this step you have to lift up the already assembled frame and hold them in place while trying to screw them to the cusion while supporting the weight of the frame
-
-
-
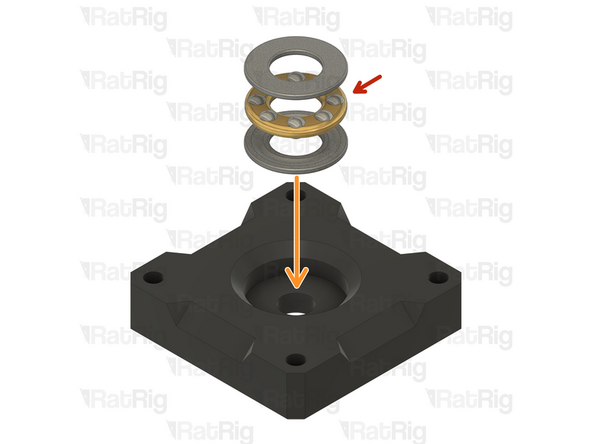
Axial Thrust Bearing
-
The axial thrust bearing has three components. Two end caps and an inner bearing assembly.
-
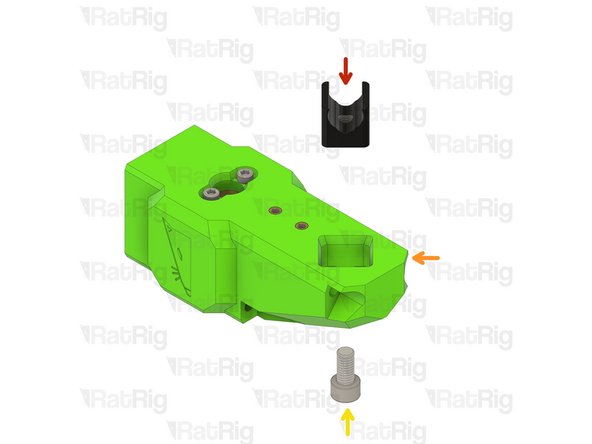
Assemble the axial thrust bearing into the pillow_block as shown
-
Make sure that the thrust bearing is fully inserted into the printed part. The top ring of the thrust bearing should be flush with the top of the pillow_block.
-
If desired, you may add a drop of light oil to the inner bearing assembly of the thrust bearing
-
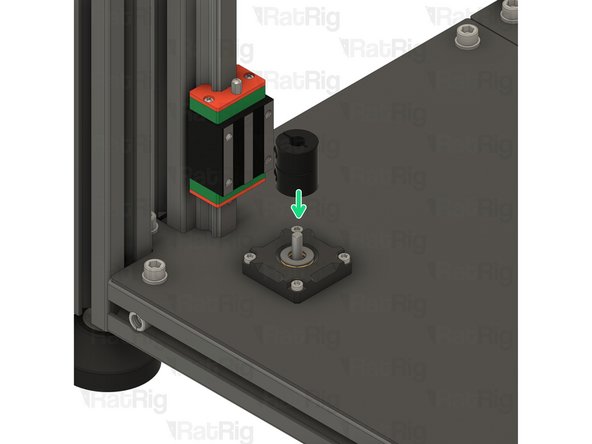
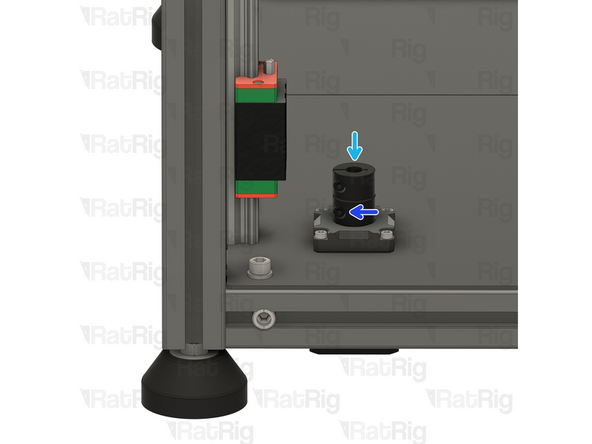
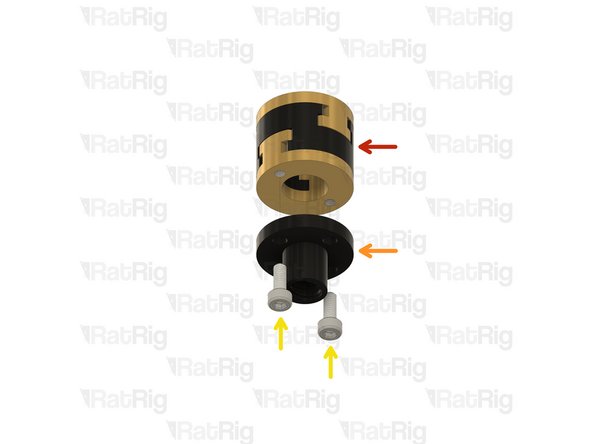
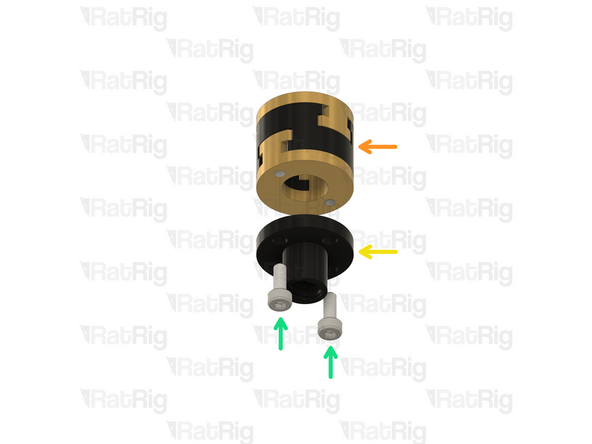
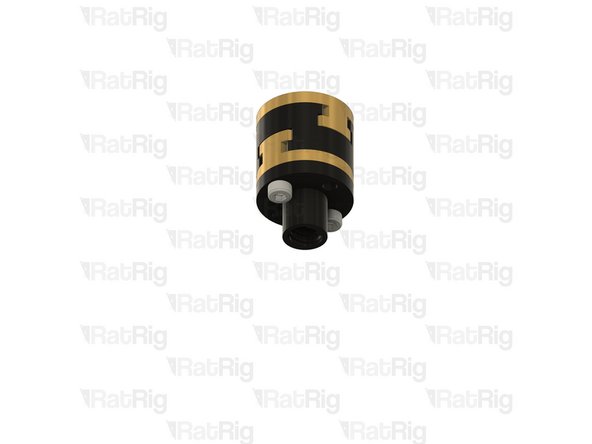
Install the lead screw coupler on to the exposed shaft of the NEMA17 motor. Use the smallest hole in the coupler for the stepper motor.
-
Apply downward pressure to the top of the lead screw coupler whilst tightening the marked screw
-
Tighten the marked M3 screw to secure the lead screw coupler to the motor shaft
-
-
-
375mm TR8x4 Lead Screw
-
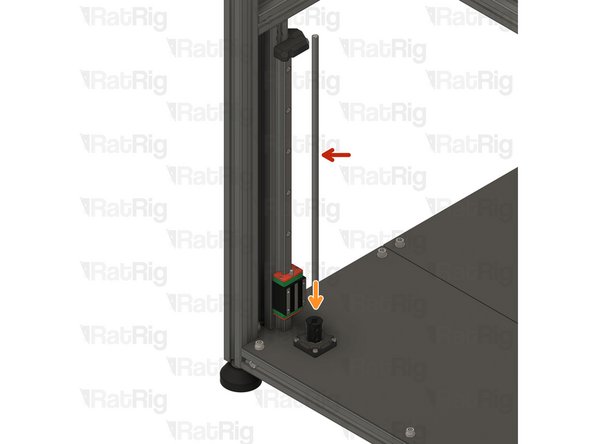
Install the lead screw in the Rigid Lead Screw Coupler
-
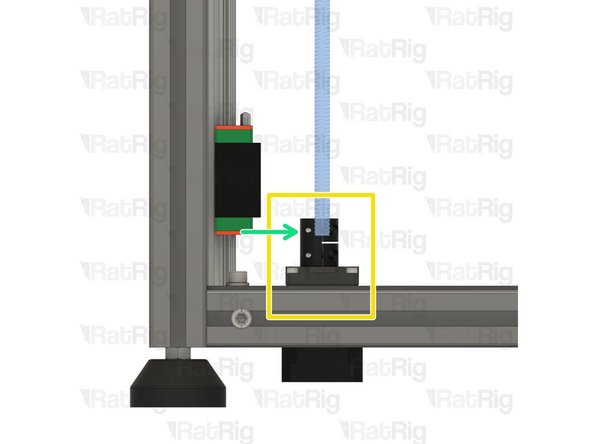
Ensure the Lead Screw doesn't touch the NEMA17 motor shaft.
-
Tighten the M3 screw on the coupler, locking the lead screw.
-
Repeat the previous steps and install the other 2 lead screws
My advice is do everything except installing the lead screws. If you install the lead screw arms on the carriages first you can thread the lead screw through the top and down into the coupler on the motor shaft. It's much easier this way.
-
-
-
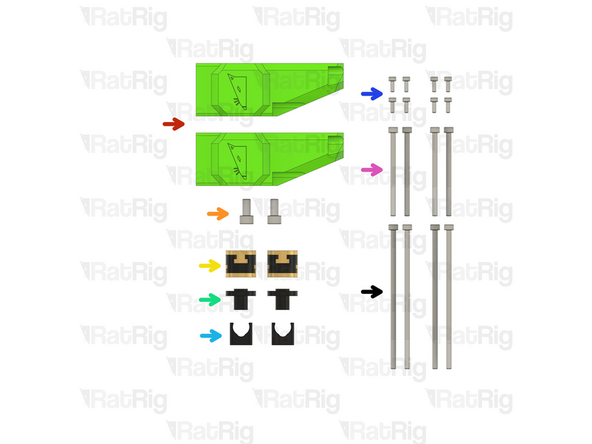
2x vc4_arm_front
-
2x M6x12 Cap Head Screw
-
2x Rat Rig Bi-Material Lead Screw Decoupler
-
2x TR8x4 POM Lead screw Nut
-
2x Rat Rig V-Core 4.0 - POM Arm Insert
-
8x M3x8 Cap Head Screw
-
4x M4x60 Cap Head Screw
-
4x M4x100 Cap Head Screw
all my arm where black but it would be nice to indicate that the 2 front arm are smaller than the back one
-
-
-
Rat Rig Bi-Material Lead Screw Decoupler
-
TR8x4 POM Lead screw Nut
-
M3x8 Cap Head Screw
-
Front bed arm assembly
-
Lead screw decoupler assembly
-
M3x8 Cap Head Screw
-
Install a lead screw decoupler assembly into each arm as shown
-
Take care not to over tighten the M3x8 screws as you damage the printed parts
-
-
-
Rat Rig V-Core 4.0 - POM Arm Insert
-
Insert the POM arm insert, pay special attention to its orientation
-
Front arm assembly
-
M6x12 Cap Head Screw
-
Take care not to over tighten the M6x12 screws as you can damage the printed parts or the POM insert
I needed to install the heat inserts into 2 of the arms and only one had all already installed.
I had to "open up" the holes on one of the arms so I could actually fit the heat insert's flanged part to line it up with the hole so it would melt through the hole correctly, and I needed to take a diamond file to the square hole to allow the POM arm insert to be seated.
Also, just like the others, I really wish you guys would've kept the arms Punkfil Gooey Green, it feels more true to the RatRig aesthetic in my opinion.
Slighty disappointed by the fact, that the arms are not in punkfill gooey green. Slightly more annoyed, that I was searching for gooey green parts for quite a while before realising that they came in black.
@ratrig The images should be updated, or at least clearly noted that these parts can come in either colour!
One of my POM Arm Inserts come with a broken off corner. I hope this isn't a problem later on.
The fit of these pieces is extremely tight, the clearance in the printed parts is just too small. Without Ben White's trick with using a longer M16×16 screw, you don't have any chance of pulling these in. Given the slanted surfaces you cannot push them in with a vice either.
@ratrig Also annoying that the missing heat-inserts aren't mentioned in the assembly steps. I was delighted when I heard that all heatset inserts come pre-installed. (So I could skip buying equipment for that.) Withou MoJo's comment, I clearly would have missed that these inserts are not preinstalled. Are M3×4×4.6 (SKU HW3224NC) the correct ones?
Hi @maclemon , The colour of the arms did change to black as we think suits the machine looks better, of course, this is personal preference. The website pictures show the real kit colours while the guide still shows the old color scheme, the guide pictures need to be updated to match the real parts, as it's only an aesthetic change, we are prioritizing other aspects of the documentation. The first production kits had all the heat inserts pre-installed, this was a nice surprise for the early bird users. Nowadays the kit doesn't come with pre-installed heat inserts anymore, the guide has all the required steps to clearly instruct you where those should be installed. Thank you for your feedback!
IMPORTANT To followup on Seppo's comment in a previous step - the arms did not come with heat inserts in them as shown. I didn't realize this until way later (installing the felt wipers in the Accessories section, where it is more difficult).
I needed to install (2) M3 heat inserts in each arm. Do this now vs waiting! It's not called out anywhere else.
the arm are black now... disappointed..
-
-
-
M4x100 Cap Head Screw
-
M4x60 Cap Head Screw
-
Insert the screws through the front arm
-
Repeat Steps 12, 13 and 14 to assemble another front arm, NOTE: the POM insert must be rotated
-
NOTE: the POM insert must be rotated 45º compared to the previous assembly
The left arm is shown on the right, and the right arm is shown on the left.
In the NOTE: the POM insert must be rotated 90°.
-
-
-
Front arm assembly
-
The POM insert groove must be aligned as shown
-
Thread the Lead Screw into the front arm assembly
-
Do not force the Lead Screw through the POM nut on the decoupler as this can cause damage. It should thread through smoothly
-
Tighten the M4 Cap Head Screws to secure the arm to the carriage
-
Take care not to overtighten the M4 screws as you may damage the printed parts
This assembly step is for the Left front, not the Right, plus there is mention of the Rear bed arm.
-
-
-
Repeat the previous Step and install the Right front arm
-
The POM insert groove must be aligned as shown
-
-
-
2x M4x100 Cap Head Screw
-
2x M4x60 Cap Head Screw
-
1x vc4_arm_cable printed part
-
1x vc4_arm_rear assembly
-
1x TR8x4 POM Lead screw Nut
-
1x Rat Rig Bi-Material Lead Screw Decoupler
-
1x M6x12 Cap Head Screw
-
1x Rat Rig V-Core 4.0 - POM Arm Insert
@ratrig Heatset inserts are not mentioned in the instructions, but seem to be missing in this part. It's unclear if there should be 4 or 6.
2 each:
- at the top of the arm
- on the left side for mounting vc4_arm_cable printed part
- Maybe also on the right side? The 2ⁿᵈ image in step 20 seems to show them, but I'm not sure.
-
-
-
6x M3x8 Cap Head Screws
-
Rat Rig Bi-Material Lead Screw Decoupler
-
TR8x4 POM Lead screw Nut
-
M3x8 Cap Head Screw
-
-
-
2x M3x8 Cap Head Screws
-
vc4_arm_rear printed part
-
Insert the M3x8 Cap Head Screws into the vc4_arm_cable printed part and tighten them into the rear arm heat inserts.
-
Take care not to over tighten the M3x8 screws as you damage the printed parts
-
Lead screw decoupler assembly
-
M3x8 Cap Head Screw
-
Install a lead screw decoupler assembly into the rear arm as shown
-
Take care not to overtighten the M3x8 screws as you may damage the printed parts
Insert the M3x18 Cap Head Screws into the vc4_arm_cable printed part should be M3x8
For clarity, it should probably read: "Install a lead screw decoupler assembly into the rear arm as shown", instead of "into each arm".
-
-
-
Rat Rig V-Core 4.0 - POM Arm Insert
-
Insert the POM arm insert, pay special attention to its orientation
-
M6x12 Cap Head Screw
-
Take care not to over tighten the M6x12 screws as you can damage the printed parts or the POM insert
-
M4x100 Cap Head Screw
-
M4x60 Cap Head Screw
-
Insert the screws through the front arm
-
-
-
Rear arm assembly
-
The POM insert groove must be aligned as shown
-
Install the rear arm through the rear bed arm and decoupler
-
Thread the Lead screw in to the rear arm assembly
-
Do not force the lead screw through the POM nut on the decoupler as this can cause damage. It should thread through smoothly
-
Tighten the M4 Cap Head Screws to secure the arm to the carriage
-
Take care not to over tighten the M4 screws as you damage the printed parts
-
-
-
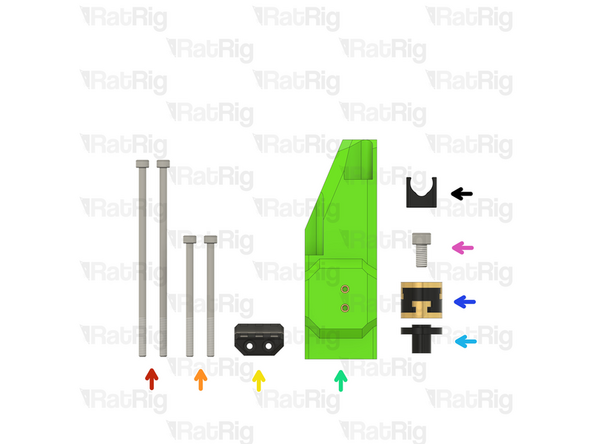
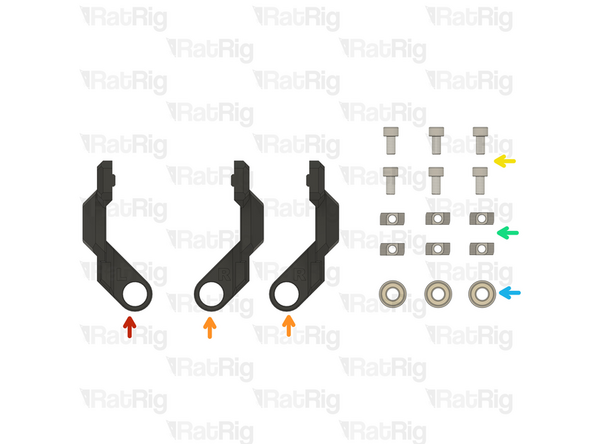
vc4_z_constraint_left
-
2x vc4_z_constraint_right
-
6x M6x12 Cap Head Screw
-
6x 3030 Drop-in T-Nut - M6
-
3x F688ZZ Ball Bearing
-
-
-
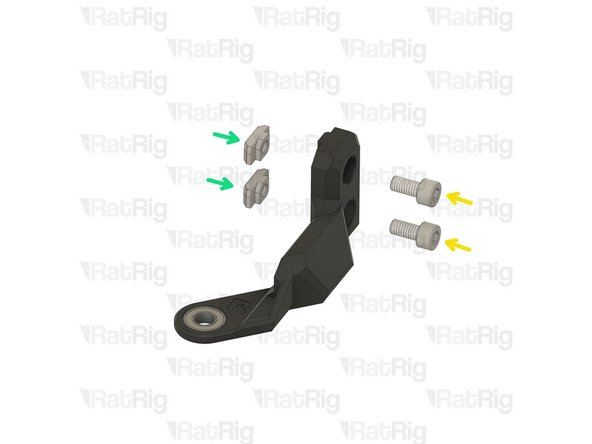
vc4_z_constraint
-
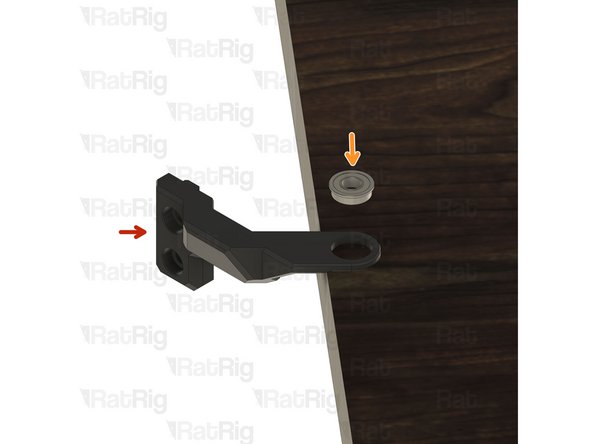
F688ZZ Ball Bearing
-
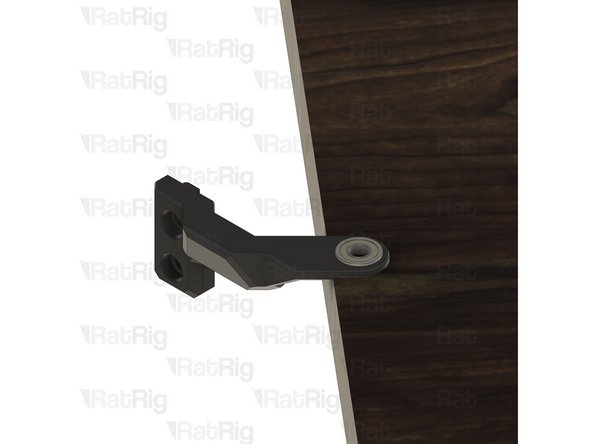
Insert the Bearing into the Z_constarin printed part
-
Make sure the bearing is inserted uniformly to avoid damaging the printed part - Use a flat surface like a wood table top to provide support to the printed part.
-
M6x12 Cap Head Screw
-
Insert an M6x12 cap head screw into each position on the lead screw constraint as shown
-
3030 Drop-in T-Nut - M6
-
Loosely thread a 3030 T-Nut onto each of the M6x12 screws. Do not tighten them at this point
-
-
-
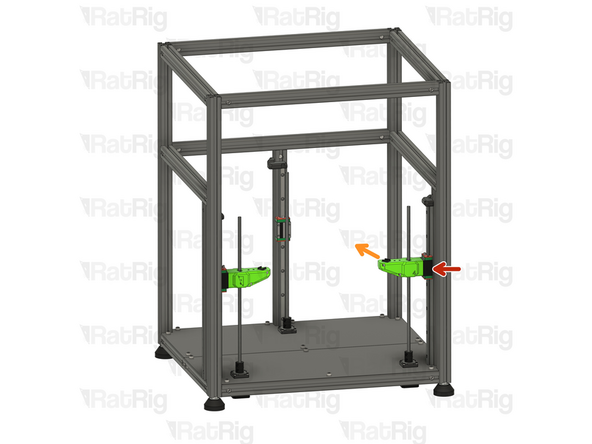
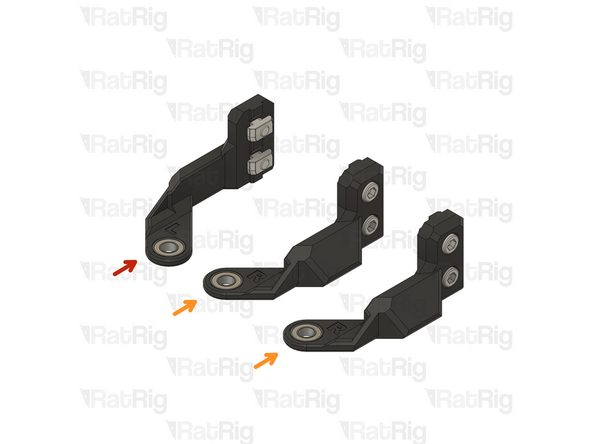
Repeat the previous Step and assemble all the Z_constrains:
-
1x vc4_z_constraint_left assembly
-
2x vc4_z_constraint_right assembly
-
-
-
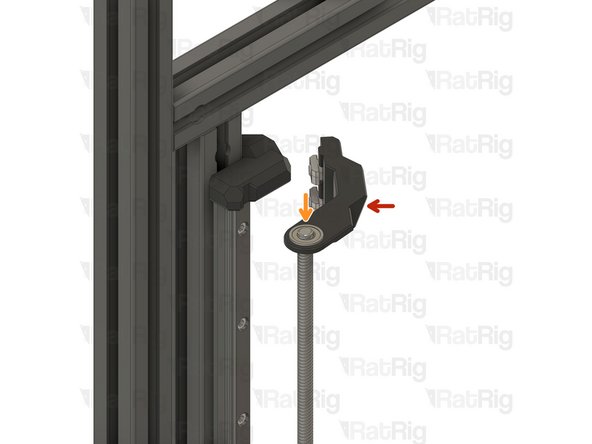
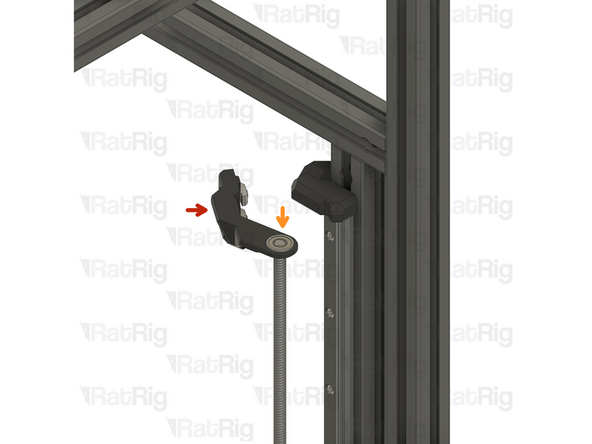
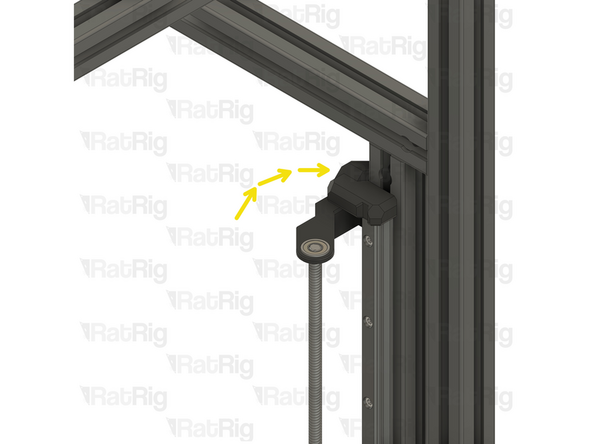
Left lead screw constraint assembly
-
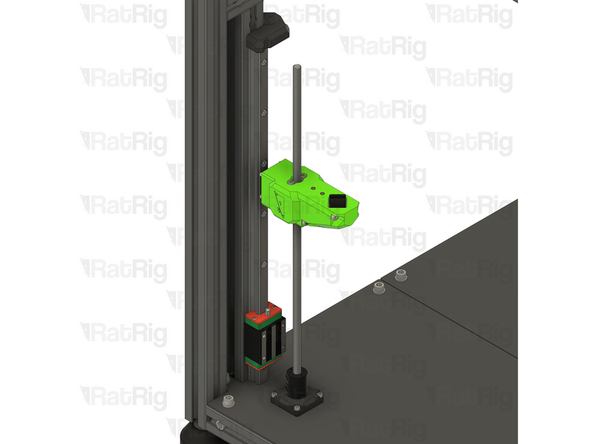
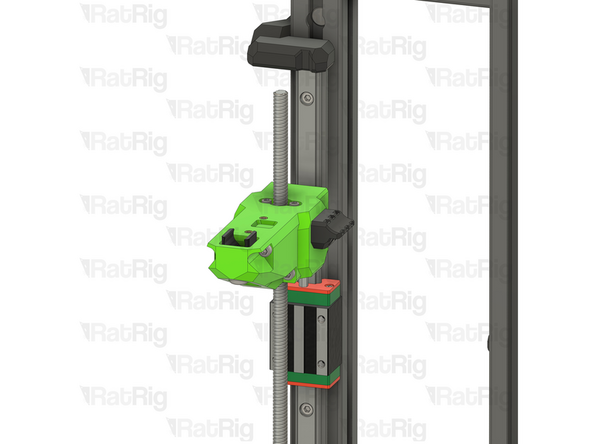
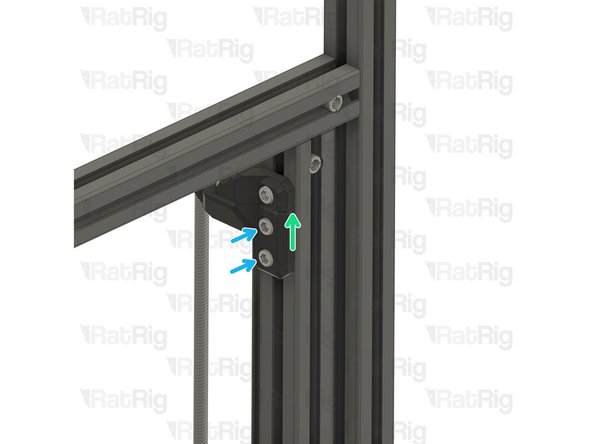
Position the constraint assembly so that the left lead screw passes through the bearing
-
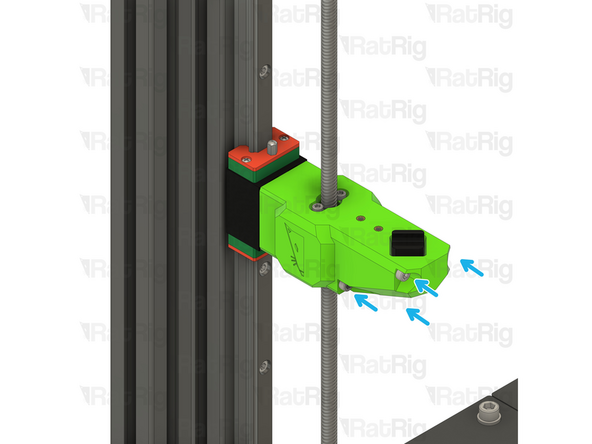
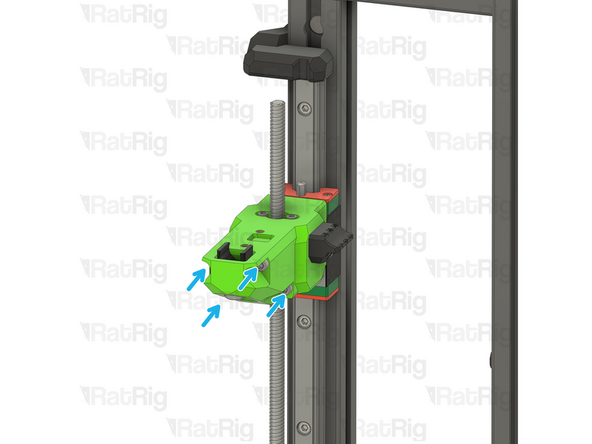
Rotate the constraint assembly anticlockwise and fit it to the rear 3030 extrusion as shown
-
Push the constraint assembly upwards until it touches the Z-axis limit printed part.
-
Fasten both M6x12 screws to secure the constraint assembly to the V-Core 4 frame
-
Take care not to over tighten the M6 screws as you damage the printed part
This step is for the left side and the two mentions of "right" should be changed to "left."
-
-
-
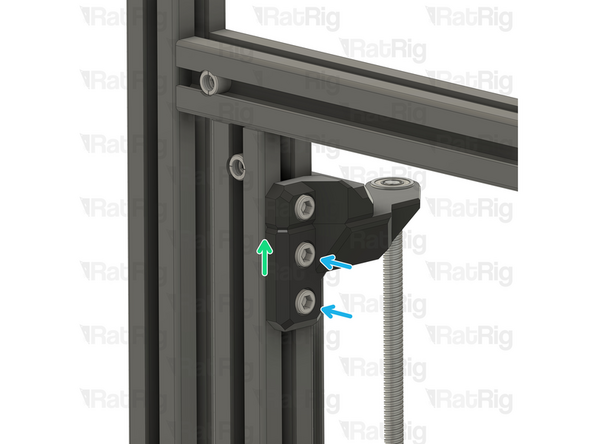
Right lead screw constraint assembly
-
Position the constraint assembly so that the right lead screw passes through the bearing
-
Rotate the constraint assembly clockwise and fit it to the rear 3030 extrusion as shown
-
Push the constraint assembly upwards until it touches the horizontal 3030 extrusion
-
Fasten both M6x12 screws to secure the constraint assembly to the V-Core 4 frame
-
Take care not to over tighten the M6 screws as you damage the printed part
-
Repeat the previous Steps and install the Rear Z constraint
In the line, "Step 26 Install the left and back Z constraints." Left should be changed to right.
-
Cancel: I did not complete this guide.
25 other people completed this guide.






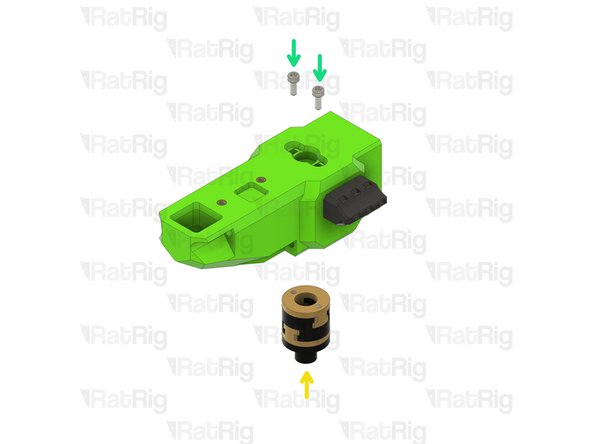
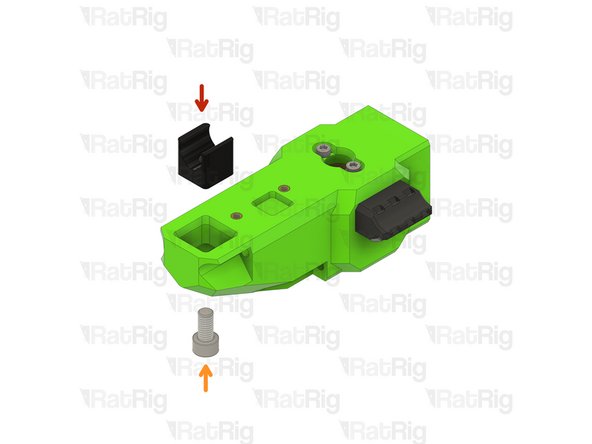

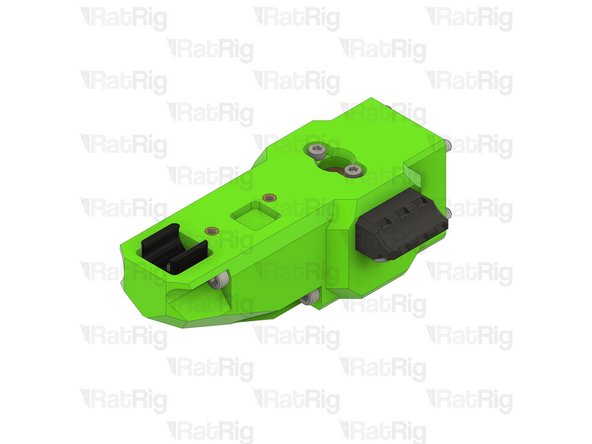
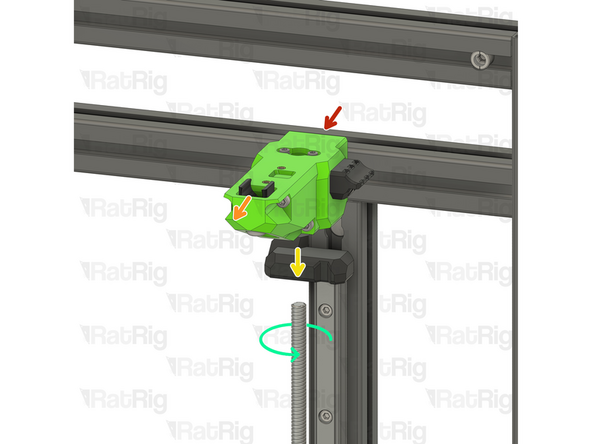

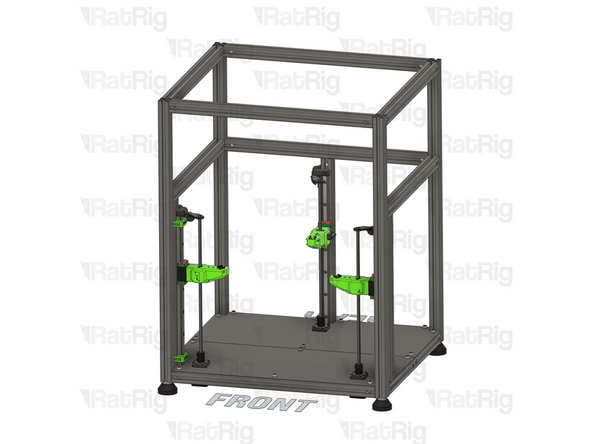

I always leave the plastic end-stops on the rails until the last possible moment - since you are mounting rails vertically, having the carriage fall off is not fun. They are easy to remove at a later step.
JohnM - Reply